Wedding Sugar Cookies Recipe

There’s something magical about the smell of sugar cookies baking in the oven—the warm, buttery aroma that instantly makes a kitchen feel like home. I still remember the first time I made these wedding sugar cookies for my cousin’s bridal shower. I wanted them to look as delicate and elegant as her wedding dress, and I hoped they would taste just as unforgettable. I spent hours rolling out the dough, carefully cutting each shape, and decorating them with soft pastel icing. The moment they were done, everyone gathered around the table, eyes wide with excitement, and the first bite was met with blissful silence followed by delighted smiles.
That day, I realized that wedding sugar cookies are more than just cookies—they’re a little piece of celebration, a sweet memory captured in every bite. Whether you’re making them for a wedding, a bridal shower, or just because you love a touch of elegance in your everyday baking, these cookies have a way of turning any ordinary moment into something special.
There’s an art to making sugar cookies that taste soft and buttery, yet hold their shape beautifully when cut into delicate hearts, flowers, or even little wedding bells. And I’ve spent years perfecting this recipe to get that perfect balance. So today, I’m sharing the full guide to making these wedding sugar cookies at home, complete with tips, tricks, and little secrets that will make your baking experience smooth, enjoyable, and absolutely delicious.
Why I Love This Recipe

I’ve tried countless sugar cookie recipes over the years, and what makes this particular recipe stand out is its perfect balance of texture and flavor. Many sugar cookies either end up too crisp or too soft, and achieving that just-right consistency can feel like a mystery. But with this recipe, you get cookies that are tender on the inside, lightly crisp on the edges, and melt-in-your-mouth delightful without being overly sweet.
Another thing I adore about this recipe is its versatility. The dough holds its shape wonderfully, making it perfect for any decorative icing or embellishments. You can cut them into traditional round shapes or get creative with hearts, flowers, or even initials for a wedding party favor. And the flavor! There’s a subtle hint of vanilla that enhances the buttery goodness, making each bite feel indulgent but not overwhelming.
This recipe is special because it turns a simple cookie into a statement piece for your celebration. It’s also forgiving—meaning even if you’re a beginner baker, you can achieve professional-looking results with just a bit of patience and love. Baking these cookies isn’t just about the end product; it’s about the joy of creating something beautiful, savoring the process, and sharing sweet moments with family and friends.
Ingredients for Wedding Sugar Cookies
Let’s talk ingredients, because the key to these cookies lies in using the right components in the right way.
- All-purpose flour: The backbone of your cookies. I always sift it before measuring to avoid lumps and ensure a soft, delicate texture.
- Baking powder: This little addition helps the cookies rise just enough to stay tender without puffing up too much.
- Salt: Just a pinch enhances the sweetness and balances the flavor beautifully.
- Unsalted butter: Use high-quality butter, softened to room temperature. This gives the cookies their rich, creamy texture.
- Granulated sugar: Sweet, but not overpowering. I like to use fine sugar for smoother dough.
- Large eggs: They bind everything together and add a touch of richness.
- Pure vanilla extract: Vanilla is key—don’t use imitation here. It’s subtle but makes all the difference in flavor.
- Optional almond extract: A tiny drop adds a lovely depth and elegance, perfect for wedding cookies.
When I gather these ingredients, I like to lay them all out on the counter. It keeps me organized and prevents last-minute scrambling, which can throw off the texture or consistency of your dough.
How Much Time Will You Need?
Baking wedding sugar cookies is not a rushed affair—it’s a labor of love. Here’s a realistic breakdown of the time you’ll need:
- Preparation time: About 20-25 minutes to cream butter and sugar, mix in eggs, and combine the dry ingredients.
- Chilling the dough: This is crucial! At least 1 hour in the fridge, or overnight for best results. It makes rolling and cutting easier and helps the cookies keep their shape.
- Rolling and cutting: Depending on the number of cookies, 20-30 minutes. I like to work in small batches to avoid the dough getting too soft.
- Baking: 8-12 minutes per batch. Keep a close eye—they should be lightly golden at the edges.
- Cooling and decorating: At least 30 minutes to cool, plus however long you want for decorating.
All in, expect about 2-3 hours from start to finish if you’re making a single batch. If you’re planning a big batch for a wedding or party, allow extra time for rolling, baking, and decorating.
How to Make Wedding Sugar Cookies
Step by step, here’s how I bring these cookies to life:
Step 1: Cream the butter and sugar
In a large bowl, beat the softened butter and granulated sugar together until fluffy and pale. This process usually takes 3-4 minutes with an electric mixer. This step is key to light, tender cookies.
Step 2: Add eggs and flavorings
Beat in the eggs one at a time, then mix in the vanilla extract and optional almond extract. Make sure everything is fully incorporated before moving on to the dry ingredients.
Step 3: Combine dry ingredients
In a separate bowl, whisk together the flour, baking powder, and salt. Gradually add the dry mixture to the wet ingredients, mixing until a smooth dough forms. Don’t overmix—overworked dough can lead to tough cookies.
Step 4: Chill the dough
Wrap the dough in plastic wrap and refrigerate for at least 1 hour. Chilled dough is easier to roll and helps your cookies maintain crisp edges and soft centers.
Step 5: Roll and cut the dough
Lightly flour your work surface and rolling pin. Roll the dough to about 1/4 inch thickness and use cookie cutters to create your desired shapes. I like to work in small sections so the dough stays cold.
Step 6: Bake the cookies
Place the cut cookies on a parchment-lined baking sheet and bake in a preheated oven at 350°F (175°C) for 8-12 minutes, until the edges are just beginning to turn golden. Rotate the sheet halfway through for even baking.
Step 7: Cool and decorate
Allow the cookies to cool completely on a wire rack before decorating with royal icing, fondant, or a simple glaze. Patience here ensures that your decorations don’t slide or melt.
Substitutions
Sometimes, you need to tweak ingredients—here’s how you can make this recipe your own:
- Butter substitutes: You can use a high-quality plant-based butter for a vegan version.
- Flour alternatives: Gluten-free all-purpose blends work well, but you may need to add an extra teaspoon of liquid to achieve the same texture.
- Sweeteners: Coconut sugar or erythritol can replace granulated sugar for a lower-sugar option, though the texture may be slightly different.
- Extracts: Don’t have almond extract? A touch of lemon or orange zest adds a lovely aromatic twist.
Substitutions give you flexibility, but remember that small changes can subtly alter texture and flavor, so adjust carefully.
Best Side Dishes for Wedding Sugar Cookies
Sugar cookies are sweet on their own, but pairing them thoughtfully can elevate your serving experience:
- Herbal tea: Chamomile or Earl Grey complements the sweetness perfectly.
- Fresh fruit platter: Strawberries, raspberries, or melon add a refreshing contrast.
- Light cheesecake bites: Creamy and tangy, they pair beautifully with delicate cookies.
Serving them with these simple sides turns a batch of cookies into a mini celebration spread.
Serving and Presentation Tips
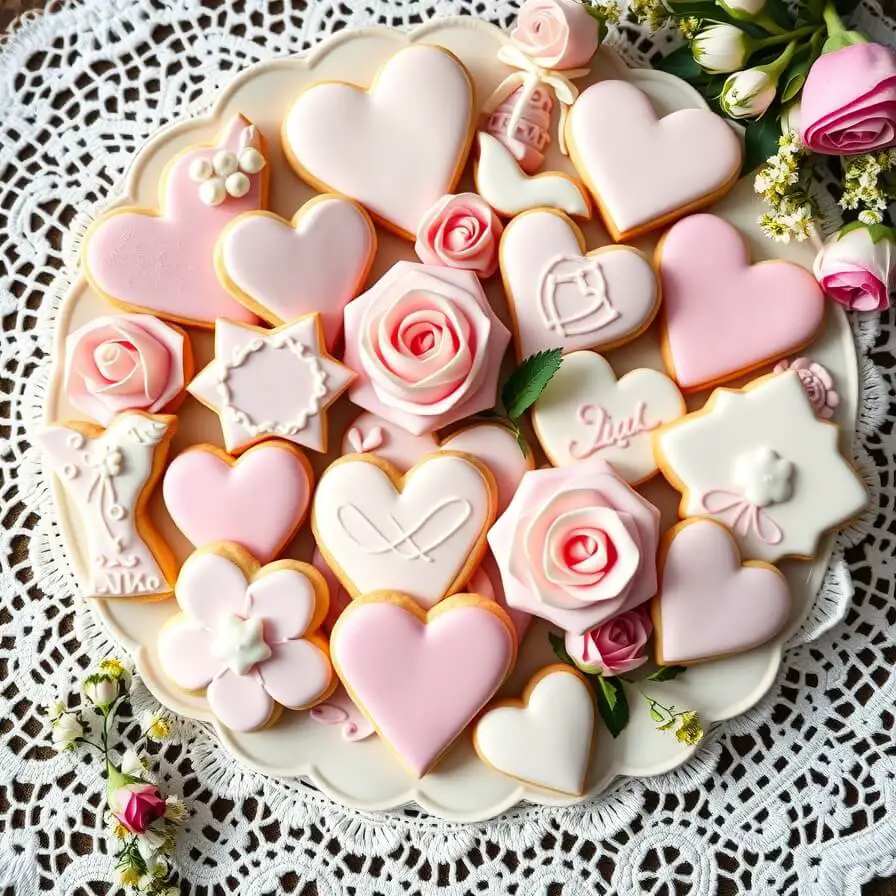
There’s a little magic in serving wedding sugar cookies in a way that feels elegant and special. One of my favorite ways to present them is on a tiered cake stand—it instantly adds a celebratory touch without feeling over-the-top. If you’re making themed cookies for a wedding, consider color-coordinating your icing with the wedding palette. Pastel shades like blush pink, soft lavender, or creamy ivory work beautifully for a classic, romantic vibe.
For a rustic wedding, a simple arrangement on a wooden serving tray with some fresh flowers or greenery scattered around can feel effortlessly chic. And don’t forget about texture—adding a little shimmer with edible glitter, or delicate piping for intricate designs, makes the cookies feel like little works of art. Even small touches like tying a bundle of cookies with ribbon for guests or stacking them neatly in a decorative box adds a personal, thoughtful touch. Presentation can elevate even the simplest sugar cookie into something memorable.
Tips and Tricks to Make This Recipe Even Better

If you want your wedding sugar cookies to look and taste like they belong in a bakery display, these tips will make a world of difference:
- Chill the dough thoroughly: Don’t skip this step. Cold dough rolls more evenly, reduces spreading, and helps maintain sharp edges on your shapes.
- Use a light touch with flour: Too much flour can make the cookies dry. Dust your rolling surface lightly and keep some on hand for adjustments.
- Consistent cookie thickness: Use rolling pin guides or small spacers to keep all cookies uniform. This ensures even baking and makes decorating easier.
- Cool completely before decorating: Hot cookies can cause icing to melt or slide. I usually wait at least 20 minutes on a wire rack before adding royal icing or glaze.
- Experiment with flavors: A hint of almond, lemon, or orange zest in the dough adds subtle complexity that makes your cookies stand out.
These little tricks are the difference between ordinary cookies and a batch that guests remember for weeks.
Common Mistakes to Avoid
Even seasoned bakers have slipped up, so here are a few pitfalls to watch out for:
- Skipping chilling time: Warm dough spreads too much and loses its shape. Patience here is key.
- Overmixing the dough: Once you add flour, mix gently. Overworking can make cookies dense and tough.
- Uneven thickness: Thin edges will bake too quickly, thick centers may remain undercooked. Roll carefully.
- Decorating too soon: Hot or even slightly warm cookies can ruin intricate icing designs.
- Ignoring ingredient quality: Using imitation vanilla or low-quality butter can affect flavor and texture. Always opt for real, fresh ingredients.
Avoiding these mistakes ensures your cookies are consistently beautiful and delicious.
How to Store It
Once baked and cooled, storing sugar cookies correctly keeps them fresh and flavorful:
- Short-term: Keep in an airtight container at room temperature for up to 5 days.
- Long-term: Layer cookies with parchment paper in an airtight container and freeze for up to 2 months. Thaw at room temperature before serving.
- Decorated cookies: Allow icing to harden completely, then store in a single layer with parchment between them to prevent sticking.
Proper storage not only maintains freshness but also protects your beautiful decorations.
FAQ About Wedding Sugar Cookies
Can I make these cookies gluten-free?
Yes! Use a high-quality gluten-free all-purpose flour blend. Dough may require a small adjustment in moisture.
Can I decorate with royal icing or fondant?
Absolutely! This dough holds its shape well, making it perfect for detailed royal icing designs or fondant cutouts.
Can I prepare the dough in advance?
Definitely. Dough can be refrigerated for up to 2 days or frozen for up to a month.
How do I prevent cookies from spreading too much?
Chill the dough thoroughly and avoid overworking it. Using parchment paper or silicone mats also helps.
Can I make these vegan?
Yes! Replace butter with plant-based alternatives and eggs with flax eggs (1 tbsp flax + 3 tbsp water per egg).

Wedding Sugar Cookies Recipe
- Total Time: 1 hour 35 minutes (including chilling)
- Yield: 24–30 1x
- Diet: Vegetarian
Description
These wedding sugar cookies are tender, buttery, and perfect for celebrations. Their soft yet structured texture makes them ideal for decorating with royal icing or fondant. Each cookie carries a subtle hint of vanilla and, if desired, almond extract, making them elegant and flavorful. Perfect for weddings, bridal showers, or gifting, they’re versatile and incredibly satisfying to bake. This recipe is forgiving, beginner-friendly, and promises beautiful results every time.
Ingredients
- 2 3/4 cups all-purpose flour
- 1 tsp baking powder
- 1/2 tsp salt
- 1 cup unsalted butter, softened
- 1 1/2 cups granulated sugar
- 2 large eggs
- 2 tsp pure vanilla extract
- 1/2 tsp almond extract (optional)
Instructions
- Cream butter and sugar until light and fluffy.
- Add eggs one at a time, then vanilla and almond extracts. Mix until combined.
- Whisk together flour, baking powder, and salt; gradually add to wet mixture. Mix until dough forms.
- Chill dough for at least 1 hour.
- Roll out dough to 1/4 inch thickness. Cut into desired shapes.
- Bake at 350°F (175°C) for 8-12 minutes or until edges are lightly golden.
- Cool completely before decorating.
Notes
- Chill dough for best results.
- Use parchment paper to prevent sticking.
- For gluten-free version, use a 1:1 flour blend and adjust liquid if needed.
- Experiment with extracts or zest for added flavor.
- Prep Time: 25 minutes
- Cook Time: 10 minutes
- Category: Dessert
- Method: Baking
- Cuisine: American
Nutrition
- Serving Size: 24-30
- Calories: 150
- Sugar: 12g
- Sodium: 40mg
- Fat: 7g
- Saturated Fat: 4g
- Unsaturated Fat: 3g
- Trans Fat: 0g
- Carbohydrates: 19g
- Fiber: 0.5g
- Protein: 2g
- Cholesterol: 20mg