Toffee Bars Recipe
I’ll never forget the first time I tried to make toffee bars. I had promised my niece a sweet treat for her birthday, and armed with confidence (and a brand-new candy thermometer), I set out to conquer what seemed like a simple recipe. Forty-five minutes later, I stared at a pan of burnt sugar that smelled like it belonged in a chemistry lab rather than my kitchen. My niece, bless her, was just excited to lick the bowl clean, but I was convinced I’d ruined everything.
After that disaster, I spent a weekend experimenting, adjusting heat levels, testing butter types, and even sampling tiny burnt bits just to understand where I went wrong. By the end of it, I had a tray of perfectly golden, crisp, buttery toffee bars that melted in your mouth and didn’t stick to the roof. That first successful batch became a weekend ritual—each bar wrapped in parchment paper, a little gift for friends, neighbors, and anyone who happened to walk through the door. There’s something magical about toffee bars: they are simple yet indulgent, humble yet luxurious, and always seem to make any kitchen feel like home.
Pro Notes & Mistakes I Learned the Hard Way
Making toffee bars taught me patience, precision, and humility. Here’s what I learned:
- Heat matters: Too high, and you get a burnt mess; too low, and the toffee never sets properly. I now swear by medium heat and constant stirring.
- The butter-sugar timing: Add butter too early, and your toffee can separate; too late, and it won’t have that glossy, crackly finish.
- Thermometers are lifesavers: I finally invested in a reliable candy thermometer. It removes the guesswork and saves hours of trial and error.
- Cooling is crucial: Pouring the toffee onto parchment before it’s ready can make it bend or break unevenly. I let it sit for a minute, then carefully spread it evenly.
These lessons made me appreciate the little details that turn a simple batch of sugar and butter into a confection worth savoring.
What Makes These Bars Shine
So why are these toffee bars so irresistible? For me, it’s the balance. The buttery base has a deep caramel flavor, complemented by the slight crunch of a golden sugar top. Add a sprinkling of sea salt or chopped nuts, and each bite hits the perfect mix of sweet, savory, and nutty richness.
Unlike fudge or brittle, these bars aren’t overly soft or overly hard—they have that perfect snap, yet they melt slightly when they touch your tongue. They are also versatile: I’ve drizzled chocolate on some batches, sprinkled chopped pecans on others, and even layered crushed cookies for a bit of texture. Each variation highlights the buttery backbone while giving you room to play.
The aroma alone is enough to make the kitchen feel cozy. The first whiff is always a signal that the weekend, or any random weekday, has just become extraordinary.
Ingredients in Context
When I talk about toffee bars, I emphasize ingredients because the difference between “good” and “extraordinary” is in the details.
- Unsalted butter: Always unsalted. You control the sweetness better, and it prevents the bars from becoming too greasy.
- Granulated sugar: Classic white sugar works best for that crisp caramelization. Brown sugar can work in a pinch, but it changes the texture and flavor subtly.
- Vanilla extract: A teaspoon of pure vanilla adds depth without overpowering the buttery notes.
- Sea salt or nuts: Optional, but these finishing touches elevate your bars to a café-level treat.
If you’re in a pinch, I’ve had success using vegan butter or coconut oil for dairy-free adaptations, though the flavor shifts slightly. And while almonds, pecans, or walnuts are my favorite, any nut will do—or skip entirely for a smooth, classic bite. The key is using the best-quality ingredients you can find—your taste buds will thank you.
Step-by-Step Instructions
The magic happens in the process. Here’s my detailed, sensory-driven guide:
- Prep your pan: Line a 9×13-inch baking dish with parchment paper and lightly butter the edges to prevent sticking.
- Melt butter and sugar: In a heavy-bottomed saucepan over medium heat, melt butter. Add sugar gradually, stirring constantly. The mixture will bubble vigorously—resist the urge to walk away.
- Monitor the color: The toffee should turn a deep golden brown, not dark amber. This usually takes 8–10 minutes on medium heat. Use your candy thermometer—look for around 300°F (hard crack stage).
- Add vanilla and optional nuts: Remove from heat, stir in vanilla. If you like, fold in chopped nuts at this stage.
- Pour carefully: Pour the hot toffee into the prepared pan. Use a spatula to spread it evenly.
- Cool completely: Let it cool at room temperature for at least 30 minutes. You can speed it slightly by chilling, but don’t rush—it can crack unevenly.
- Cut and serve: Once firm, lift from the pan using parchment edges and cut into bars.
The first time I poured it, it bubbled over the sides. I panicked and grabbed a spoon to scoop it back in, only to realize the beauty of letting it flow naturally. It hardened into a rustic, homemade shape that everyone loved.
Storing and Making Ahead

One of the best things about toffee bars is that they keep well, which makes them perfect for prepping ahead of time. I often make a batch at the start of the week, wrap individual bars in parchment or wax paper, and stash them in an airtight container.
- Room temperature: Store up to a week in a cool, dry spot. Avoid humid areas, as moisture can soften the crisp texture.
- Refrigerator: If your kitchen is warm, pop them in the fridge for 2–3 weeks. They’ll maintain their crunch but may require a few minutes to soften slightly before eating.
- Freezing: For long-term storage, freeze individually wrapped bars in a sealed container for up to 3 months. Let them thaw at room temperature before serving—this preserves both texture and flavor.
A tip I learned the hard way: don’t leave them in direct sunlight. One afternoon, I left a tray on the counter near a sunny window, and they melted slightly, losing that perfect snap. Lesson learned: cool, dry, dark places are your friend.
Common Questions About Toffee Bars
Can I use brown sugar instead of granulated sugar?
Yes, but the flavor changes slightly. Brown sugar will create a softer, more molasses-forward bar. Granulated sugar gives you that classic crisp toffee texture.
Why is my toffee sticky or soft?
This usually means it didn’t reach the hard crack stage (around 300°F). Using a candy thermometer is the easiest fix. Also, pouring onto a cold surface or not letting it cool completely can make it sticky.
Can I make them vegan or dairy-free?
Absolutely. Use a plant-based butter substitute or coconut oil. Flavor will vary slightly, but the bars still maintain their sweet, crunchy appeal.
How do I get that perfect snap?
Patience is key. Cook the sugar-butter mixture slowly over medium heat, monitor with a thermometer, and let the toffee cool completely before cutting. Rushing any step can affect the texture.
Can I add chocolate or nuts?
Yes! Drizzle melted chocolate on top, or sprinkle chopped pecans, almonds, or walnuts before the toffee sets. It elevates the flavor and adds texture.
Toffee Bars Recipe
- Total Time: 25 minutes
- Yield: 16 1x
- Diet: Vegetarian
Description
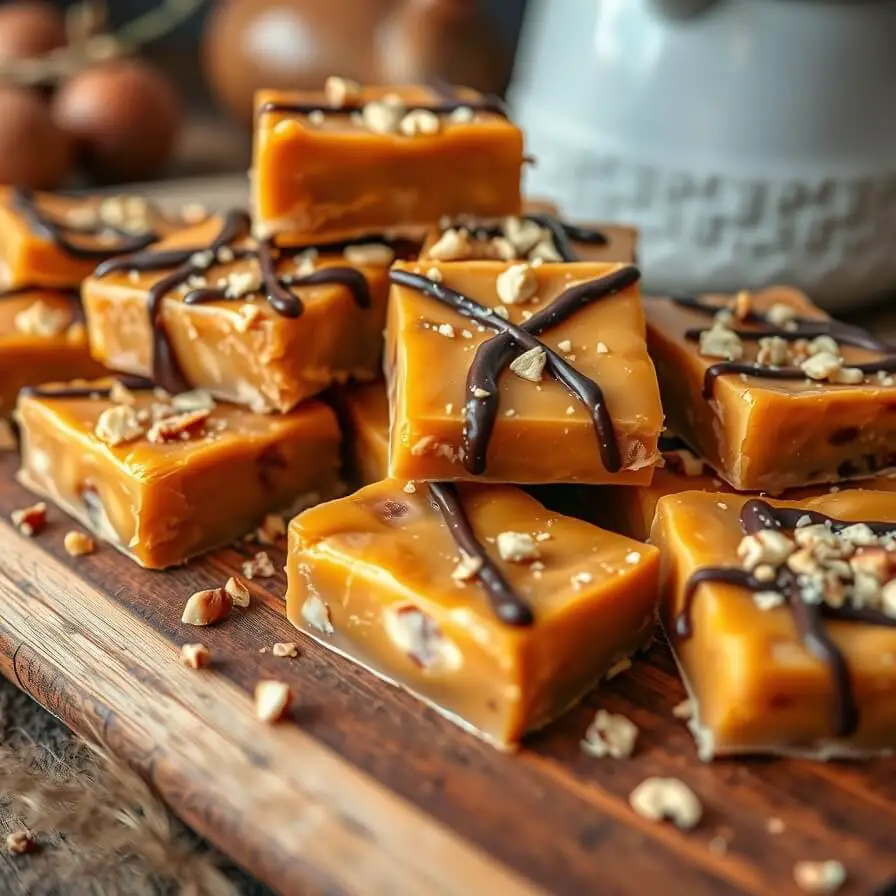
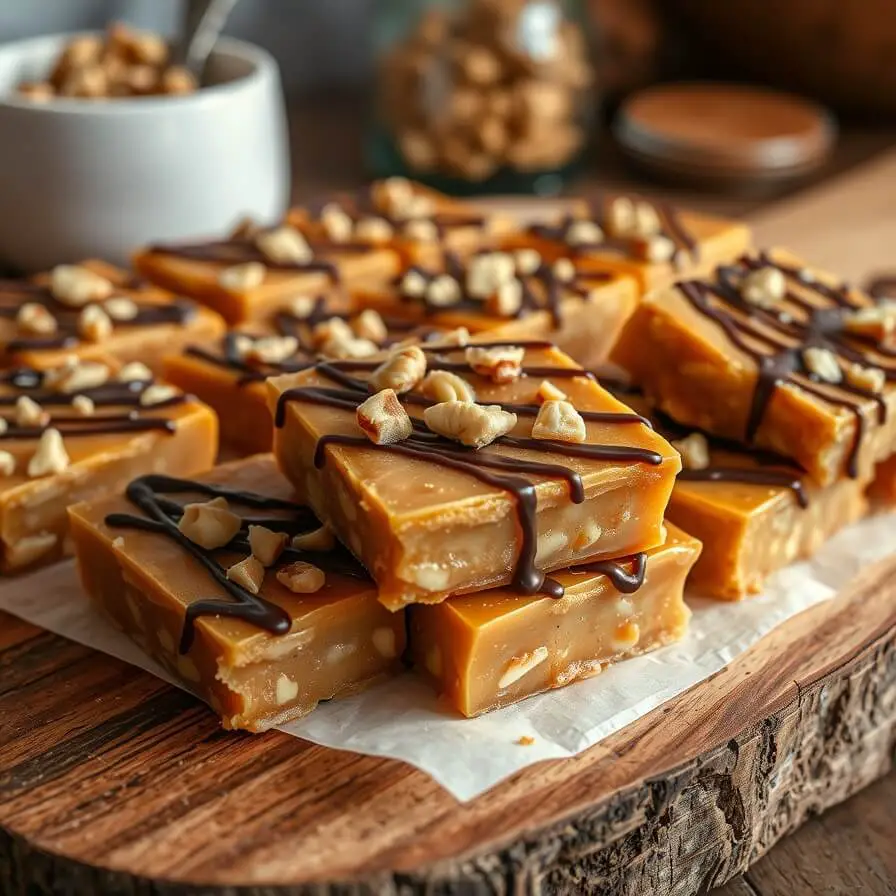
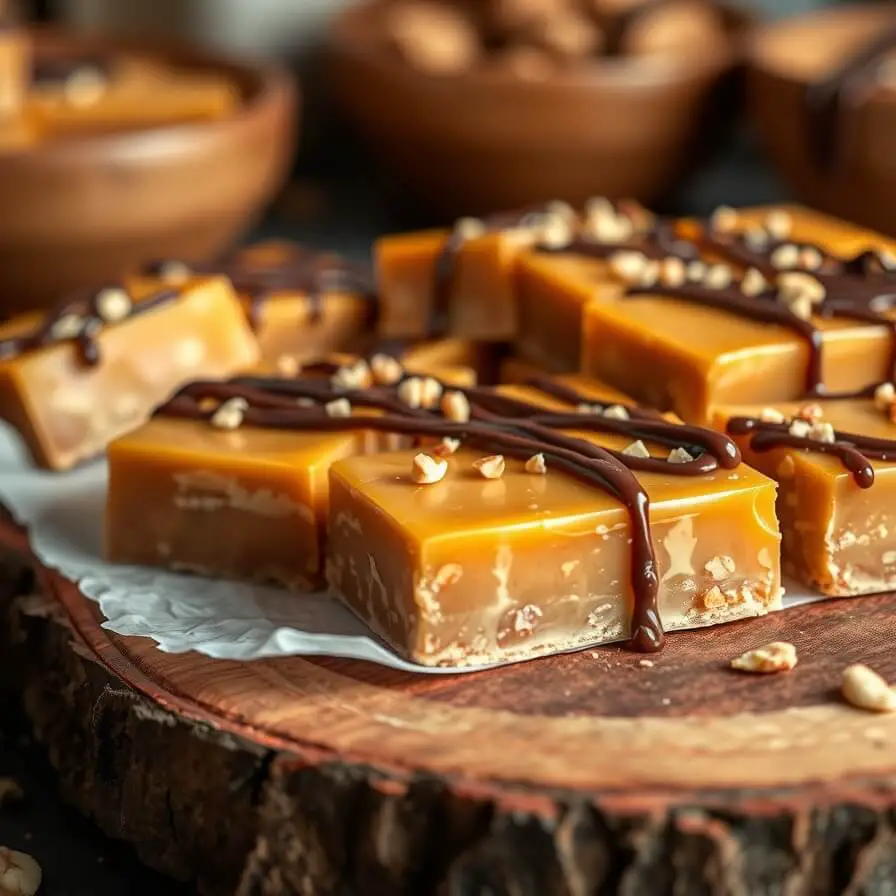
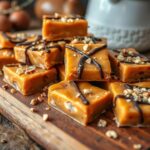
A close-up of homemade toffee bars, perfectly golden and glossy, some drizzled with dark chocolate and sprinkled with chopped nuts. The bars sit on a rustic wooden board, capturing the rich, buttery texture and inviting crackle of freshly made toffee. Warm, natural lighting highlights the dessert’s decadent appeal, making it irresistible and ready to enjoy.
Ingredients
- 1 cup unsalted butter
- 1 cup granulated sugar
- 1 tsp pure vanilla extract
- Pinch of sea salt (optional)
- ½ cup chopped nuts (optional)
- 2 tbsp dark chocolate, melted (optional)
Instructions
- Line a 9×13-inch baking pan with parchment paper, lightly butter edges.
- Melt butter in a heavy-bottomed saucepan over medium heat.
- Gradually add sugar, stirring constantly. Cook until golden brown (around 300°F).
- Remove from heat, stir in vanilla and optional nuts.
- Pour mixture into prepared pan and spread evenly.
- Cool at room temperature until firm (30–60 minutes).
- Optional: drizzle with melted chocolate once slightly cooled.
- Cut into bars and serve.
Notes
- Ensure consistent medium heat to prevent burning.
- Use a candy thermometer for accuracy.
- Store in airtight containers at room temperature or in the fridge.
- Prep Time: 15 minutes
- Cook Time: 10 minutes
- Category: Dessert
- Method: no-bake final set, Stove-to-pan
- Cuisine: American
Nutrition
- Serving Size: 16
- Calories: 250
- Sugar: 24g
- Sodium: 55mg
- Fat: 16g
- Saturated Fat: 10g
- Unsaturated Fat: 5g
- Trans Fat: 0g
- Carbohydrates: 28g
- Fiber: 1g
- Protein: 2g
- Cholesterol: 35mg