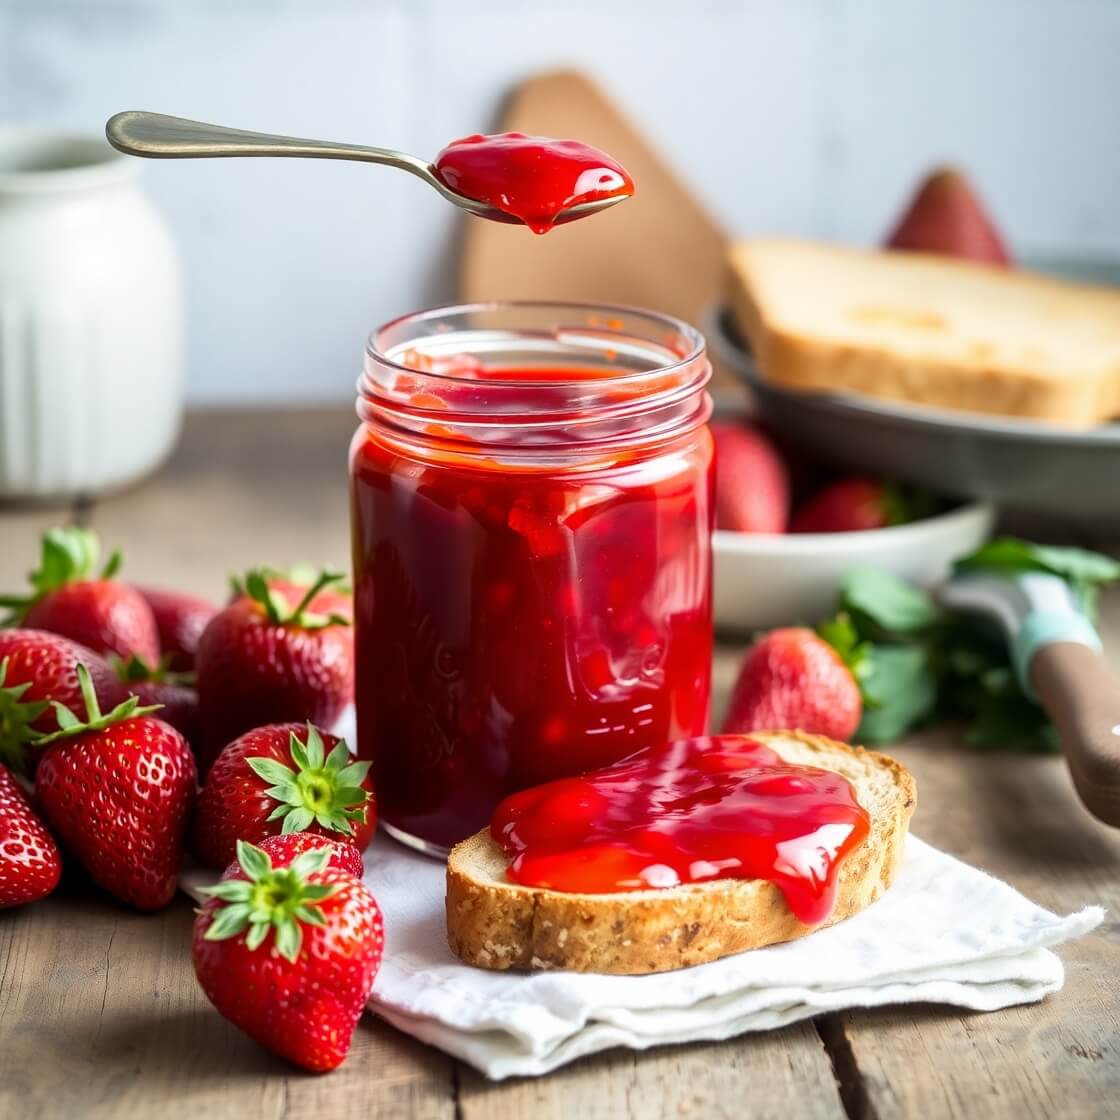
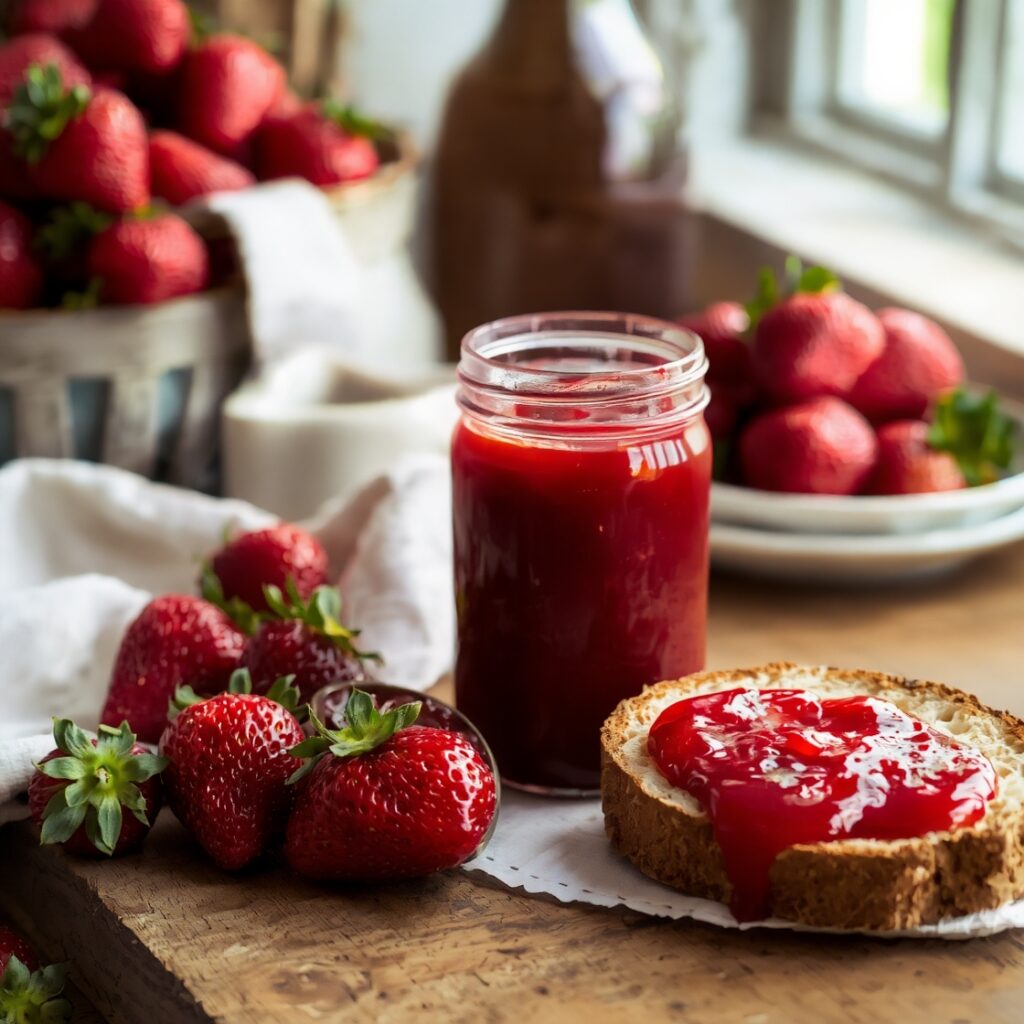
Strawberry Jam Recipe Canning
Every summer, the local farmers’ market feels like stepping into a patchwork quilt of colors and aromas. One of my favorite stalls is the berry stand—overflowing baskets of strawberries that smell like sunlight. Last year, I grabbed a flat of the juiciest, reddest berries, thinking, “I’ll just make a small batch of jam.” Two hours later, my kitchen smelled like a candy shop in the best possible way, and my family was hovering, spoons in hand, sampling straight from the saucepan. That’s when I realized strawberry jam is more than just a spread; it’s a summer memory you can jar and savor all year long.
Canning strawberry jam has this magical quality—transforming fragile, perishable berries into something enduring. And while it sounds intimidating, with a little guidance, it’s surprisingly forgiving. There’s a rhythm to it: chopping, simmering, skimming, tasting, then bottling. Each step feels like part of a ritual, a gentle pause in our fast-paced lives.
What Makes This Strawberry Jam Special
What I love about this jam is the balance between sweetness and that vibrant strawberry tang. You still taste the fruit—it’s bright and fresh, not overly sugary like store-bought varieties. The texture is spreadable yet slightly chunky, so it feels homemade with every bite. Unlike recipes that rely on pectin powder, this method lets the strawberries do the work, giving a natural consistency and a rich, authentic flavor.
Ingredients in Context
I’ve learned that the best jam starts with great strawberries. Look for berries that are ripe but firm, deep red, and fragrant. Too soft, and your jam turns watery; too under-ripe, and it’ll taste tart.
Here’s my go-to ingredient guide:
- Fresh strawberries (2 pounds): Local if possible. The difference in flavor is remarkable.
- Granulated sugar (1 1/2 cups): You can adjust slightly for sweeter or more tart jam, but don’t skimp too much—it helps preserve the fruit.
- Lemon juice (2 tablespoons): This brightens the flavor and aids in natural gelling. Freshly squeezed always tastes better.
- Optional: vanilla bean or a pinch of sea salt: Adds subtle depth.
If you’re pressed for time, frozen strawberries work too—they tend to release juice more quickly—but I always prefer the fresh ones for their fragrance and texture.
Cooking Time at a Glance
Here’s a rough idea of how the process unfolds:
- Prep (washing, hulling, chopping berries): 15–20 minutes
- Cooking (simmering, thickening, skimming foam): 25–35 minutes
- Canning & sealing jars: 20–30 minutes
- Cooling & storing: 12+ hours
The beauty of jam is that the aroma and taste reward patience. You’ll want to linger over the bubbling pot, tasting and adjusting as you go.
Step-by-Step Strawberry Jam Magic

Step – 1: Prep Your Berries
Wash the strawberries gently, hull them, and cut larger berries in halves or quarters. Smaller berries can stay whole. This helps them cook evenly and gives the jam that beautiful, slightly chunky texture.
Tip: I always reserve a few perfectly shaped berries to drop into jars at the end—it makes the jam look irresistible.
Step – 2: Mix Sugar and Fruit
Combine the strawberries with sugar in a large saucepan. Let them sit for 10–15 minutes. You’ll notice the sugar drawing out the juice—it’s a natural syrup that’s part of the magic. Stir occasionally, and inhale deeply. This is the kind of aroma that makes your kitchen feel like home.
Step – 3: Simmer to Perfection
Add lemon juice and optional vanilla or salt. Heat the mixture over medium, stirring often. As it bubbles, foam may rise to the top. Skim gently with a spoon. The jam should thicken after 20–30 minutes of simmering.
Cooking cue: You’ll know it’s ready when a spoonful drips slowly rather than running quickly. For an extra check, place a small plate in the freezer before cooking, then drop a spoon of jam on it—if it wrinkles when pushed with your finger, it’s done.
Step – 4: Jar It Up
Sterilize jars and lids in boiling water. Carefully ladle the hot jam into jars, leaving about 1/4 inch headspace. Wipe rims clean, place lids on top, and screw bands until fingertip-tight. Submerge jars in boiling water for 10 minutes to seal.
When you lift the jars out, they’ll hiss and pop as the vacuum seal forms. That sound is one of my favorite parts of canning—it’s oddly satisfying.
Step – 5: Cool and Store
Allow jars to cool completely on a towel or rack. Check that lids are sealed (they shouldn’t flex when pressed). Store in a cool, dark place. Refrigerate after opening.
Even though the waiting period is tough, the reward is worth it: jam that tastes like a summer morning in every spoonful.
Substitutions and Adaptations
Strawberry jam is surprisingly adaptable:
- Vegan & refined sugar-free: Use coconut sugar or a natural fruit sweetener. The flavor will be slightly different but still luscious.
- Chunky vs. smooth: Mash berries with a potato masher for a rustic feel, or blend half the mixture for a smoother texture.
- Kid-friendly: Add a splash of orange juice instead of lemon for a sweeter profile.
I often experiment with herbs like basil or mint for a twist. A hint of fresh basil turns a classic strawberry jam into something that feels gourmet without any effort.
Pro Tips from My Jam Kitchen

Over the years, I’ve learned a few tricks that make strawberry jam even better—and save you some frustration along the way.
- Pick the right pot: A wide, heavy-bottomed saucepan works best. It helps the jam cook evenly and reduces scorching.
- Don’t rush the simmer: Stir frequently, and keep the heat at a gentle bubble. High heat can cause burnt edges before the center thickens.
- Foam isn’t bad—it’s normal: Skimming it off makes the jam clearer and prettier, but if you leave a little, it won’t affect flavor.
- Taste along the way: If the jam is too tart, a pinch more sugar can balance it. Too sweet? Add a splash of lemon juice.
Common Mistakes to Avoid
Even seasoned jam makers have moments of panic, so here’s what I’ve learned from past mishaps:
- Overcooking: If the jam is too thick or sticky, it’s overcooked. Keep a close eye near the end of simmering.
- Under-filling jars: Leaving too much headspace can lead to seal failure. Always aim for that 1/4-inch margin.
- Neglecting sterilization: It might seem tedious, but jars and lids must be sterilized to prevent spoilage.
- Skipping the pectin check (if using fresh fruit only): Natural pectin levels vary, so test consistency before canning.
A few minor missteps are part of the learning curve, but with patience, you’ll quickly get the hang of it.
Storage, Make-Ahead, and Shelf Life
Proper storage is key for enjoying your jam for months:
- Pantry: Unopened, sealed jars keep in a cool, dark place for up to a year.
- Refrigerator: Once opened, store jam in the fridge. It will last 3–4 weeks.
- Freezer: For extra longevity, freeze in airtight containers—perfect if you have an abundance of berries.
Pro tip: Label jars with the date and type of jam. It makes it easier to rotate and enjoy your homemade collection.
FAQs About Strawberry Jam Canning
Q: Can I use frozen strawberries?
A: Absolutely. Frozen berries work well, though they release juice faster. Reduce simmering time slightly to avoid overcooking.
Q: How do I know when the jam is ready?
A: A plate test works best. Chill a small plate in the freezer, spoon a little jam onto it, and push it gently. If it wrinkles, it’s done.
Q: Can I make low-sugar or sugar-free jam?
A: Yes! Substitute coconut sugar or fruit-based sweeteners. Keep in mind that sugar contributes to preservation, so sugar-free jam should be stored in the fridge or frozen.
Q: What’s the best jar size for jam?
A: I prefer 8-ounce jars—they’re the perfect portion for gifts, and they empty before spoilage becomes a concern.
Q: Can I add flavors like vanilla or herbs?
A: Definitely. A split vanilla bean or fresh basil leaves can elevate your jam. Add them during simmering and remove before jarring.

Strawberry Jam Recipe Canning
- Total Time: 1 hour 15 minutes
- Yield: 4–5 1x
- Diet: Vegetarian
Description
This strawberry jam recipe for canning is the ultimate way to preserve the bright flavors of summer. With just a few simple ingredients — fresh strawberries, sugar, and lemon juice — you can create a deliciously vibrant jam that’s perfect for spreading on toast, swirling into yogurt, or giving as a thoughtful homemade gift. Whether you’re a seasoned canner or new to preserving, this step-by-step guide walks you through the entire process with clarity and care. It’s a rewarding weekend project that fills your pantry with jars of sweet, ruby-red goodness that lasts all year.
Ingredients
- 4 cups fresh strawberries, hulled and chopped
- 2½ to 3 cups granulated sugar (adjust to taste)
- 2 tablespoons fresh lemon juice
- ½ teaspoon butter (optional, to reduce foaming)
- 1 packet fruit pectin (optional, based on texture preference)
Instructions
- Wash and sterilize jars, lids, and rings. Keep them warm until ready to use.
- Prepare strawberries by hulling and chopping. Slightly mash if you prefer a smoother texture.
- In a large saucepan, combine strawberries, sugar, lemon juice, and butter (if using). Let it rest for 5–10 minutes.
- Bring mixture to a boil, stirring constantly. Reduce heat and simmer until thickened, skimming foam if needed.
- Test for set using a cold plate. Once set, ladle hot jam into warm jars, leaving ¼ inch headspace.
- Wipe rims clean, apply lids and rings, and process jars in a water bath for 10–15 minutes.
- Remove jars and let cool for 12–24 hours. Ensure seals are tight before storing.
Notes
- Always use ripe strawberries for the best flavor.
- Adjust sugar to taste, but be mindful it affects the jam’s shelf life.
- For a chunkier jam, don’t mash the strawberries completely.
- Don’t skip the lemon juice — it helps with flavor and preservation.
- Prep Time: 20 minutes
- Cook Time: 30 minutes
- Category: Preserves & Condiments
- Method: Stovetop, Water Bath Canning
- Cuisine: American
Nutrition
- Serving Size: 4–5
- Calories: 52
- Sugar: 12g
- Sodium: 0mg
- Fat: 0g
- Saturated Fat: 0g
- Unsaturated Fat: 0g
- Trans Fat: 0g
- Carbohydrates: 13g
- Fiber: 0.3g
- Protein: 0g
- Cholesterol: 0mg