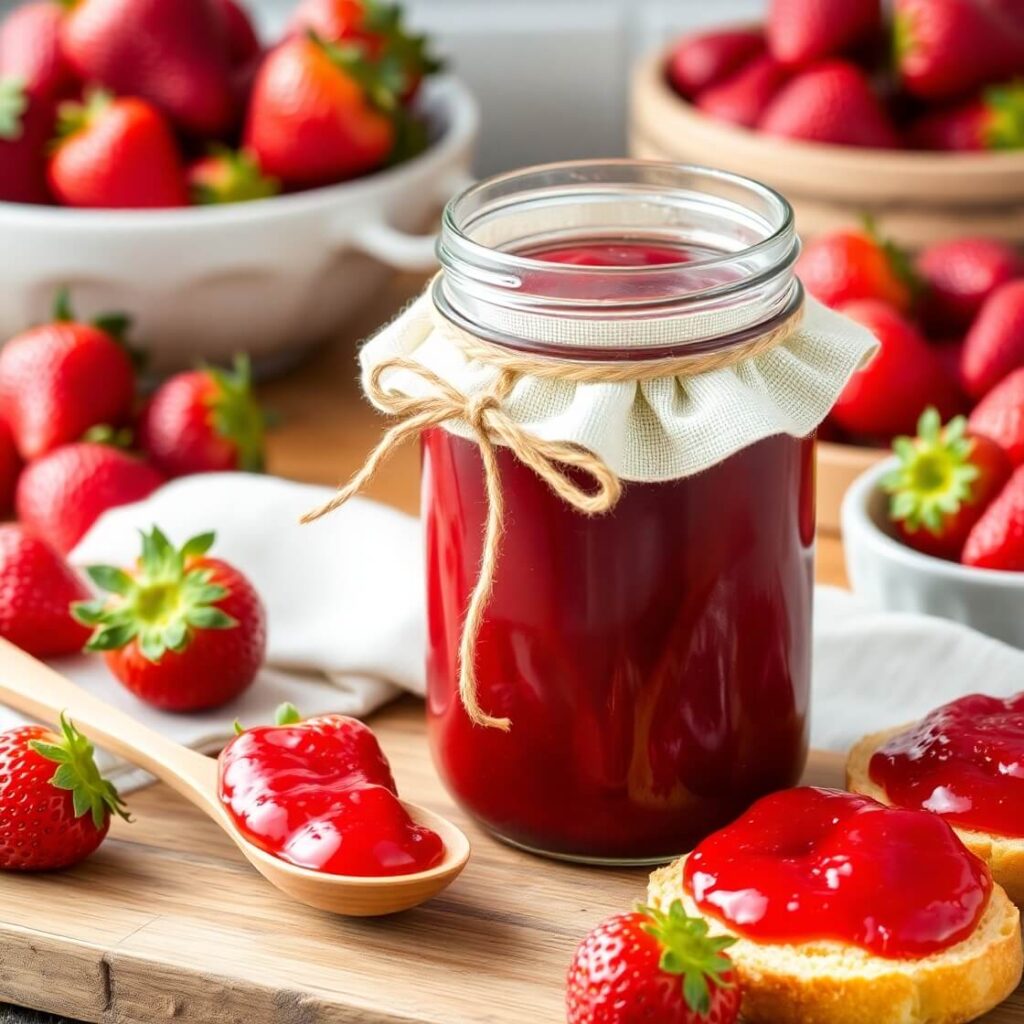
Strawberry Jam Recipe

There’s something about strawberry season that makes me feel like a kid again. Every year, I look forward to the first sunny weekend when the farmers’ market overflows with red, plump berries. Last summer, I found myself wandering past the stalls, drawn by the scent of freshly picked strawberries. One basket caught my eye, and I remember the vendor teasing, “These are too good to just eat—make jam!” I laughed, thinking about my mother’s kitchen, the sound of bubbling pots, and jars lined up like little treasures. That day, I came home with a basket of strawberries, a few stalks of rhubarb (because why not experiment?), and an old family recipe that I still swear by.
Jam-making, for me, isn’t just about preserving fruit—it’s about capturing a season in a jar. I love the way the kitchen smells halfway through cooking: sweet, tangy, and a little like summer sunshine condensed. It’s a ritual, really, one that turns simple fruit into something magical you can spread on toast for months.
Picking the Right Strawberries
Not all strawberries are created equal, and the kind you buy makes a noticeable difference. I always go for berries that smell fragrant and yield slightly to gentle pressure. Avoid anything that looks pale or overly mushy—the jam will be sweeter and more flavorful if your fruit is ripe but firm.
If you’re lucky enough to visit a farm and pick your own, even better. The contrast of sun-warmed berries is worth the extra effort. For sugar, I usually stick to granulated white, but you can mix in a touch of brown sugar for a deeper flavor. Organic is always a plus, especially when you’re skipping preservatives.
Ingredients That Make It Work
Here’s what I usually have on hand, along with a few notes from experience:
- Strawberries – 4 cups, hulled and chopped. Ripe, fragrant berries are the foundation of this jam.
- Rhubarb – 1 cup, diced (optional, but I love the tart kick).
- Granulated sugar – 3 cups. Adjust depending on sweetness of berries.
- Lemon juice – 2 tablespoons, fresh if possible. This balances the sugar and helps set the jam.
- Vanilla extract – a splash, if you want a subtle aroma.
If you need to adapt: skip the rhubarb for pure strawberry jam, or swap lemon for lime for a twist. For a vegan variation (though all jam technically is vegan), you can add chia seeds toward the end for extra thickness without any pectin.
Timing Your Jam
Jam-making is quick once everything is prepped, but it does require attention. Here’s a rough breakdown:
- Prep time: 15–20 minutes (hulling, chopping, measuring)
- Cooking time: 20–30 minutes on the stovetop
- Cooling / setting: 4–6 hours at room temperature or overnight in the fridge
Step-by-Step Instructions
Step 1: Prepping the Fruit
Wash your strawberries and rhubarb thoroughly. Hull the strawberries by removing the green tops and chop them into roughly uniform pieces. Dice the rhubarb into small chunks so it cooks evenly. At this stage, I often taste a piece of each fruit—ripe strawberries should taste like summer, and rhubarb should be bright and tart.
Step 2: Mixing With Sugar
In a large bowl, combine the chopped strawberries and rhubarb with sugar. Let them sit for 10–15 minutes. You’ll notice the sugar drawing out juices, creating a glossy, fragrant syrup. This step is key for even cooking and helps prevent your jam from being too watery.
Step 3: Cooking the Jam
Transfer the fruit and syrup to a heavy-bottomed saucepan over medium heat. Stir gently as it comes to a simmer. After about 5–7 minutes, the mixture should start bubbling and thickening. Use a wooden spoon to scrape the bottom occasionally to avoid scorching.
At this point, add the lemon juice and a splash of vanilla extract if desired. Keep simmering for another 15–20 minutes. You’ll know it’s ready when the mixture coats the back of a spoon, and you see the tiny seeds suspended in the syrupy fruit.
Step 4: Testing the Set
There are a couple of ways to check if your jam is ready. The classic method is the chilled plate test: place a small spoon of jam on a cold plate, let it sit for a minute, then push it with your finger. If it wrinkles and doesn’t flood back into the pool, it’s done. I sometimes rely on the visual cue alone—bubbling thickens, and the color deepens to a glossy, ruby red.
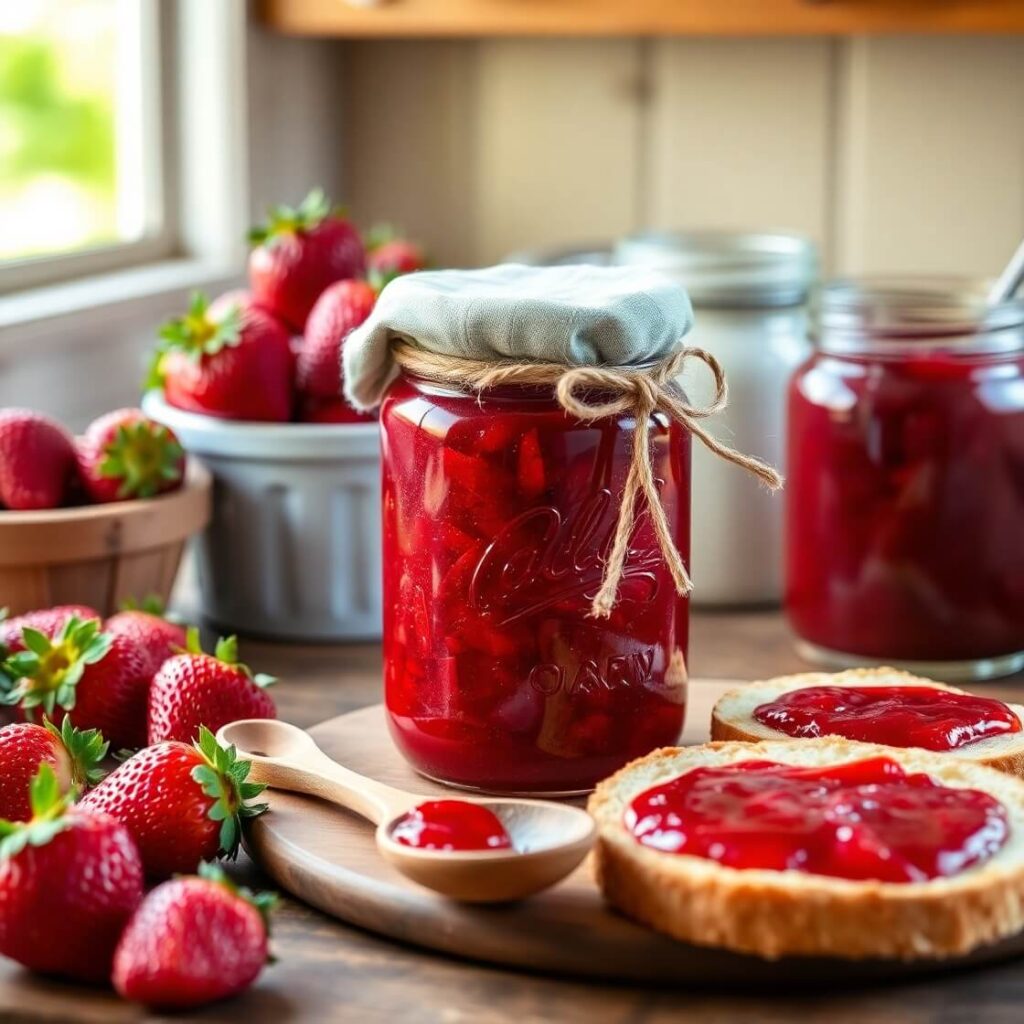
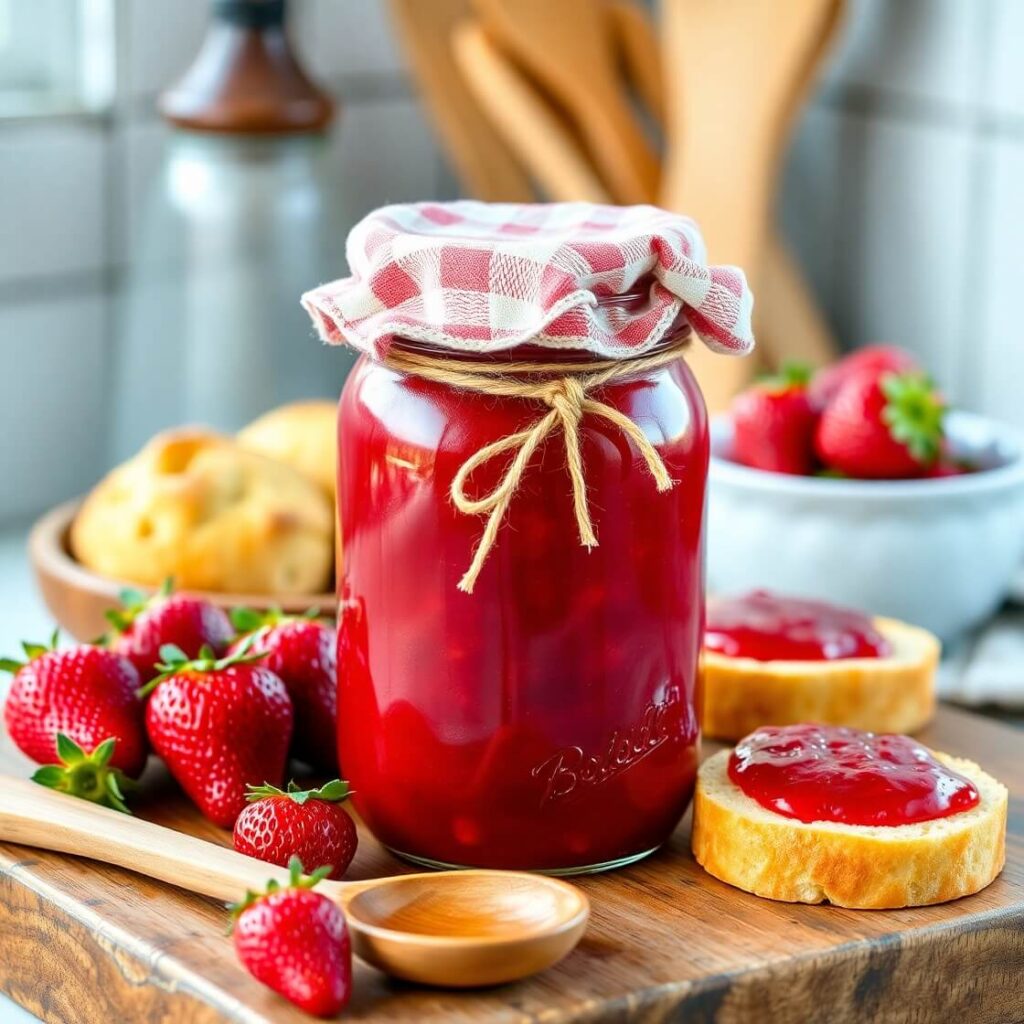
Step 5: Jar It Up
Sterilize your jars and lids by boiling them or running them through the dishwasher. Carefully spoon the hot jam into jars, leaving a little headspace at the top. Wipe the rims clean and seal tightly. Let them cool at room temperature before storing in the fridge.
Substitutions & Tweaks
Jam-making is surprisingly flexible. Here are a few options I’ve experimented with over the years:
- Sugar alternatives: Coconut sugar or maple syrup can work, but the jam may be darker and slightly thinner.
- Fruit swaps: Add raspberries, blueberries, or even a touch of blackberries for a mixed berry version.
- Texture tweaks: If you prefer smoother jam, use an immersion blender for a few seconds before jarring.
Pairing Ideas for Your Strawberry Jam
This jam shines in so many ways. Spread it on warm, buttered toast for breakfast, swirl it into yogurt, or spoon it over vanilla ice cream for a quick dessert. A trick I’ve learned: pair it with mild cheeses like brie or cream cheese—the sweet-tart contrast is irresistible.
Common Kitchen Hiccups
Even the most seasoned home cooks have jam mishaps. Here’s what I’ve learned:
- Too runny? Keep simmering. Sometimes it takes longer than expected, especially if your berries are very juicy.
- Burning on the bottom? Always use a heavy-bottomed pan and stir gently. Patience is key.
- Crystals forming? This usually happens with over-sugaring or rapid cooling. Stir well and reheat slightly if needed.
Pro Tips From My Kitchen
Over the years, I’ve picked up a few tricks that make strawberry jam foolproof:
- Use a heavy-bottomed pan – It prevents scorching and ensures even heat distribution. I learned this the hard way with a thin saucepan; one distracted moment, and half the batch was a sticky mess at the bottom.
- Don’t rush the simmer – Jam needs time to thicken naturally. It’s tempting to crank up the heat, but patience preserves the flavor and texture.
- Taste as you go – Adjust sweetness or tartness with sugar or lemon juice gradually. Strawberries vary in sweetness season to season, so this step is essential.
- Stir gently – Over-stirring can break down the berries too much. I like leaving chunks for that rustic, homemade feel.
One little secret I swear by: add a tiny pinch of salt. It balances the sweetness beautifully without making the jam taste salty.
Mistakes to Avoid
Even experienced cooks sometimes hit bumps. Here are common mistakes and how to avoid them:
- Jam too runny – Often caused by insufficient cooking or too much juice from overly ripe berries. Solution: simmer a bit longer, stirring gently, until it coats a spoon.
- Crystals forming – Usually a sugar issue. Dissolve sugar completely before boiling, and don’t stir too vigorously once bubbling.
- Overcooked flavor – Keep the heat moderate. Long, rapid boiling can make strawberries taste caramelized instead of fresh and bright.
- Jars not sealing properly – Always sterilize jars and lids. A quick rinse in boiling water or a dishwasher cycle works well.
Storage & Make-Ahead Tips
Jam is one of those magical recipes that keeps giving:
- Refrigerator – Store in tightly sealed jars for up to 4 weeks. Always use a clean spoon to avoid contamination.
- Freezer – Pour jam into freezer-safe containers, leaving about ½ inch headspace. Freeze up to 6 months. Thaw in the fridge before use.
- Gifting tip – Make extra! Strawberry jam makes a simple, thoughtful homemade gift. Add a ribbon and label for a personal touch.
Frequently Asked Questions
Do I need pectin?
Not for this recipe. The natural pectin in strawberries, combined with lemon juice, is usually enough to set the jam. If you want a firmer texture, you can stir in commercial pectin following the package instructions.
Can I use frozen strawberries?
Yes, but thaw and drain them slightly first. Frozen berries release extra liquid, so you may need to simmer longer to reach the desired thickness.
Is rhubarb necessary?
Nope. Rhubarb adds tartness and depth, but pure strawberry jam is just as delicious.
Can I reduce the sugar?
You can reduce sugar slightly, but be mindful that sugar is both a preservative and a flavor enhancer. Too little sugar may affect shelf life and set.
How do I know when it’s done?
Check consistency by spoon test or chilled plate method. The jam should coat the back of a spoon and wrinkle slightly when pushed.
Strawberry Jam Recipe
- Total Time: 1 hour 15 minutes
- Yield: 3-4 1x
- Diet: Vegetarian
Description
This homemade strawberry jam recipe is perfect for preserving the sweet, bright flavor of fresh strawberries. With just a few simple ingredients—strawberries, sugar, and lemon juice—you can make a delicious and versatile jam that’s perfect for spreading on toast, adding to yogurt, or gifting to friends and family.
Ingredients
- 4 cups fresh strawberries, hulled and chopped
- 4 cups granulated sugar
- 1/4 cup fresh lemon juice
Instructions
- Prepare the strawberries by washing, hulling, and chopping them into small pieces.
- In a large bowl, combine the strawberries with the sugar and let them sit for 30 minutes to macerate.
- Transfer the strawberry mixture to a large pot and add the lemon juice. Bring to a boil over medium-high heat, then reduce to a simmer.
- Let the jam cook for 45 minutes to 1 hour, stirring regularly, until it thickens and passes the wrinkle test.
- Ladle the jam into sterilized jars, seal, and allow to cool completely before storing.
Notes
- Be sure to test the consistency before removing the jam from the heat.
- Sterilize your jars to ensure your jam stays fresh for as long as possible.
- Prep Time: 15 minutes
- Cook Time: 1 hour
- Category: Jam
- Method: Simmering
- Cuisine: American
Nutrition
- Serving Size: 3-4
- Calories: 50
- Sugar: 12g
- Sodium: 0mg
- Fat: 0g
- Saturated Fat: 0g
- Unsaturated Fat: 0g
- Trans Fat: 0g
- Carbohydrates: 13g
- Fiber: 1g
- Protein: 0g
- Cholesterol: 0mg
A Sweet Reminder
Strawberry jam is more than a preserve—it’s a little jar of summer memories. Whether you’re making it with kids, gifting it to friends, or savoring it on a quiet morning, each spoonful carries the warmth of sun-ripened strawberries and the love you put into the kitchen.
Love this recipe? Subscribe for more seasonal favorites, straight from my kitchen to yours.