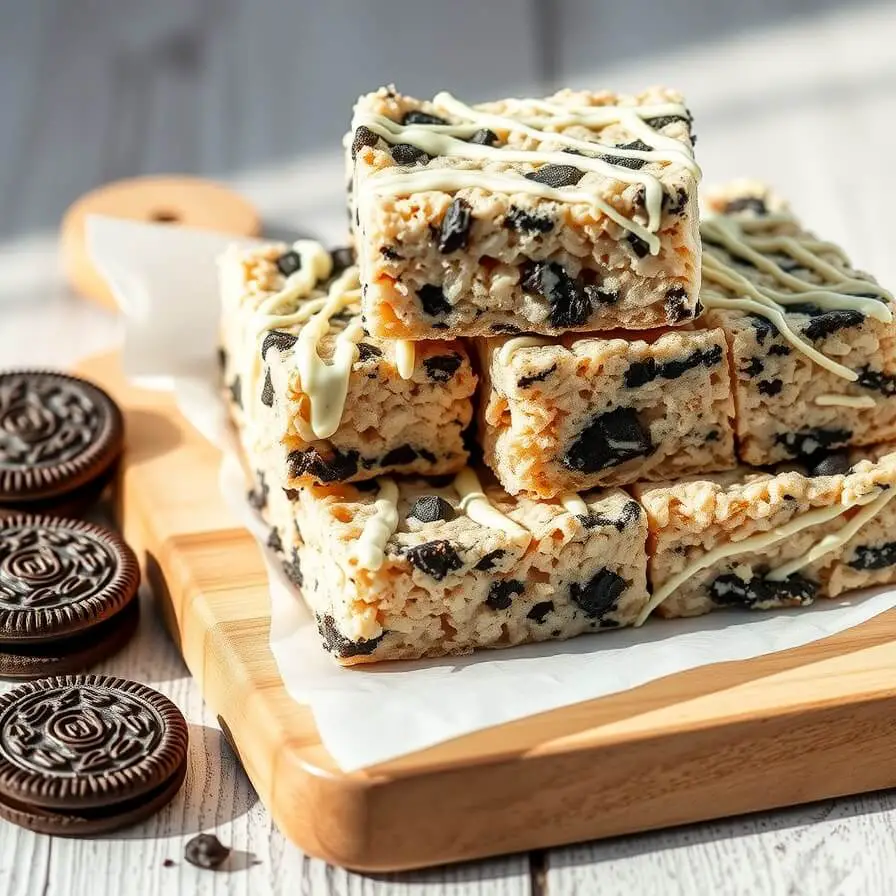
How to make Homemeade Oreo Rice Krispie Treats
The first time I made Oreo rice crispy treats, it wasn’t planned at all. I had promised my kids a batch of the classic marshmallow squares one rainy Saturday, only to discover I didn’t have quite enough cereal in the pantry. What I did have was a half-empty package of Oreos—the family-size, because I always fall for those at the grocery store.
Instead of shelving the idea, I decided to crush a handful of cookies and toss them into the marshmallow mixture. I figured it couldn’t hurt, and honestly, I was more curious than confident about how they’d turn out.
When I pulled the pan out and sliced that first square, the kitchen filled with the warm, sweet scent of marshmallows mixed with the deep cocoa smell of Oreos. My kids circled the counter like hawks, waiting for the treats to cool just enough to eat. After one bite, the verdict was unanimous: this “accidental” recipe needed to happen again.
Now, these Oreo rice crispy treats have become a favorite whenever the seasons shift—especially in fall when school is back in session, or in spring when I want a dessert that feels celebratory without heating up the oven. They’re a no-fuss, crowd-pleasing sweet that feels familiar yet surprising every time I serve them.
Why I Love Making These for Fall and Spring Gatherings
Certain recipes just seem tied to seasons, even if they don’t look seasonal on paper. For me, Oreo rice crispy treats are the kind of dessert I pull out when I want something fun, playful, and just a little nostalgic.
In the fall, they’re perfect for bake sales or school parties. I’ll often cut them into bite-sized squares, wrap them in wax paper, and tuck them into my kids’ lunchboxes. The combination of crunchy cereal, gooey marshmallow, and chunks of Oreo feels just right when the air turns crisp and cozy desserts start calling.
In the spring, I like to dress them up with a drizzle of white chocolate and maybe even pastel sprinkles to make them Easter-ready. There’s something cheerful about the cookies-and-cream look that fits with the season of renewal.
The truth is, these treats aren’t fancy. They’re not something you’d find in a glossy bakery case. But that’s exactly what makes them special—they’re homemade, simple, and versatile enough to adapt to any holiday or occasion.
How to Serve Them for Maximum Fun
The beauty of Oreo rice crispy treats is that they can play different roles depending on the occasion. If you’re looking for ideas beyond the classic square-cut version, here are a few ways I’ve served them:
- Cookie-and-Cream Bars at Parties: Press them into a 9×13 pan, let them cool, then cut into neat squares. They travel well and stack beautifully on a dessert platter.
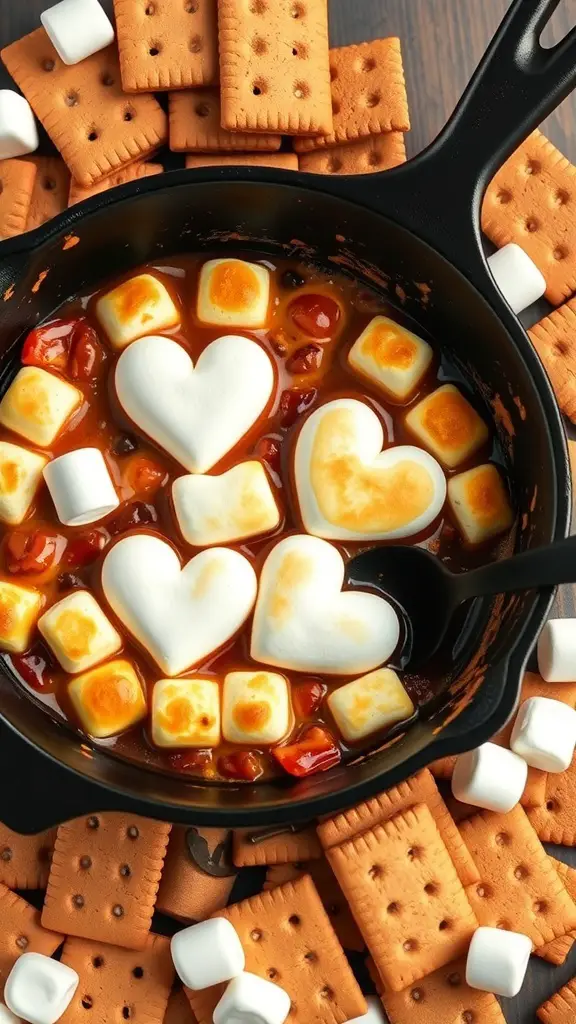
- Fun Shapes for Kids: Use cookie cutters while the mixture is still slightly warm to cut them into hearts, stars, or seasonal shapes. I once made bunny-shaped ones for an Easter brunch, and they were a hit.
- Dressed-Up Treats for Grown-Ups: A drizzle of melted dark chocolate and a sprinkle of crushed Oreos on top turns them into something worthy of a coffee date with friends.
- Layered Dessert Bars: Press half the cereal-marshmallow mixture into the pan, scatter extra chopped Oreos and even mini chocolate chips, then press the second half on top. Double the fun, double the crunch.
They’re endlessly adaptable, which is why I find myself making them for everything from casual movie nights to school potlucks.
Ingredients That Make the Difference
Every cook has their little quirks about ingredients, and I’m no different. When it comes to Oreo rice crispy treats, the ingredients are simple, but small choices can really elevate the final result.
- Rice Cereal: Classic Rice Krispies are the go-to, but any puffed rice cereal works. I’ve even used the cocoa-flavored version for extra chocolate punch.
- Marshmallows: Fresh marshmallows make all the difference. Older, slightly stiff marshmallows don’t melt as smoothly, which can make the mixture harder to stir. I prefer mini marshmallows since they melt quicker.
- Butter: I always use salted butter here. The salt balances the sweetness and keeps the treats from being cloying. If you only have unsalted, add a pinch of salt to the melted marshmallow mixture.
- Oreos: Regular Oreos are my default, but I’ve also experimented with Golden Oreos, mint Oreos, and even the seasonal pumpkin spice variety. Each one changes the personality of the treats just enough to feel special.
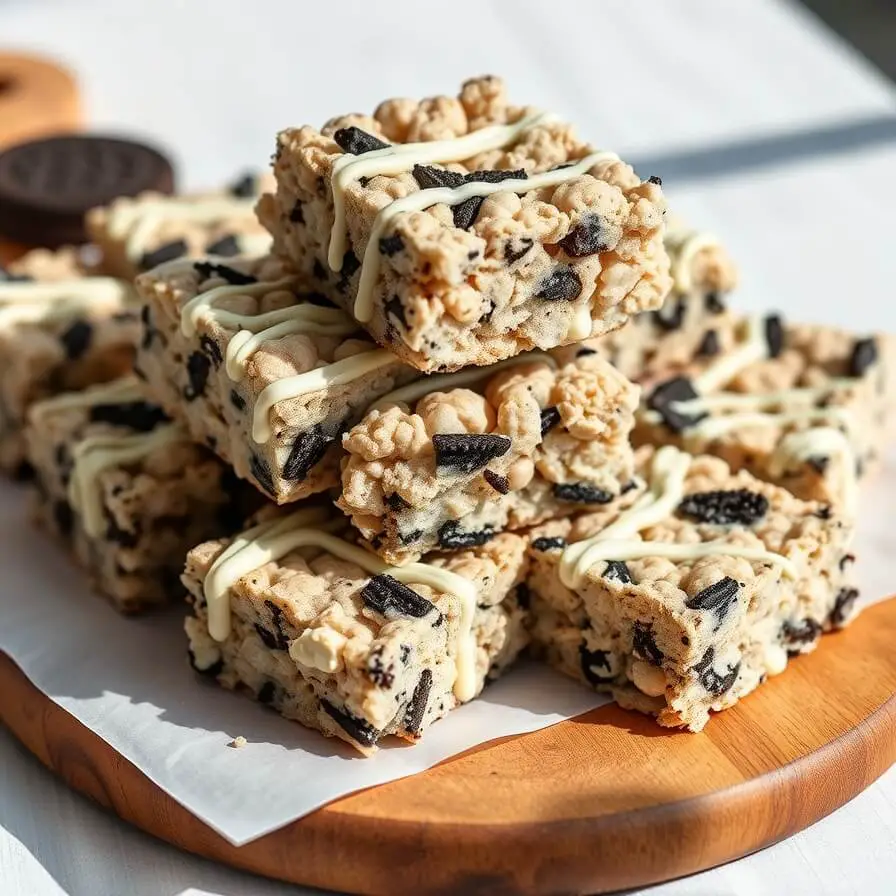
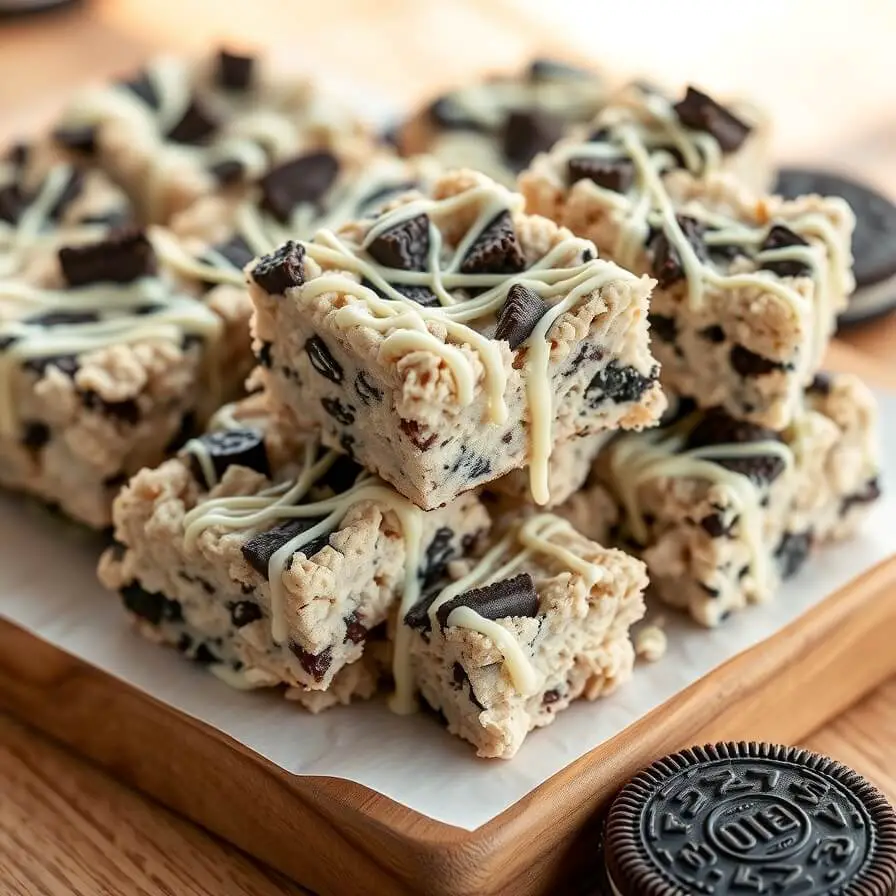
- Optional Toppings: Melted white chocolate or dark chocolate drizzled across the top makes the bars look polished. A handful of extra crushed Oreos pressed into the surface while still warm adds irresistible crunch.
One tip I learned the hard way: crush the Oreos gently. You want chunks, not dust, so the cookies stand out both visually and in flavor.
How to make Rice Krispie Treats with Oreos

When I first started making rice crispy treats as a teenager, I burned my marshmallows on more than one occasion. The trick is low heat and constant stirring—once they scorch, there’s no saving the flavor. Here’s how I approach Oreo rice crispy treats now:
- Prep the pan. Lightly butter or line a 9×13 pan with parchment paper. This step seems skippable, but trust me—it saves you from chiseling the bars out later.
- Melt the butter. In a large pot, melt 6 tablespoons of butter over low heat. You want it smooth and golden, not browned.
- Stir in the marshmallows. Add about 16 ounces of mini marshmallows and stir until fully melted. The mixture should look glossy and stretchy, with no lumps.
- Add vanilla for depth. Just half a teaspoon makes the flavor warmer and more balanced.
- Fold in the cereal. Pour in 6 cups of rice cereal and stir until the marshmallow coats everything evenly. The sound of the cereal crackling against the pot is one of my favorite kitchen moments.
- Add crushed Oreos. About 15–18 cookies, broken into chunky pieces, go in next. Stir quickly so the pieces distribute without turning into crumbs.
- Press into the pan. Transfer the mixture into the prepared pan. Use a buttered spatula or wax paper to press it down gently—don’t compact it too much, or the bars will be hard instead of chewy.
- Cool and cut. Let the treats rest for about 30 minutes before slicing. I usually sneak a warm corner piece, though—it’s impossible not to.
The result is chewy, gooey, and studded with satisfying Oreo crunch in every bite.
Storing and Making Ahead
Oreo rice crispy treats are at their best within the first day, when they’re still soft and chewy. But if you’re planning ahead, here’s what I’ve learned:
- Room Temperature Storage: Keep them in an airtight container for up to 3 days. Separate layers with parchment paper to prevent sticking.
- Freezer-Friendly: Wrap individual squares in plastic wrap, then store in a freezer bag for up to 2 months. Thaw at room temperature for a few hours before serving.
- Make Ahead for Events: If I’m making these for a party, I’ll prepare them the night before and slice them the next day. They hold up beautifully.
One mistake I made once was refrigerating them. The cold made the marshmallows stiff, and the bars lost their soft, chewy bite. Room temperature really is the way to go.
Pro Notes and Mistakes I’ve Made Along the Way
No matter how simple a recipe seems, there are always little lessons you only learn by trial and error. Oreo rice crispy treats might look foolproof, but I’ve had my fair share of kitchen hiccups.
- Overheating the marshmallows: The first time I made these, I got impatient and cranked the heat up too high. The marshmallows seized, turned sticky in all the wrong ways, and gave the final bars a slightly burnt undertone. Low and slow is the secret.
- Packing them too tightly: I once pressed the mixture into the pan with a little too much enthusiasm. The result? Brick-hard bars that needed a steak knife to cut through. Now, I use a piece of wax paper and just gently press until even.
- Oreos too finely crushed: If you crush the cookies into dust, they disappear into the mixture and you lose that satisfying cookie crunch. Larger chunks—some as big as a quarter—give the best texture.
- Forgetting the vanilla: Skipping vanilla doesn’t ruin the recipe, but it does flatten the flavor. That tiny splash adds surprising warmth that ties the chocolate and marshmallow together.
These are the sorts of mistakes that make me laugh now, but they taught me how to get consistently chewy, picture-perfect bars every time.
Serving Ideas That Always Impress
I’ve served these bars in so many different contexts, and every time, they get devoured. A few favorites:
- School Bake Sales: Wrap individual squares in wax paper and tie with string. They look homemade and charming, and they sell fast.
- Movie Night: Cut into extra-large squares and serve with tall glasses of cold milk. There’s something about cookies-and-cream that feels made for movie marathons.
- Spring Brunch: Drizzle with pastel-colored candy melts or white chocolate, then sprinkle with crushed Oreos. They instantly look holiday-ready.
- Dessert Buffet: Pair with brownies and chocolate chip cookies for a trio of “comfort desserts.” These balance out the richness of other chocolate-heavy options.
When I really want to lean into the theme, I’ll even serve them alongside cookies-and-cream ice cream. It’s decadent, yes, but completely irresistible.
Print
Oreo Rice Crispy Treats Recipe
- Total Time: 20 minutes
- Yield: 12–16 1x
- Diet: Vegetarian
Description
These Oreo rice crispy treats combine gooey marshmallows, crunchy cereal, and chunks of Oreo cookies for the ultimate no-bake dessert. They’re quick to whip up, endlessly versatile, and loved by both kids and adults.
Ingredients
- 6 tablespoons salted butter
- 16 ounces mini marshmallows
- ½ teaspoon vanilla extract
- 6 cups rice cereal
- 15–18 Oreo cookies, roughly chopped
- Optional: extra crushed Oreos or melted chocolate for topping
Instructions
- Line a 9×13 pan with parchment paper or lightly butter it.
- Melt butter in a large pot over low heat.
- Add marshmallows and stir until completely melted and smooth.
- Stir in vanilla.
- Fold in rice cereal until evenly coated.
- Gently mix in crushed Oreos.
- Press mixture into prepared pan with a buttered spatula or wax paper—don’t press too firmly.
- Let cool for 30 minutes before slicing into squares.
Notes
- Use fresh marshmallows for the best texture.
- Don’t over-crush the Oreos—larger chunks add better flavor and texture.
- For extra indulgence, drizzle with melted chocolate before cooling.
- Prep Time: 10 minutes
- Cook Time: 10 minutes
- Category: Dessert
- Method: Stovetop, No-Bake
- Cuisine: American
Nutrition
- Serving Size: 12–16
- Calories: 230
- Sugar: 18g
- Sodium: 150mg
- Fat: 8g
- Saturated Fat: 4.5g
- Unsaturated Fat: 3g
- Trans Fat: 0g
- Carbohydrates: 38g
- Fiber: 1g
- Protein: 2g
- Cholesterol: 15mg