Oreo Pudding Dessert

The first time I tried making this Oreo pudding dessert, I completely misread the recipe. I added the milk all at once instead of gradually whisking it into the pudding mix. The kitchen instantly filled with this odd, lumpy texture that looked… less than appetizing. My kids peeked in, curious but skeptical, and my husband just shook his head with that familiar grin that says, “This is going to be interesting.”
But as I stubbornly whisked and adjusted, I realized a happy accident was unfolding. That lumpy start actually taught me something important: patience and attention to texture make all the difference in creamy desserts. By the time I finished layering crushed Oreos with the smooth, chocolatey pudding, it wasn’t just a dessert—it was a revelation. Every bite had the perfect balance of sweetness, creaminess, and cookie crunch. From that day on, this became my go-to comfort dessert, especially when I needed a quick, impressive treat for family gatherings or unexpected guests.
There’s something magical about combining the simplicity of instant pudding with the nostalgia of Oreos. It feels like childhood and sophistication all in one bowl—a dessert that’s playful, indulgent, and forgiving of kitchen mishaps.
Pro Notes & Fixes That Saved the Day
Looking back, the mistake I made taught me several key lessons:
- Gradual Mixing Matters: Slowly whisking cold milk into the pudding prevents lumps. If you start with lumps, don’t panic—whisking with a hand mixer works wonders.
- Layering is Key: Don’t skimp on crushed Oreos between layers. It adds texture contrast and ensures every spoonful has a bit of cookie crunch.
- Chill Time is Non-Negotiable: Letting it set for at least 2–3 hours in the fridge allows the pudding to firm up and the flavors to meld. Overnight is even better.
- Taste As You Go: A quick taste of the pudding before layering lets you adjust sweetness or chocolate intensity. Sometimes a pinch of extra cocoa powder or a dash of vanilla extract elevates the flavor immensely.
One of my favorite tricks is to save a few whole Oreo halves for garnish. It adds visual appeal and that little nostalgic “pop” when someone bites into a whole cookie unexpectedly.
Ingredients in Context
What I love about this recipe is that the ingredients are approachable but still feel special. You don’t need a long list of fancy items—just high-quality staples and a little thought about textures.
- Instant chocolate pudding mix: This is the base of our creamy goodness. I usually opt for a double chocolate variety for that extra indulgence, but classic chocolate works too.
- Milk: Whole milk gives the pudding a richer, creamier texture, though 2% works fine in a pinch.
- Oreos: The star of the show. Feel free to crush them by hand for chunkier bites or pulse them in a food processor for finer layers. Both textures have their charm.
- Whipped topping: Optional but highly recommended. It adds a light, airy layer on top that balances the denser pudding.
- Vanilla extract: Just a teaspoon enhances the chocolate and gives the dessert a subtle warmth.
- Optional extras: A drizzle of chocolate syrup, a sprinkle of sea salt, or even mini chocolate chips can take it to the next level.
When I shop for this dessert, I sometimes wander past the cookie aisle just to see if there’s a limited edition Oreo flavor that could elevate the pudding—peanut butter, birthday cake, or mint usually make for delightful experiments.
The Secret Behind Its Flavor
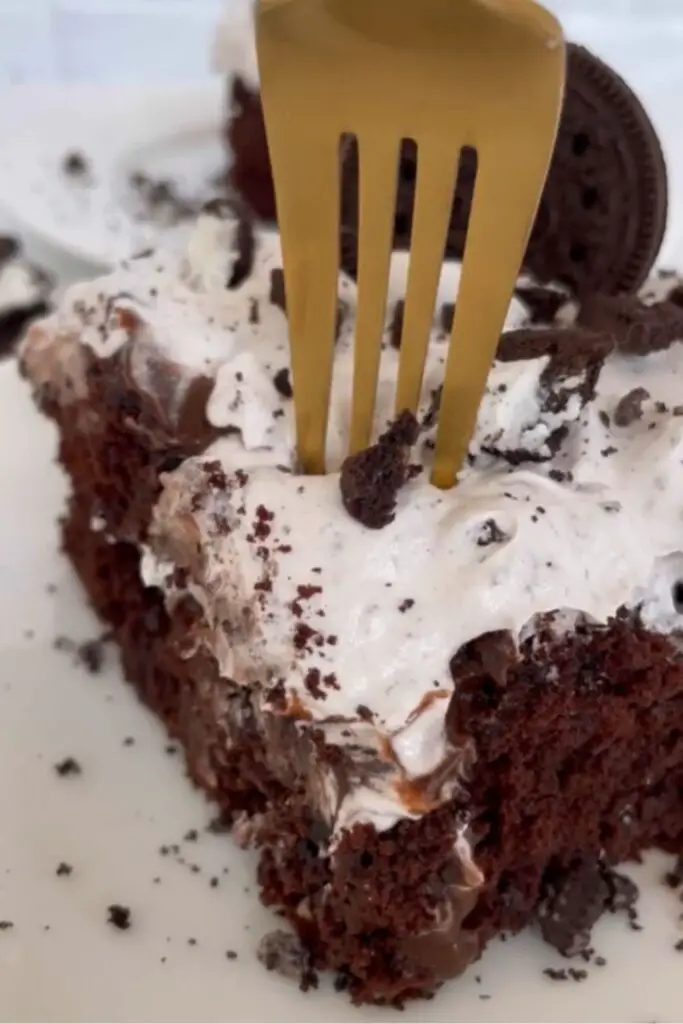
So, what makes this pudding stand out from any other chocolate dessert? It’s the layering and the balance of textures. The pudding is smooth, creamy, and lightly sweet, while the Oreos provide crunch and chocolatey depth. Adding a little whipped topping introduces a light, almost mousse-like contrast that prevents the dessert from feeling heavy.
There’s also the psychological factor: seeing the layers of dark cookie against rich brown pudding makes every spoonful visually enticing. The first bite always surprises with how soft the pudding is against the subtle crunch of cookie crumbs. It’s a combination that feels indulgent but approachable—perfect for kids and adults alike.
I’ve also learned that the flavors develop even more if you let the dessert sit overnight. The cookie layers soften slightly, blending with the pudding while still maintaining just enough bite. This is a dessert that rewards patience.
Step-by-Step Instructions
Here’s how I usually approach it in my kitchen, with a few personal notes from past experiments:
- Prepare the pudding: Whisk the pudding mix with milk gradually to avoid lumps. I like to start with half the milk, whisk until smooth, then slowly add the rest.
- Crush the Oreos: Pulse gently in a food processor or crush in a zip-top bag with a rolling pin. I personally enjoy leaving a few larger chunks for texture.
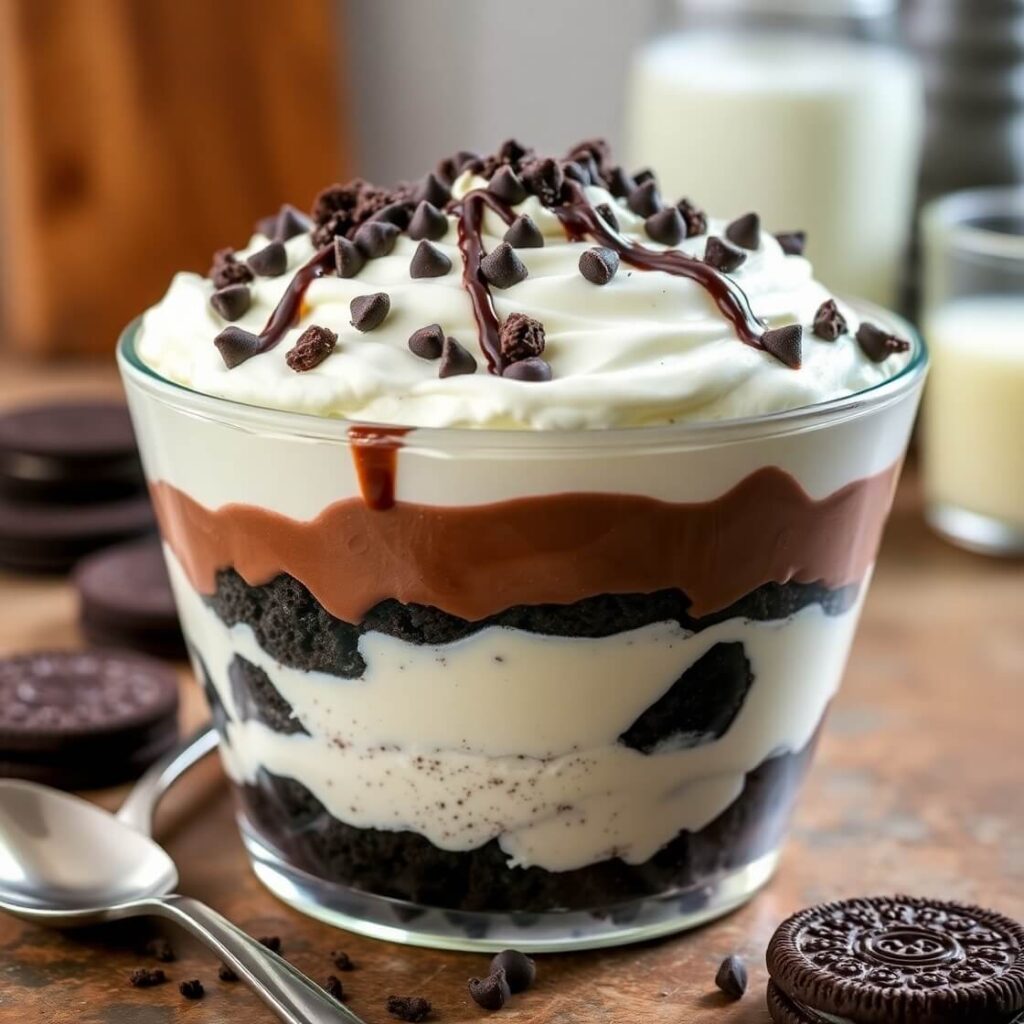
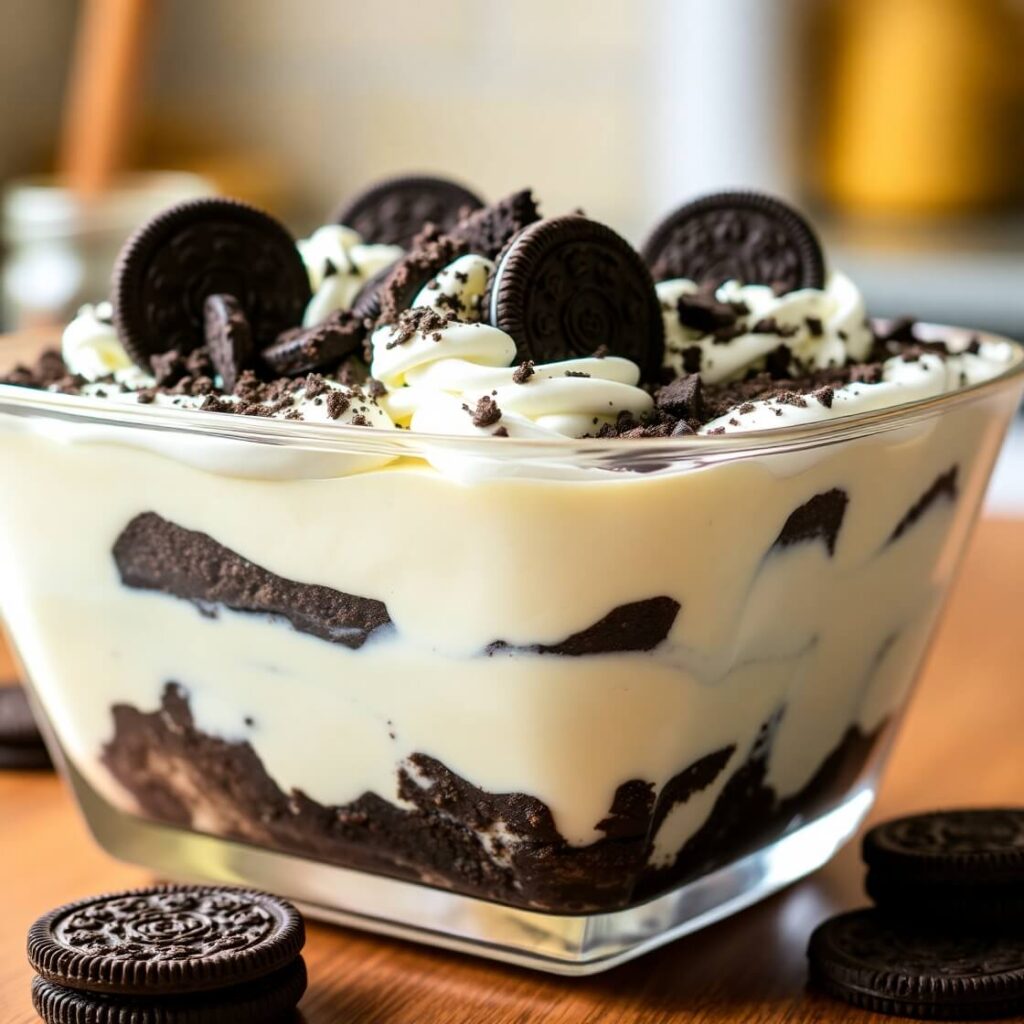
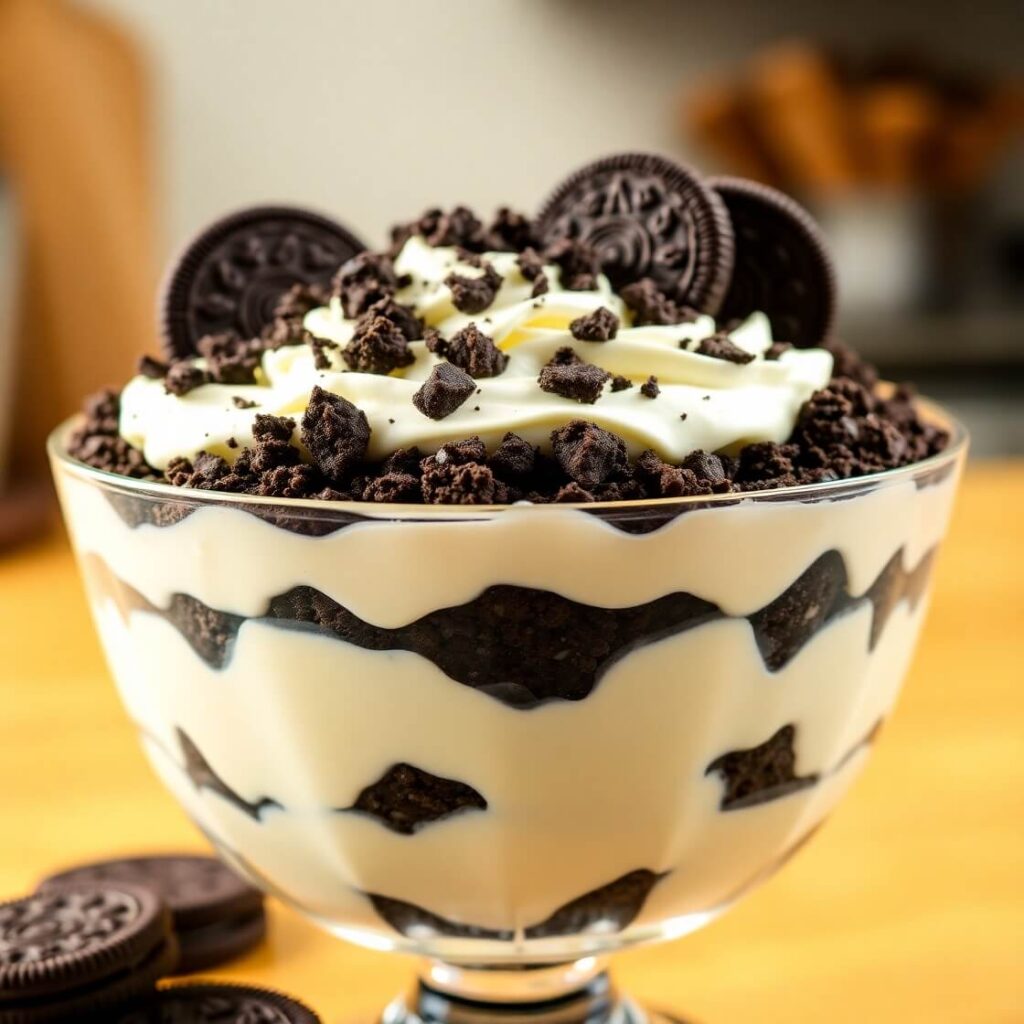
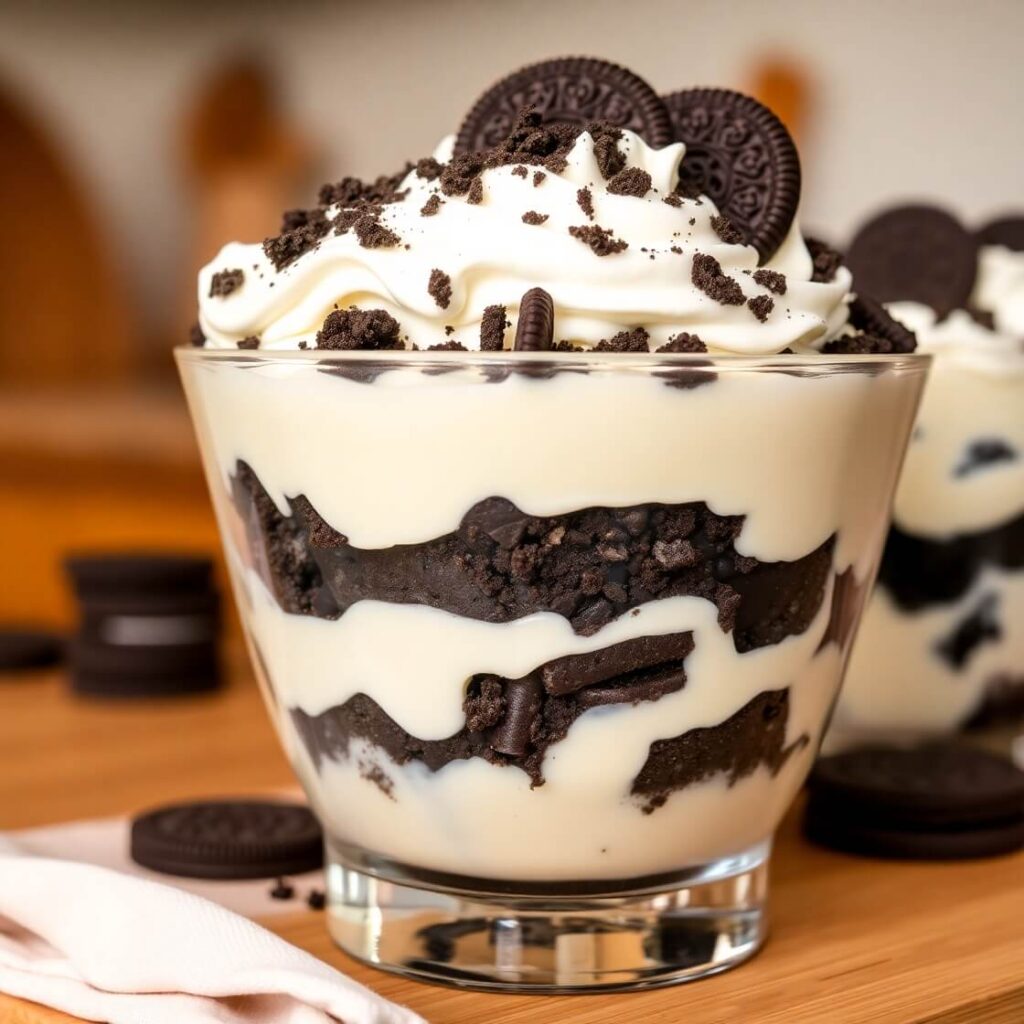
- Layering: Start with a layer of crushed Oreos at the bottom of a clear glass dish or trifle bowl. Spoon a layer of pudding over the cookies, smoothing gently with a spatula. Repeat until your dish is full, ending with pudding.
- Add whipped topping: Spread or pipe whipped topping over the final pudding layer. Smooth or swirl for a casual, homemade look.
- Garnish: Sprinkle remaining crushed Oreos or place whole halves on top. Optional drizzle of chocolate syrup or a light dusting of cocoa powder adds elegance.
- Chill: Refrigerate for at least 2–3 hours. Overnight chilling intensifies flavor and texture.
During my first attempt, I accidentally flipped the dish upside down when trying to remove it from the fridge. The pudding survived, albeit with a few smudged layers, and my family loved it even more because it looked “homemade” in the best sense.
Cooking Time Snapshot
Even though it’s an easy dessert, timing can make all the difference:
- Prep time: 15–20 minutes
- Chill time: 2–3 hours (or overnight for best results)
- Total time: Approximately 2 hours 30 minutes
This makes it perfect for preparing ahead of a family dinner, a casual gathering with friends, or a quiet weeknight treat. I often make it in the morning so it’s ready by dinner, giving me a little extra time to relax in the kitchen.
Substitutions & Adaptations
One of my favorite things about this dessert is how flexible it is:
- Vegan version: Use a plant-based milk (like oat or almond) and vegan chocolate pudding mix. Some brands offer dairy-free whipped topping too.
- Gluten-free: Opt for gluten-free chocolate cookies or Oreos. They work surprisingly well without losing texture.
- Extra indulgence: Layer chocolate ganache between pudding layers for a richer, more decadent version.
- Kid-friendly twists: Add mini chocolate chips, rainbow sprinkles, or crushed peanut butter cups. I’ve learned from experience that these small additions always spark joy during dessert time.
Even if you deviate slightly from the original recipe, the forgiving nature of the pudding and cookies ensures success. The key is to maintain the creamy-to-crunchy ratio.
Serving Ideas That Make It Shine
One of my favorite parts about this dessert is how versatile it is on the table. For casual family dinners, I often scoop it into small clear glasses so everyone can see the layers. The kids love using spoons to dig down and get every last Oreo crumb. For a dinner party, I sometimes prepare it in a large trifle dish and decorate the top with whole Oreo halves, chocolate shavings, or even a drizzle of caramel.
A quick tip: add a sprig of mint on top. It adds a pop of color and a hint of freshness that balances the sweetness. I’ve noticed that little detail makes a big difference in presentation and makes guests think you spent way more time than you did.
Another idea is to serve it with a side of fresh berries—strawberries, raspberries, or even sliced bananas. The tartness contrasts beautifully with the rich, creamy pudding and chocolatey cookie layers, giving every bite a surprising burst of flavor.
For an extra playful touch, I’ve experimented with layering crushed Oreos with vanilla pudding for a cookies-and-cream effect. My kids declared that version “the ultimate treat,” and it disappeared faster than the original version.
Pro Notes & Mistakes to Avoid
Even after making this dessert countless times, I still remind myself of a few key tricks:
- Avoid Over-Crushing Cookies: Fine crumbs are great for layering, but leaving some chunks adds a satisfying crunch in each bite.
- Whipped Topping Tricks: For a fluffier layer, whip it a little longer than suggested on the package, but don’t overdo it—it can separate.
- Layering Order: Always start with cookies at the bottom; it keeps the structure intact and avoids a pudding-only bottom layer.
- Temperature Matters: Make sure your pudding has cooled slightly before layering. Warm pudding can make the cookies soggy too quickly.
- Presentation Tip: If you want clean, distinct layers, use a spatula to level each layer carefully. But for a more rustic, homemade look, don’t worry about perfection—sometimes slightly messy layers look the most inviting.
I learned these tips the hard way—one batch ended up with pudding spilling over the sides, and yet, we still devoured it. Mistakes in the kitchen sometimes lead to new family favorites.
Storage & Make-Ahead Tips
This dessert is perfect for preparing ahead of time:
- Refrigerator: Cover tightly with plastic wrap or a lid and refrigerate for up to 3 days. Layers will firm up and the flavors will meld beautifully.
- Freezing: While I haven’t personally tried freezing this exact dessert, pudding tends to change texture after freezing. If you want to experiment, freeze in individual cups rather than a large dish, and thaw slowly in the fridge.
- Serving After Storage: Let it sit at room temperature for 10–15 minutes before serving if it has been chilled. This softens the pudding slightly and enhances the flavor.
I often prepare it a day ahead for family gatherings or dinner parties—it frees up time to focus on the main courses without worrying about dessert at the last minute. The layered look also holds up well, so it remains visually appealing even after a day in the fridge.
FAQs About Oreo Pudding Dessert
Can I use homemade chocolate pudding?
Absolutely! While instant pudding is convenient, homemade pudding adds depth and a fresh taste. Just make sure it’s thick enough to hold the layers.
Can I make this dairy-free or vegan?
Yes! Plant-based milk and a dairy-free pudding mix work well. Top with a non-dairy whipped cream, and you’ve got a vegan-friendly dessert.
Do the cookies get soggy?
Yes and no. The cookies soften slightly as they absorb pudding, but the dessert maintains a pleasant texture. Leaving some larger cookie chunks ensures a satisfying crunch.
How many servings does this dessert make?
A standard 9×9-inch dish serves 6–8, depending on portion size. Individual cups or glasses allow for more servings, especially for kids or buffet-style presentations.
Can I adjust sweetness?
Definitely! Taste your pudding before layering and add a bit more sugar, cocoa, or vanilla extract if desired. Remember, Oreos are already sweet, so balance is key.

Oreo Pudding Dessert
- Total Time: 2 hours 15 minutes
- Yield: 8–10 1x
- Diet: Vegetarian
Description
A creamy, no-bake dessert layering crushed Oreos, rich vanilla pudding, tangy cream cheese, and fluffy whipped topping for a crowd-pleasing treat. Perfect for quick gatherings, potlucks, or whenever you crave an indulgent cookies-and-cream experience without the fuss of baking. Ready in under 30 minutes and best served chilled.
Ingredients
- 36 Oreo cookies, crushed (reserve ½ cup for topping)
- 2 (3.4 oz) boxes instant vanilla pudding mix
- 4 cups cold whole milk
- 8 oz cream cheese, softened
- ½ cup powdered sugar
- 8 oz whipped topping (Cool Whip or homemade)
Instructions
- Crush Oreos into a mix of fine crumbs and chunks; set aside ½ cup for garnish.
- In a bowl, whisk pudding mix with cold milk for 2 minutes; set aside to thicken.
- Beat cream cheese with powdered sugar until smooth; fold in half of the whipped topping gently.
- Layer half the crushed Oreos in a 9×13-inch dish.
- Spread cream cheese mixture over Oreos evenly.
- Pour pudding mixture on top and smooth.
- Top with remaining whipped topping and sprinkle reserved Oreo crumbs.
- Cover and chill at least 2 hours before serving.
Notes
- For a richer dessert, use mascarpone cheese instead of cream cheese.
- To add fruit, layer sliced strawberries or bananas between the cream cheese and pudding layers.
- For extra chocolate flavor, swap vanilla pudding for chocolate pudding.
- Prep Time: 15 minutes
- Cook Time: 2 hours
- Category: Dessert
- Method: No-Bake
- Cuisine: American
Nutrition
- Serving Size: 8–10
- Calories: 350
- Sugar: 28g
- Sodium: 200mg
- Fat: 18g
- Saturated Fat: 10g
- Unsaturated Fat: 6g
- Trans Fat: 0g
- Carbohydrates: 40g
- Fiber: 1g
- Protein: 5g
- Cholesterol: 40mg