4-Ingredient Oreo Balls (Easy Recipe)

I still remember the first time I tried to make Oreo balls. It was a rainy Saturday, the kind that begs for comfort food, and I had grand visions of perfectly round, chocolate-coated spheres sitting elegantly on a platter. I didn’t realize that “perfectly round” is a lot harder than it looks. My first batch looked more like tiny, sad moons than bite-sized delights.
What saved the day wasn’t some secret trick I’d read online—it was a small tweak I made mid-cook when I noticed the chocolate was too thick to coat the crumbs properly. A splash of cream and a steady hand later, and suddenly those lumpy little things transformed into the soft, indulgent Oreo balls I now make for every holiday, birthday, and impromptu craving. My kids were immediately in line for seconds, crumbs decorating their cheeks as if it were a badge of honor. That day, I learned that mistakes in the kitchen often lead to happy accidents—and the perfect recipe for Oreo balls was born.
Pro Notes & Fixes I’ve Learned Along the Way

If you think Oreo balls are foolproof, think again. Here are a few nuggets of wisdom I wish I’d known from the start:
- Room temperature cream cheese matters. Cold cream cheese will resist mixing, leaving lumps that are tricky to smooth out.
- Don’t overmix. I once tried to “perfect” the mixture and ended up with a mushy blob that refused to hold shape. Mix just until combined.
- Chocolate tempering tip: Overheated chocolate will seize. If it starts clumping, a teaspoon of coconut oil or heavy cream fixes it instantly.
- Roll quickly, chill quickly. The mixture gets sticky fast. Roll into balls and refrigerate for at least 30 minutes before dipping to prevent a messy meltdown.
These small adjustments make a huge difference, and they’re the same tricks I use whenever I whip up a batch for a party or just a quiet evening at home.
Here’s Why You’ll Love These Easy Treats
I love how simple and approachable this recipe is, yet the flavors are anything but boring. Here’s what I use and why:
- Oreo cookies (about 36, classic or golden). Crushing them by hand gives a slightly uneven texture that feels homemade, but a food processor works too.
- Cream cheese (8 oz, softened). This binds the crumbs while adding a creamy tang that complements the chocolate perfectly.
- Semi-sweet chocolate (12 oz). I prefer melting in chunks over chips because it melts more evenly and creates a smoother coating.
- Optional toppings: Crushed Oreos, sprinkles, or a drizzle of white chocolate for a festive touch. These make each batch feel special, especially if you’re giving them as gifts.
Substitutions are easy if needed. Vegan cream cheese or dairy-free chocolate works surprisingly well, and gluten-free Oreos let everyone indulge without compromise.
The Secret Behind Its Flavor
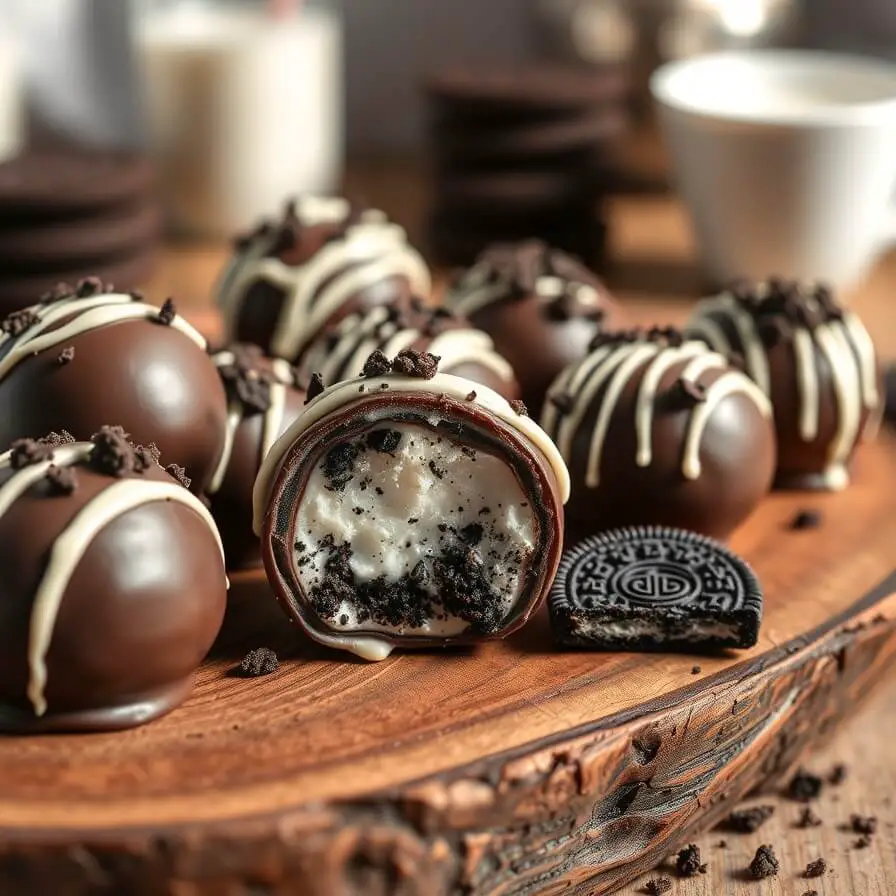
What makes Oreo balls irresistible isn’t just chocolate—it’s the balance. The slight crunch of cookie crumbs paired with the creamy center is exactly what your taste buds want. And when you add the chocolate coating, there’s a satisfying snap before the creamy, sweet interior melts in your mouth.
It’s a texture-and-flavor dance: crunch, cream, chocolate, repeat. And the beauty is, it’s customizable. Add a pinch of espresso powder for a mocha twist, or a dash of cinnamon for warmth. Each variation brings something new while keeping that classic Oreo soul intact.
Let Me Show You How to Make These Easy Candies
Here’s how to get from crumb to candy in a few easy steps:
- Crush the cookies. Place Oreos in a large zip-top bag and crush with a rolling pin until fine crumbs form, or pulse in a food processor.
- Mix with cream cheese. Add softened cream cheese and fold with a spatula until a uniform dough forms. It should be soft but not sticky.
- Roll into balls. Scoop a tablespoon at a time and roll between your palms. Place on a parchment-lined baking sheet. Chill for 30–60 minutes.
- Melt the chocolate. Use a double boiler or microwave in 30-second intervals, stirring in between. Add a teaspoon of cream if chocolate is too thick.
- Dip and coat. Using a fork or toothpick, dip each ball into the chocolate, letting excess drip off. Place back on parchment.
- Add toppings (optional). Before the chocolate sets, sprinkle crushed Oreos or drizzle white chocolate.
- Chill and serve. Refrigerate until firm, then enjoy. Store leftovers in an airtight container in the fridge for up to a week.
The first bite is always the best—sweet, creamy, and crunchy all at once. Sometimes I catch myself sneaking an extra ball before anyone else notices.
Cooking Time Snapshot
- Prep time: 15–20 minutes
- Chill time: 30–60 minutes
- Chocolate coating: 10–15 minutes
- Total time: 1 hour (including chilling)
- Yield: About 36 bite-sized Oreo balls
Even with chilling time, this recipe feels quick because most of the work is hands-on fun. Crushing cookies, rolling balls, dipping chocolate—it’s a tactile joy, almost meditative if you let it be.
Pairings and Serving Ideas

Oreo balls are a versatile treat, perfect for both casual snacking and fancy presentations. One of my favorite ways to serve them is on a simple white platter with a scattering of crushed Oreos—it makes the black-and-white contrast pop.
For a seasonal touch, I sometimes drizzle colored chocolate over them: orange and black for Halloween, red and green for Christmas. They also pair beautifully with hot drinks. A cup of rich coffee or creamy hot chocolate elevates the experience, while cold milk always brings that nostalgic childhood vibe. For parties, try serving them alongside mini cupcakes or chocolate-dipped strawberries—the combination of textures and flavors is irresistible.
If you want to make them extra gift-worthy, place them in small cellophane bags tied with a ribbon. I’ve gifted them this way countless times, and they always vanish before the recipient even reaches the door.
Storage and Make-Ahead Tips
Oreo balls are wonderfully forgiving when it comes to storage. Here’s what I do:
- Refrigerator: Store in an airtight container for up to a week. I usually layer parchment paper between rows to prevent sticking.
- Freezer: For longer storage, freeze for up to three months. Thaw in the fridge for a few hours before serving to preserve the creamy texture.
- Make-ahead for parties: You can prepare the balls a day or two in advance, dip them in chocolate just before serving, and they’ll taste freshly made.
A little planning goes a long way, especially during the holidays when I like to prepare batches ahead of time for friends and family.
FAQs and Notes
Can I make these vegan or dairy-free?
Absolutely. Use vegan cream cheese and dairy-free chocolate. The texture is just as satisfying, and the flavor is still rich and indulgent.
What if the chocolate coating cracks?
This usually happens if the balls weren’t chilled long enough or if the chocolate was too thick. Gently reheat the chocolate and dip again, or drizzle melted chocolate on top for a decorative fix.
Can I use other cookies besides Oreos?
Yes! Chocolate chip cookies, Biscoff cookies, or even gingersnaps can create delicious variations. The key is finely crushed crumbs and balanced sweetness.
How do I prevent balls from sticking together?
Chill them thoroughly before dipping, and place them on parchment. Layering with parchment between rows in storage also helps.
Is it possible to add flavor mix-ins?
Yes—mini chocolate chips, crushed nuts, or a few drops of flavored extract (like mint or orange) can add subtle twists. I once added a touch of espresso powder for a mocha version, which my husband declared “dangerously good.”

Oreo balls Recipe
- Total Time: 1 hour
- Yield: 36 1x
- Diet: Vegetarian
Description
These bite-sized Oreo balls are a perfect blend of creamy, crunchy, and chocolatey goodness. Easy to make, versatile, and endlessly customizable, they’re perfect for parties, holidays, or a sweet everyday treat. Even kitchen mishaps turn into delicious results with this fail-safe recipe.
Ingredients
- 36 Oreo cookies (classic or golden)
- 8 oz cream cheese, softened
- 12 oz semi-sweet chocolate, chopped or chips
- Optional toppings: crushed Oreos, sprinkles, white chocolate drizzle
Instructions
- Crush Oreos into fine crumbs.
- Mix crumbs with softened cream cheese until uniform.
- Roll mixture into 1-inch balls, place on parchment-lined tray, and chill 30–60 minutes.
- Melt chocolate in a double boiler or microwave, stirring frequently; add a teaspoon of cream if too thick.
- Dip chilled balls in chocolate, let excess drip, place back on parchment.
- Decorate with toppings if desired, chill until firm.
- Serve and enjoy.
Notes
- Room temperature cream cheese ensures smooth mixing.
- Chill balls before dipping to avoid sticky mishaps.
- For a vegan version, swap cream cheese and chocolate accordingly.
- Prep Time: 15–20 minutes
- Cook Time: 30–60 minutes
- Category: Dessert, Snack
- Method: No-bake, Rolling, Dipping
- Cuisine: American
Nutrition
- Serving Size: 36
- Calories: 120
- Sugar: 11g
- Sodium: 30mg
- Fat: 7g
- Saturated Fat: 4g
- Unsaturated Fat: 3g
- Trans Fat: 0g
- Carbohydrates: 15g
- Fiber: 1g
- Protein: 1g
- Cholesterol: 10mg