Easy Homemade Mulberry Jam Recipe

I still remember the first time I made mulberry jam it was more of an accident than a planned recipe. My kids had spent the afternoon picking mulberries from a neighbor’s tree, their fingers stained deep purple, their pockets full of squashed fruit. They came home with a bowl of berries that wasn’t quite enough for a pie, but too many to just eat out of hand.
The kitchen smelled earthy and sweet, like warm sunshine trapped in fruit. I rinsed the berries, tossed them into a saucepan with sugar, and before long, the air filled with the rich, jammy aroma that only mulberries can give. I burned the first batch slightly too distracted by trying to wipe berry juice off the countertop—but I quickly learned to watch the bubbling pot with more care. That little mishap was worth it though, because once I got it right, the jam was something special: velvety, sweet with just the right tartness, and unlike anything you’d buy in a store.
Now, mulberry jam has become something of a summer ritual in our home. We make a few jars every year, and every spoonful brings me back to that first messy, stained-fingers afternoon.
Everything You’ll Need on Hand
Mulberries don’t always get the spotlight like strawberries or raspberries, but that’s part of their charm. Their flavor sits somewhere between blackberries and figs, with an earthy sweetness that feels rustic and almost old-world. If you’ve never made jam with them before, here’s what you need to know about the ingredients:
- Mulberries: Look for ripe, deep-purple berries. They should feel soft but not mushy. If you’ve picked them yourself, don’t worry if the stems are still attached—they’re edible and break down during cooking. If your berries are on the tart side, a little extra sugar balances things out.
- Sugar: Traditional jams use a lot of sugar, both for sweetness and preservation. For mulberries, sugar also helps highlight their natural flavor, which can otherwise feel muted. I usually stick with white sugar because it lets the berries shine, but you could use light brown sugar for a hint of caramel depth.
- Lemon Juice: Don’t skip this. Aside from adding a bright note to balance the sweetness, lemon juice provides the acidity needed for the jam to set properly. Fresh-squeezed is best.
- Pectin (Optional): Mulberries are naturally low in pectin, the element that helps jams thicken. You can cook the jam longer to reduce it, or add commercial pectin for a firmer set. Personally, I enjoy the softer, spoonable texture of a pectin-free mulberry jam, but if you prefer a classic gel, add it.
Substitutions are easy here. If mulberries are scarce, you can stretch them by mixing with blackberries. Honey or maple syrup can replace sugar for a different flavor profile, though the jam will be looser.
How to Make This Mulberry Jam: Step-by-Step Guide
Here’s how I make mulberry jam in my kitchen.
Step 1: Wash and prep the berries.
Rinse your mulberries under cool water, removing any debris. Don’t panic about the little stems—they’ll soften as the jam cooks.
Step 2: Combine ingredients.
In a large saucepan, add mulberries, sugar, and lemon juice. Stir gently as the sugar starts to draw juice from the berries.
Step 3: Bring to a boil.
Set the pan over medium-high heat. Once it starts bubbling, lower to medium and keep stirring. The mixture will foam a little at first, but it settles down as it thickens.
Step 4: Cook until thickened.
This is where your senses come in. The jam should coat the back of a spoon and drip slowly. I listen for the change in the boil—it goes from a loose, watery bubble to a heavier, gloppier sound.
Step 5: Test for doneness.
The easiest trick is the cold plate test. Place a spoonful of jam on a chilled plate, wait a few seconds, then run your finger through it. If it leaves a clean line without running back together, it’s ready.
Step 6: Jar and seal.
Ladle the hot jam into sterilized jars, leaving a bit of headspace. Seal with lids, and either refrigerate for short-term use or process in a boiling-water bath for longer storage.
Substitutions and Adaptations
Every kitchen is different, and every cook has their preferences. Here are a few ways you can adapt this recipe:
- No pectin route: Cook the jam longer until it reduces naturally. It won’t be as firm, but the flavor deepens beautifully.
- With pectin: For those who prefer a quicker set, add powdered or liquid pectin following package instructions.
- Sweetener swaps: Replace sugar with honey or maple syrup for a more natural sweetness. Keep in mind the jam will be looser and may not keep as long.
- Spiced version: Add a pinch of cinnamon, nutmeg, or even black pepper for a warm, spiced undertone.
- Mixed berry jam: If you don’t have enough mulberries, blend them with blackberries, raspberries, or blueberries. The mulberries add body while the others bring sharper notes.
- Vegan and gluten-free: This recipe is naturally both, so no changes are needed unless you’re experimenting with different sweeteners.
Pro Notes and Lessons Learned
After a few summers of making this jam, I’ve collected some tips that might save you from the small stumbles I learned the hard way:
- Watch the pot closely. My first batch burned because I stepped away for just two minutes. Jam thickens quickly at the end, so stir often and trust your senses.
- Foam is normal. When the berries first come to a boil, you’ll see a light foam on top. Skim it if you want a clearer jam, but it doesn’t hurt the flavor.
- Taste as you go. Mulberries can vary in sweetness depending on ripeness. Start with less sugar, taste midway, and add more if you prefer.
- Don’t rush cooling. The jam thickens as it cools. If it seems runny in the pot, let it sit on the spoon test before cooking longer—you might overdo it and end up with a paste.
- Use a wide pan if possible. The larger the surface area, the faster the jam reduces, and you’ll get a richer flavor without overcooking.
Making jam is a little science, a little art, and a lot of patience. Once you find your rhythm, the process becomes second nature.
Storage and Make-Ahead Tips
Homemade mulberry jam doesn’t last forever, but with the right approach, you can enjoy it long past summer.
- Refrigerator storage: If you simply jar it and pop it in the fridge, it will stay fresh for about 2–3 weeks.
- Freezer method: For longer storage without canning, pour cooled jam into freezer-safe containers, leaving some headspace. It will keep for 6–8 months. Thaw in the fridge overnight before using.
- Canning option: If you want shelf-stable jars, process them in a boiling-water bath for 10 minutes (adjusting for altitude). Stored in a cool pantry, they can last up to a year.
Pro tip: Always use sterilized jars and clean lids. Even the best jam can spoil if the containers aren’t properly prepped.
Print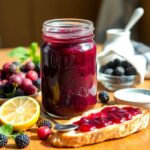
Mulberry Jam Recipe
- Total Time: 55 minutes
- Yield: 3-4 1x
- Diet: Vegetarian
Description
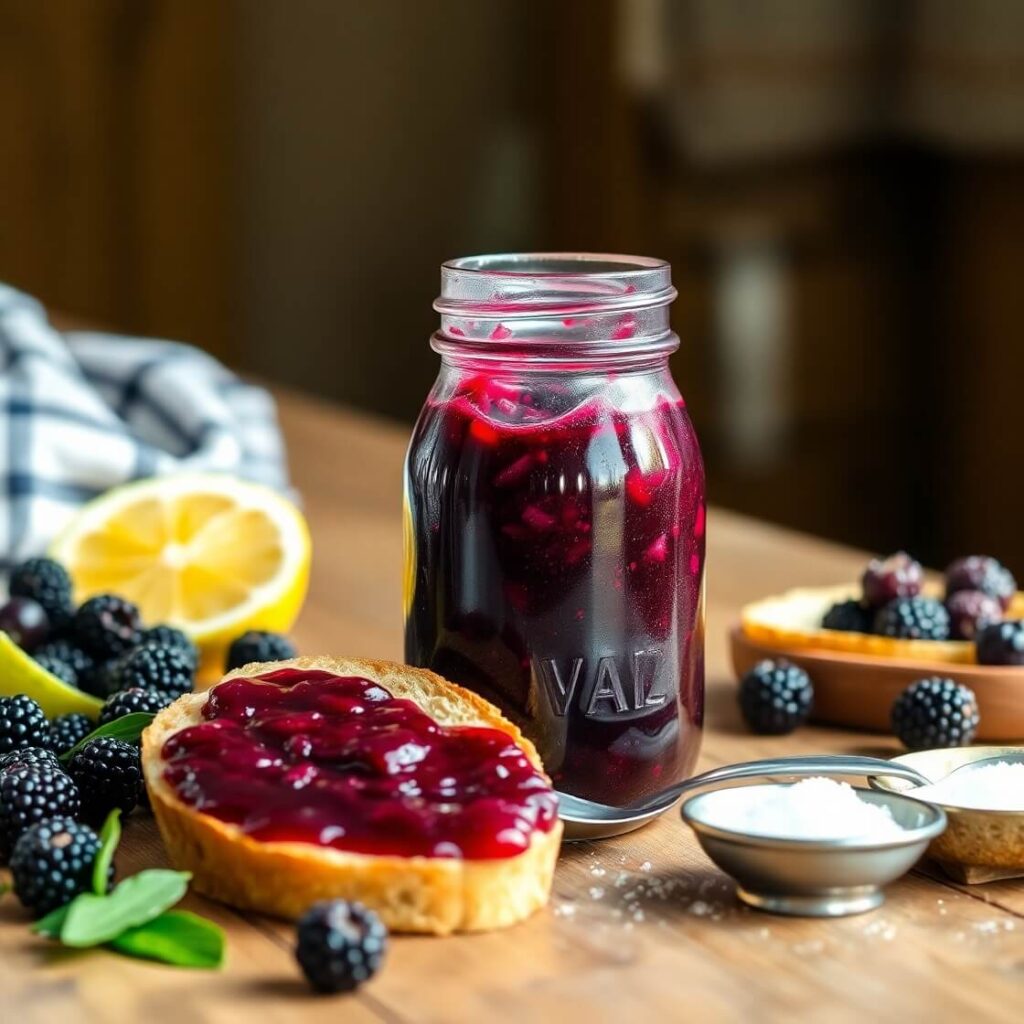
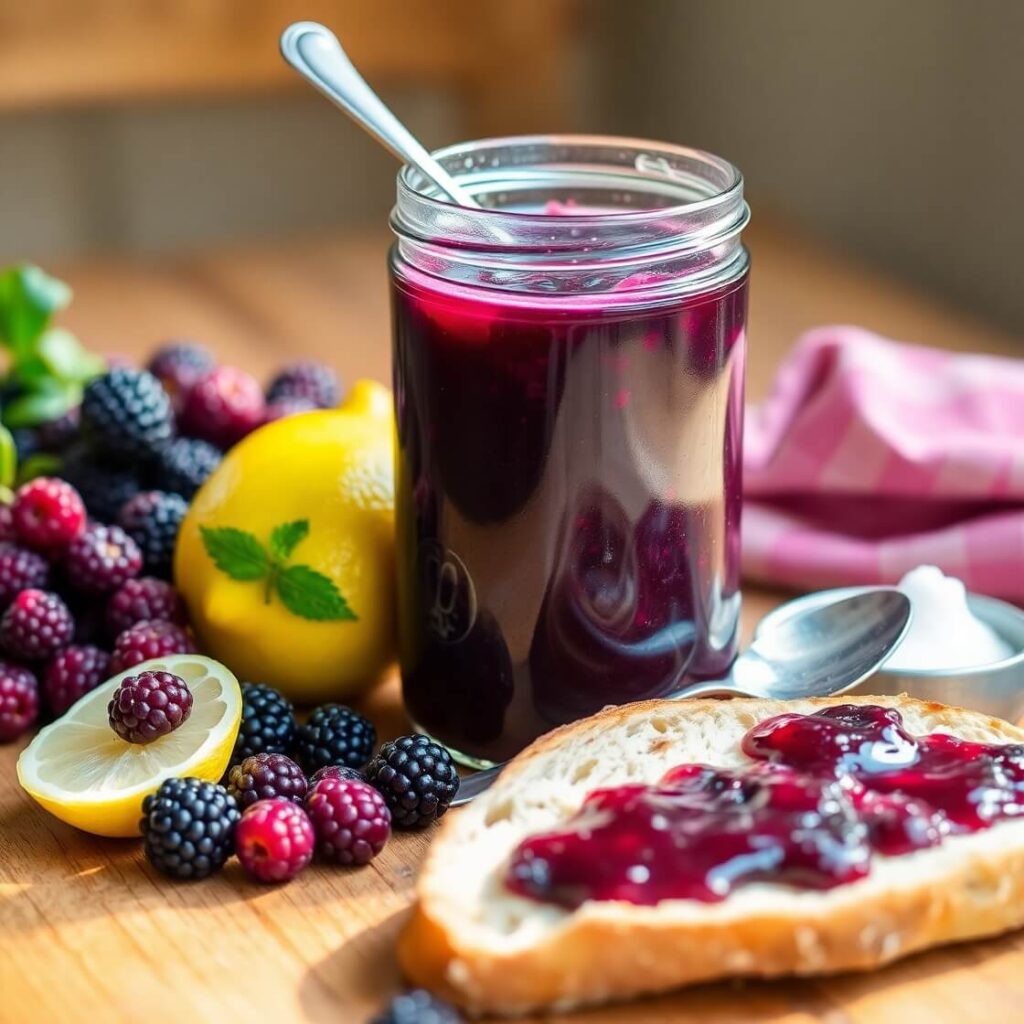
This mulberry jam recipe is a perfect way to preserve the flavor of ripe mulberries in a sweet, spreadable form. With just a few ingredients, it delivers vibrant color, rich berry flavor, and the perfect texture. Whether spread on toast, swirled into yogurt, or gifted in a charming jar, this jam brings homemade comfort into every bite. No store-bought version compares. Plus, this recipe is easy to follow—even if you’ve never made jam before.
Ingredients
- 4 cups fresh mulberries, washed and de-stemmed
- 2 ½ cups granulated sugar (adjust to taste)
- 2 tablespoons fresh lemon juice
- 1 teaspoon butter (optional, reduces foam)
- Optional: 1 tablespoon powdered pectin
Instructions
- Gently rinse the mulberries, remove stems, and drain well.
- Place mulberries in a large saucepan with sugar and lemon juice.
- Stir over low heat until the sugar dissolves completely.
- Increase heat and bring to a boil. Add butter to reduce foam.
- Let the mixture boil gently, stirring frequently to avoid burning.
- After about 25–30 minutes, test for doneness using the cold plate method.
- Add pectin if needed and cook an additional 5 minutes.
- Remove from heat. Let rest for 5 minutes before ladling into sterilized jars.
- Seal and cool completely. Store in the fridge or process for pantry storage.
Notes
- Taste the jam midway through cooking to adjust sugar if needed.
- Stir constantly in the last 10 minutes of cooking for even texture.
- Use a wide pot for quicker thickening and better jam clarity.
- Prep Time: 20 minutes
- Cook Time: 35 minutes
- Category: Condiment/Preserve
- Method: Stovetop simmer
- Cuisine: American
Nutrition
- Serving Size: 3-4
- Calories: 50
- Sugar: 11g
- Sodium: 0mg
- Fat: 0g
- Saturated Fat: 0g
- Unsaturated Fat: 0g
- Trans Fat: 0g
- Carbohydrates: 13g
- Fiber: 1g
- Protein: 0g
- Cholesterol: 0mg