How to Blanch and Shock Vegetables (And Why It Matters)
There’s a moment in every cook’s life when you’re staring at a pile of bright green beans or broccoli florets, wondering how to make them look as vibrant on the plate as they do in the produce aisle. The answer? Blanching and shocking.
I remember the first time I blanched vegetables—it was for a summer pasta salad. Instead of the limp, dull broccoli I was used to, the florets came out bright green and crisp-tender. It felt like a little kitchen magic. But the truth is, it’s just good technique.
Blanching and shocking is one of those simple tricks chefs use all the time. It’s fast, it makes your veggies taste fresher, and it even helps with meal prep. Once you learn it, you’ll never go back.
What Does Blanching Mean?
Blanching is when you briefly cook vegetables in boiling water (or steam) until they’re just tender and vibrant in color. You don’t want them fully cooked—just enough to take away that raw bite.
The result: vegetables that are still crisp, colorful, and full of flavor.
What Is Shocking?
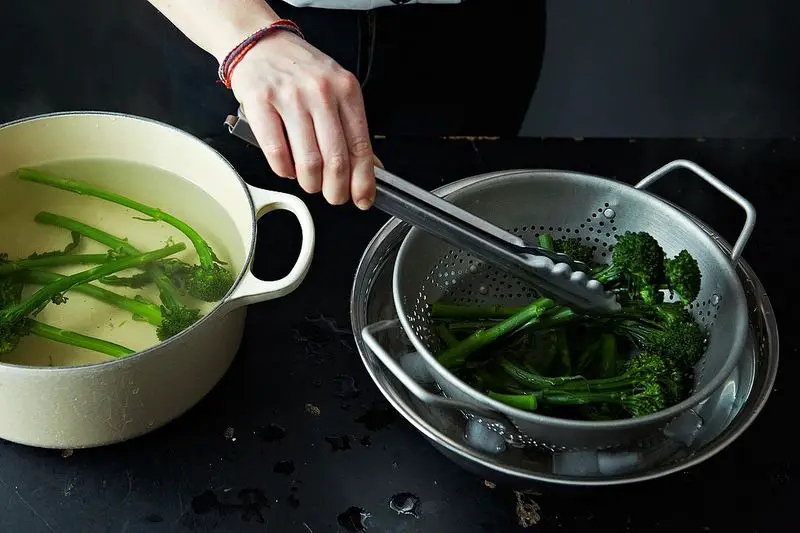
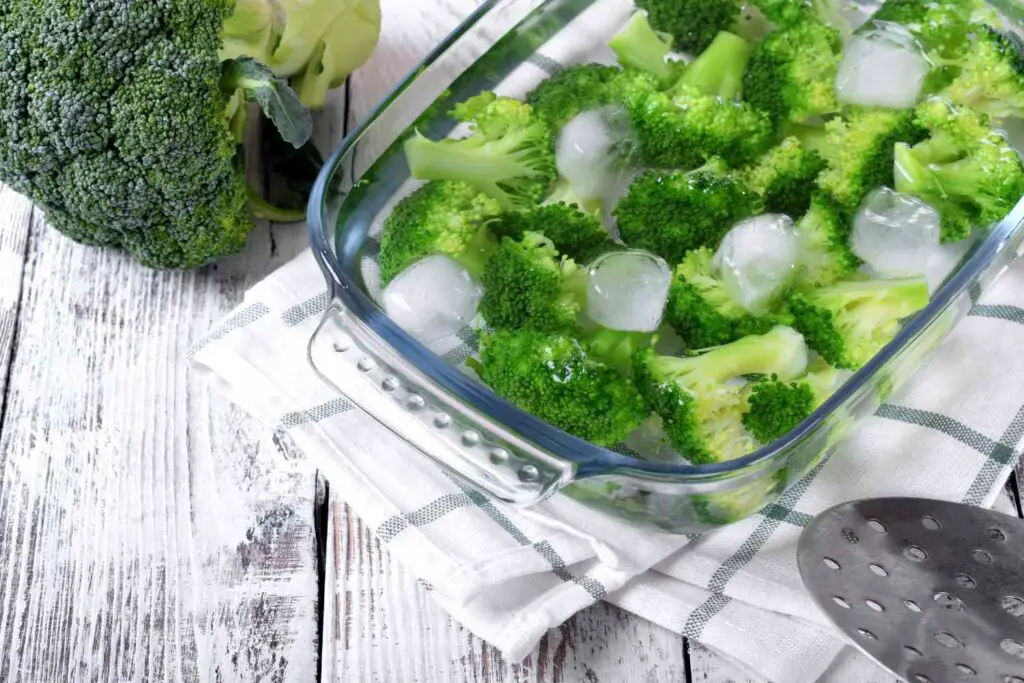
Shocking is the follow-up step. After blanching, you immediately transfer the vegetables into a bowl of ice water. This stops the cooking process in its tracks, locking in the color, texture, and nutrients.
Skip shocking, and your vegetables will keep cooking, turning mushy and dull.
Why Blanch and Shock Vegetables?
1. Keeps Vegetables Vibrant
Ever wondered why restaurant veggies look so green? It’s because blanching locks in the color, and shocking preserves it.
2. Improves Texture
Blanched vegetables are crisp-tender—not raw, not mushy. Perfect for salads, stir-fries, or crudité platters.
3. Eases Meal Prep
Blanching is a meal-prep dream. You can blanch green beans, asparagus, or broccoli ahead of time, shock them, and keep them in the fridge. When it’s time to cook, just toss them into a pan for a quick finish.
4. Helps with Peeling
Blanching tomatoes, peaches, or almonds makes peeling a breeze. A quick dunk in boiling water loosens the skins, which slip right off after shocking.
5. Food Safety for Freezing
If you want to freeze vegetables, blanching is essential. It stops enzymes that cause veggies to spoil, helping them keep their flavor and texture in the freezer.
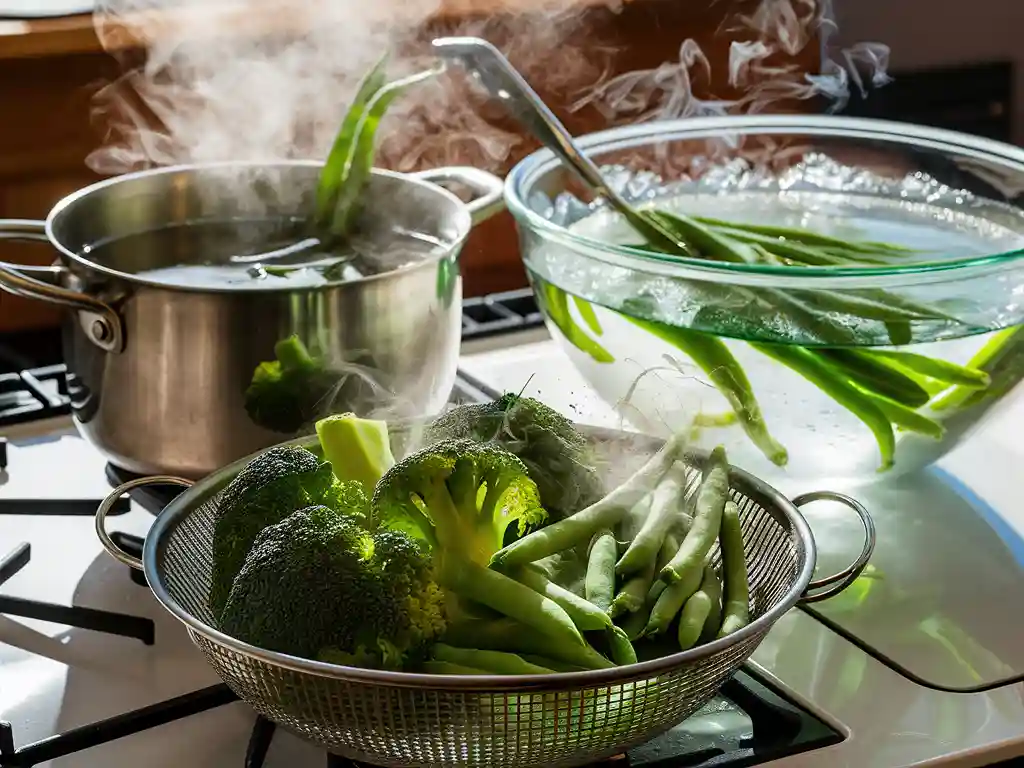
How to Blanch and Shock Vegetables
Step 1: Boil Water
Fill a large pot with water and bring it to a rolling boil. Add a good pinch of salt—this seasons the vegetables and helps lock in color.
Step 2: Prep Ice Bath
While the water heats, fill a large bowl with ice and cold water. This will be your shocking station.
Step 3: Blanch
Drop your vegetables into the boiling water. Cooking time depends on the vegetable:
- Green beans: 2–3 minutes
- Broccoli florets: 2–3 minutes
- Asparagus: 2 minutes
- Carrots (sliced): 3–4 minutes
- Peas: 1–2 minutes
The goal is bright color and slightly tender texture.
Step 4: Shock
Use a slotted spoon or tongs to transfer vegetables straight into the ice bath. Let them sit until fully cooled, usually 1–2 minutes.
Step 5: Drain and Dry
Drain the vegetables well and pat them dry before using or storing. Wet vegetables can get soggy or water down dishes.
Common Mistakes to Avoid
- Skipping the salt: Salted water is key to flavor and color.
- Overcooking: You’re not fully cooking—just softening slightly.
- Forgetting the ice bath: Without shocking, veggies lose their texture and brightness.
- Not drying properly: Excess water can ruin stir-fries and salads.
Recipe Ideas Using Blanched Vegetables
- Summer Pasta Salad: Blanched broccoli, peas, and carrots tossed with pasta, olive oil, and herbs.
- Stir-Fried Green Beans: Blanch ahead, then quickly sauté with garlic and soy sauce.
- Crudité Platter: Crisp blanched asparagus and beans with hummus or yogurt dip.
- Freezer-Friendly Veggies: Blanch corn kernels, pack in bags, and freeze for quick sides.
- Peach Cobbler: Blanch peaches for easy peeling before baking.
Final Thought
Blanching and shocking might sound fancy, but it’s really just about good cooking habits. It takes a few extra minutes, but the payoff is huge—vegetables that taste fresher, look brighter, and work beautifully in both everyday meals and special dishes.
Once you get the hang of it, you’ll find yourself blanching everything from green beans for dinner to peaches for dessert. It’s one of those simple kitchen techniques that makes your food look and taste better with almost no effort.
FAQs
1. Do you always have to shock vegetables after blanching?
Yes—shocking stops the cooking process immediately. Without it, vegetables keep cooking from residual heat, which can make them soft and dull in color.
2. Can you blanch vegetables without an ice bath?
If you don’t have ice, you can rinse vegetables under very cold running water. However, an ice bath is far more effective at rapidly cooling and preserving color and texture.
3. How long can blanched vegetables be stored in the fridge?
Properly blanched, shocked, and dried vegetables can last 3–4 days in the refrigerator. Store them in an airtight container lined with a paper towel to absorb extra moisture.
4. Is blanching the same as parboiling?
Not exactly. Both involve partially cooking in boiling water, but blanching is usually shorter and followed by shocking. Parboiling is often longer and not always followed by an ice bath.
5. Why do you salt the water for blanching?
Salting the water seasons the vegetables and helps lock in vibrant color by stabilizing chlorophyll in green vegetables.