Homemade Ice Cream Cake (Like Dairy Queen)
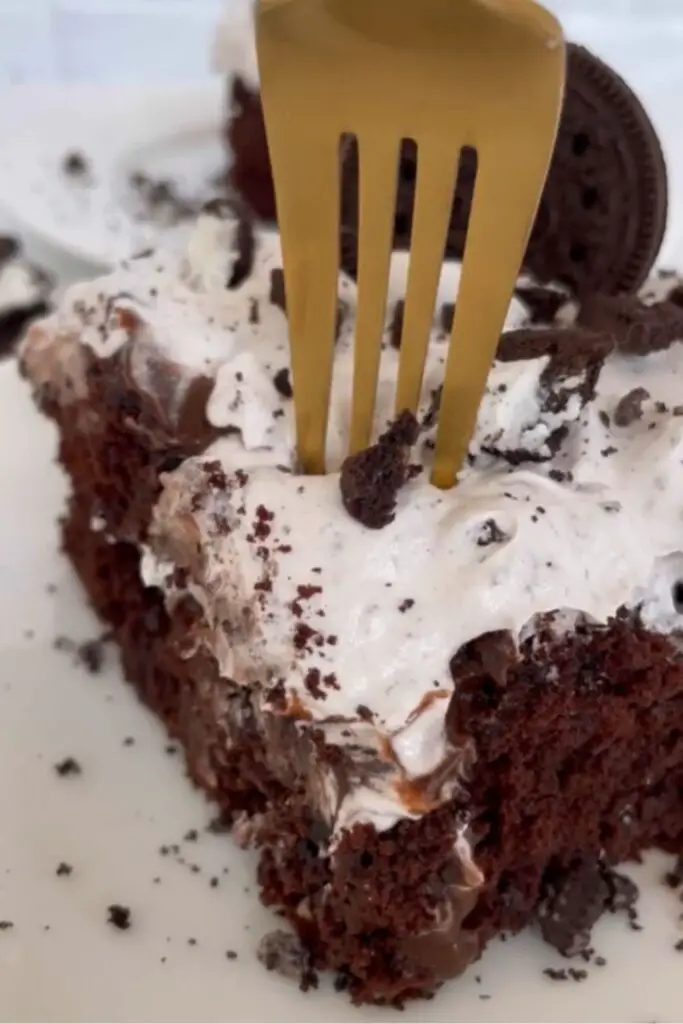
Every summer, my kitchen turns into a little laboratory of frozen treats, but one recipe always steals the spotlight: homemade ice cream cake. I remember the first time I made it for my niece’s birthday. I had just discovered a new brand of chocolate cookies, and in my excitement, I crushed half of them too finely. When I layered the ice cream over the cookie crust, it seemed like a mess, but the first bite told me everything—I had stumbled onto something magical. The crunchy cookie base, creamy ice cream, and just the right amount of frosting became the dessert everyone begged for at every family gathering. Now, it’s a tradition; every birthday, summer BBQ, or celebration somehow calls for this cake.
I love that it feels fancy but is incredibly approachable. Even my nephew, who usually turns up his nose at desserts, dove in, leaving a trail of melted ice cream on the counter as proof of its success. Making ice cream cake at home may sound intimidating, but trust me, it’s all about layering love, flavor, and a little patience.
Ingredients: What You’ll Need
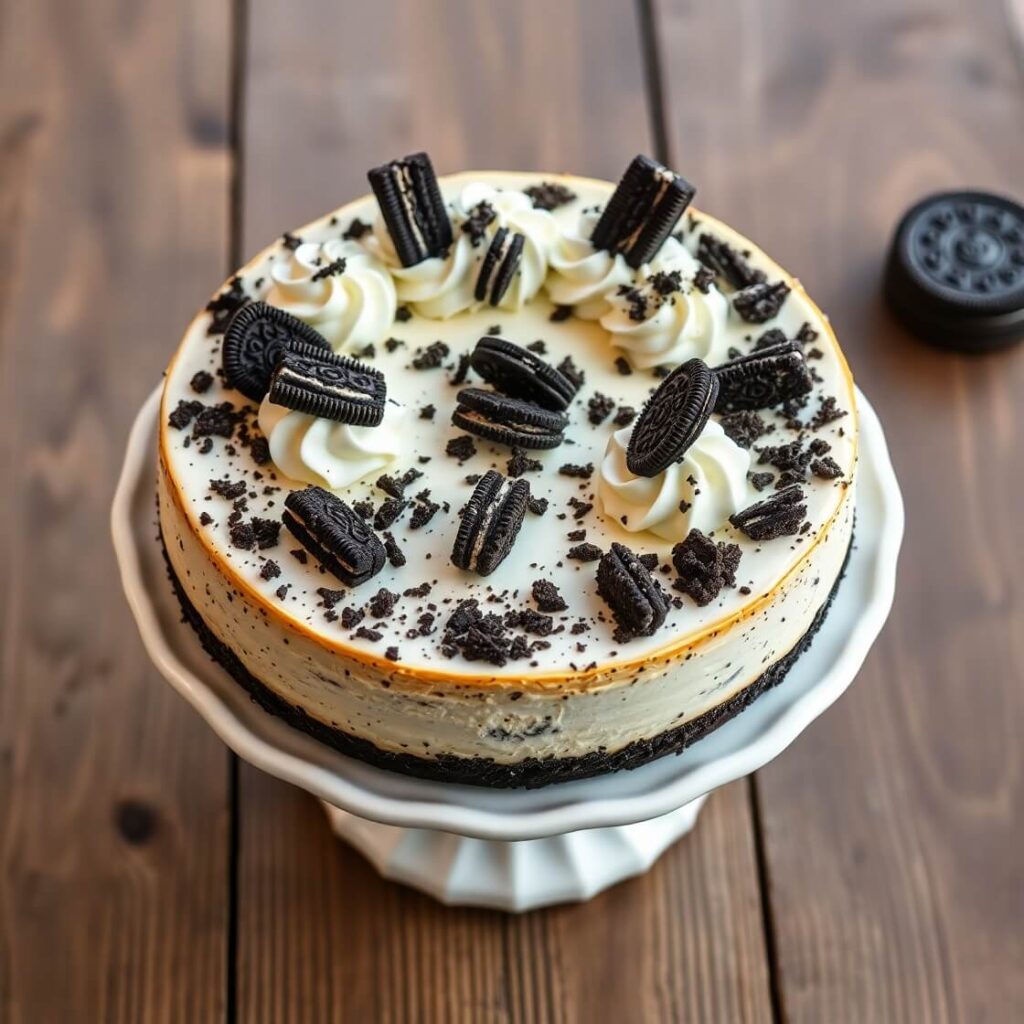
One of my favorite parts of making this cake is picking the ingredients. I always choose a high-quality ice cream—your favorite flavor works perfectly, but something rich like chocolate or cookies and cream gives the best results. For the crust, I like buttery chocolate cookies, but graham crackers or even crushed pretzels add a fun twist. The frosting is optional but highly recommended; whipped cream or marshmallow fluff creates that dreamy top layer everyone loves.
Here’s what I usually have on hand:
- 2 cups chocolate cookie crumbs (or graham crackers)
- 1/2 cup melted butter
- 1 quart of ice cream (any flavor you love)
- 1 cup whipped cream or marshmallow fluff
- Optional toppings: chocolate chips, crushed cookies, sprinkles, or fruit
A little tip: if your ice cream is too hard to scoop, let it sit out for 5–10 minutes—it softens enough to spread but won’t melt completely. I learned that the hard way after breaking a spatula the first time I tried to force frozen ice cream into a pan.
Print
Homemade Ice Cream Cake
- Total Time: 6-8 hours (including freezing)
- Yield: 8–10 1x
- Diet: Vegetarian
Description
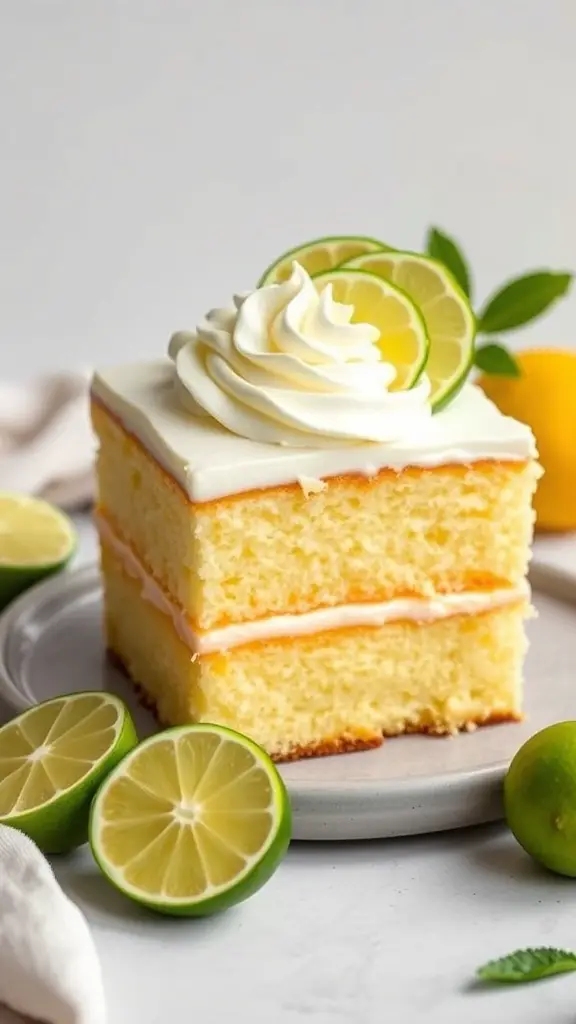
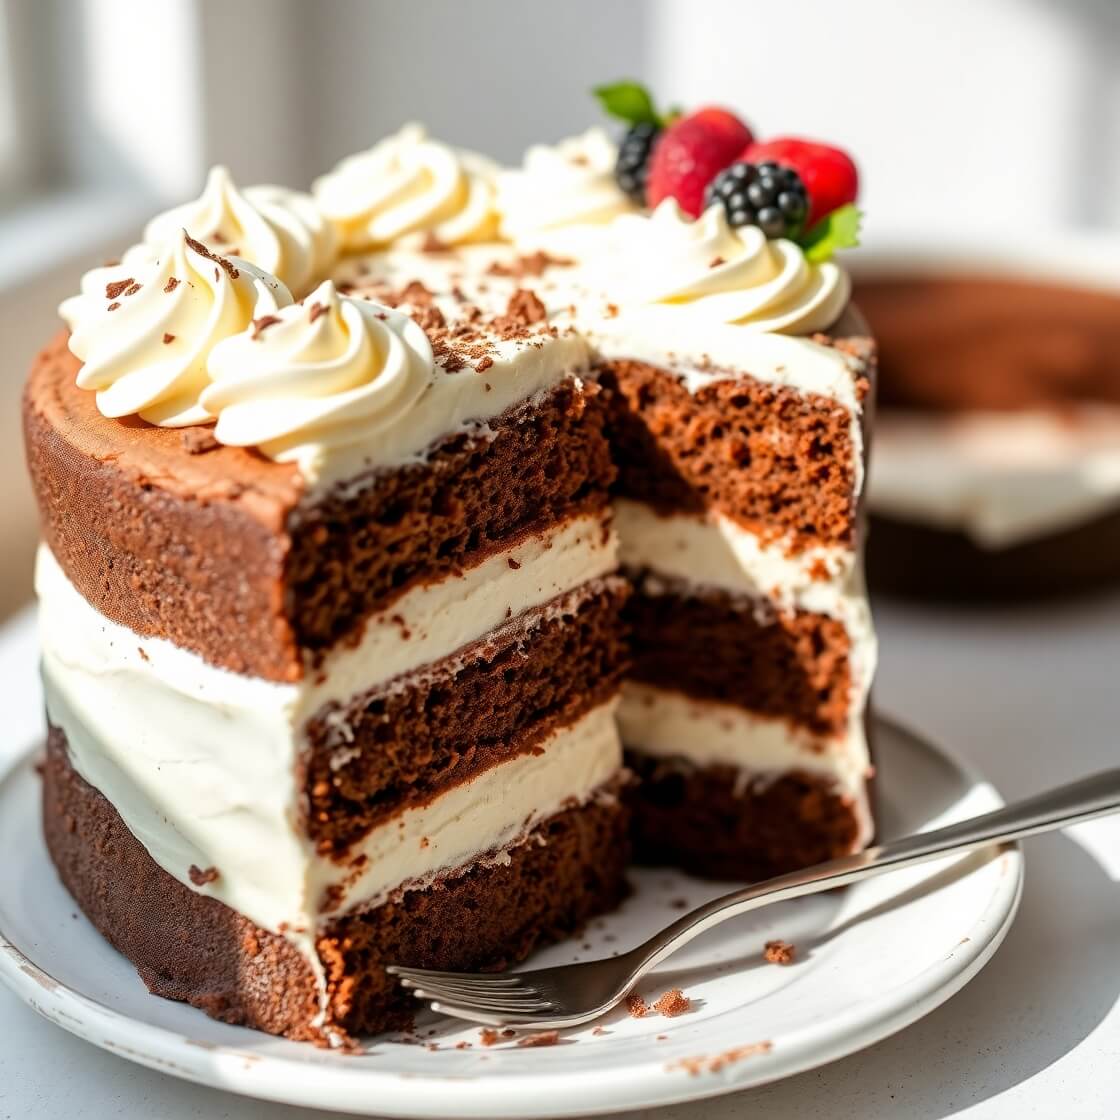
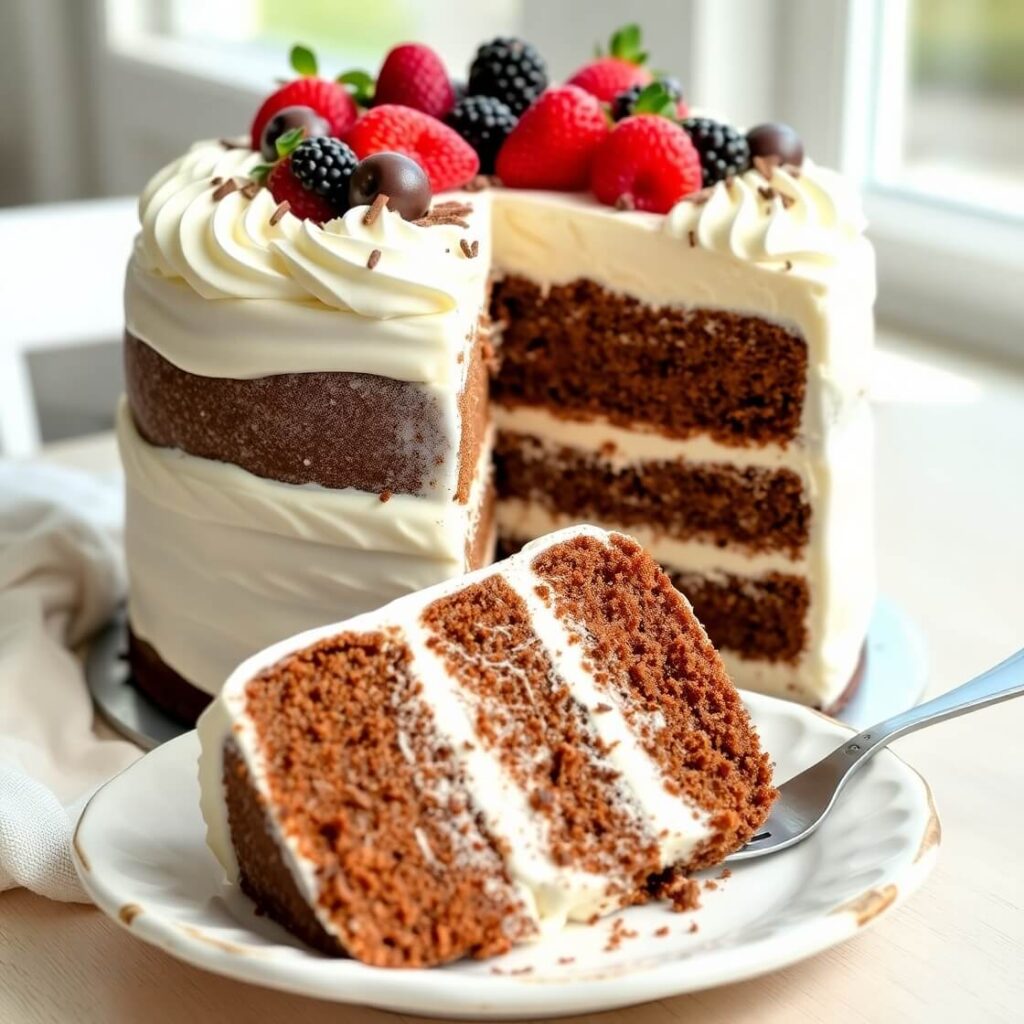
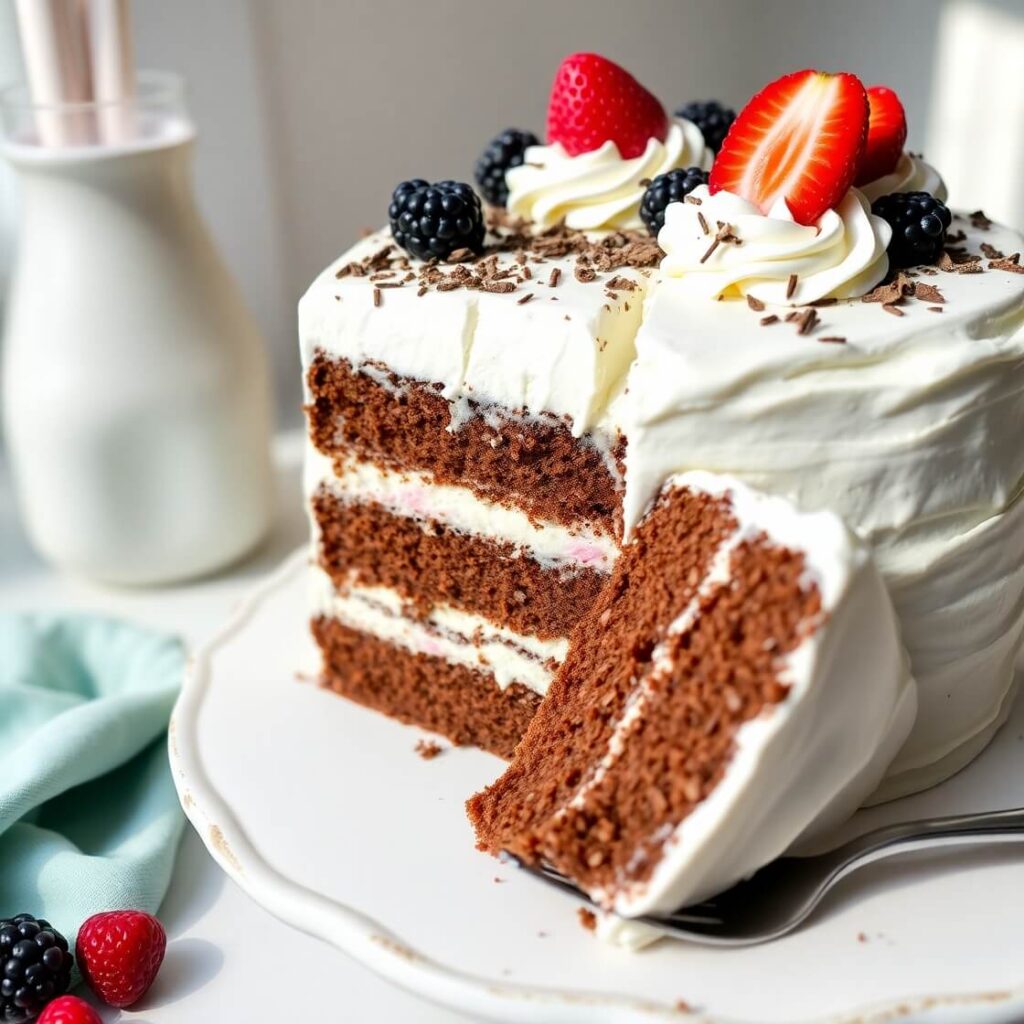
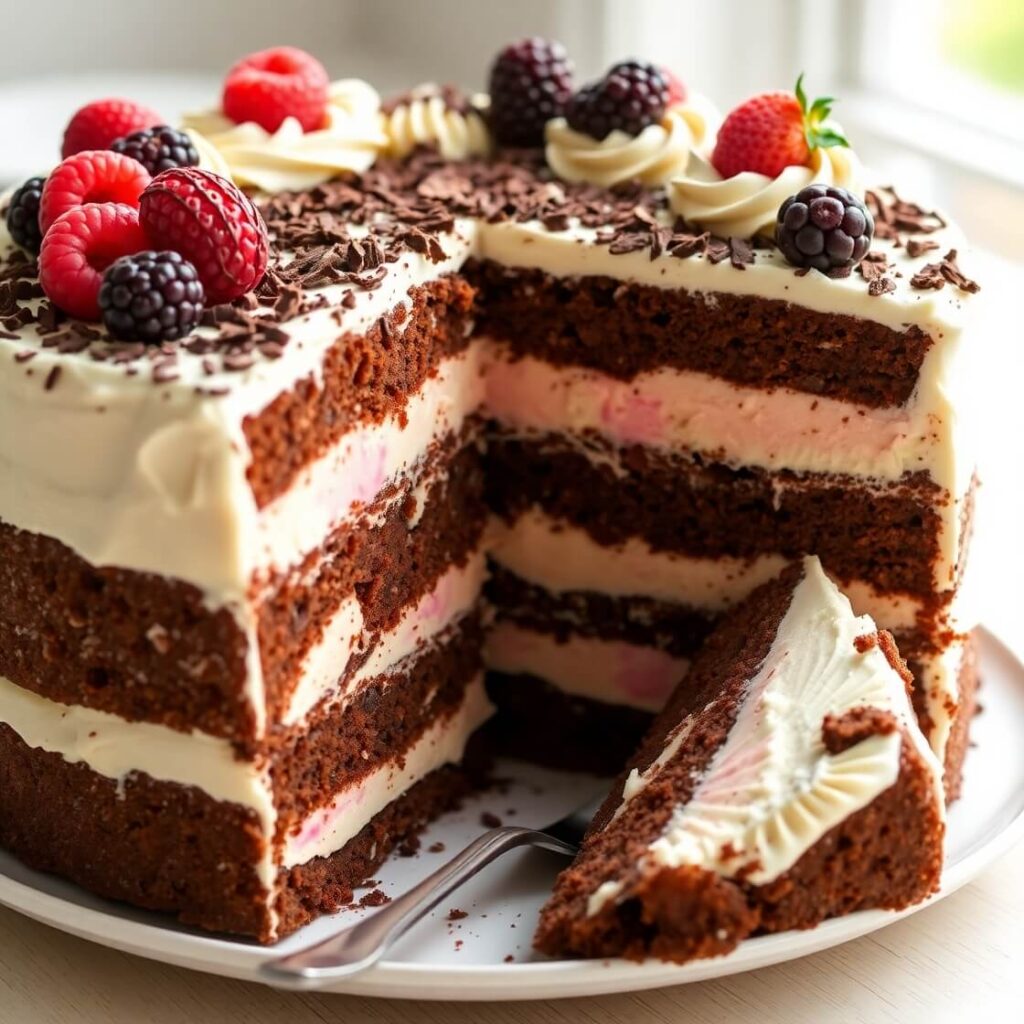
A perfect celebration dessert combining moist cake layers with creamy ice cream in between. This easy-to-make homemade ice cream cake is customizable, delicious, and impressive — great for birthdays, holidays, or anytime you want to treat yourself. You can choose your favorite cake and ice cream flavors to create a dessert that suits your taste and occasion. Freeze overnight for the best texture and serve with fresh berries or whipped cream for a beautiful presentation.
Ingredients
- 1 batch chocolate or vanilla cake batter (from scratch or box mix)
- 1–2 quarts of your favorite ice cream (softened)
- Butter (for greasing pans)
- Optional toppings: whipped cream, chocolate shavings, fresh berries, sprinkles
Instructions
- Bake cake layers in greased pans and cool completely.
- Soften ice cream slightly for easier spreading.
- Place one cake layer in a lined springform pan.
- Spread softened ice cream evenly over cake.
- Add second cake layer on top and press gently.
- Spread remaining ice cream over top layer.
- Cover and freeze for at least 4-6 hours or overnight.
- Remove from pan, decorate as desired, and serve after sitting 10 minutes at room temperature.
Notes
- Ensure cake is fully cooled before assembly.
- Use parchment paper to ease cake removal.
- For extra flavor, brush cake layers with flavored syrup before layering.
- Store tightly wrapped in the freezer to prevent ice crystals.
- Prep Time: 40 minutes
- Cook Time: 30 minutes
- Category: Dessert
- Method: Baking, Freezing
- Cuisine: American
Nutrition
- Serving Size: 8-10
- Calories: 350
- Sugar: 30g
- Sodium: 120mg
- Fat: 18g
- Saturated Fat: 10g
- Unsaturated Fat: 6g
- Trans Fat: 0g
- Carbohydrates: 40g
- Fiber: 1g
- Protein: 4g
- Cholesterol: 50mg
Step-by-Step Instructions
Creating your ice cream cake is surprisingly simple once you get the rhythm of layering.
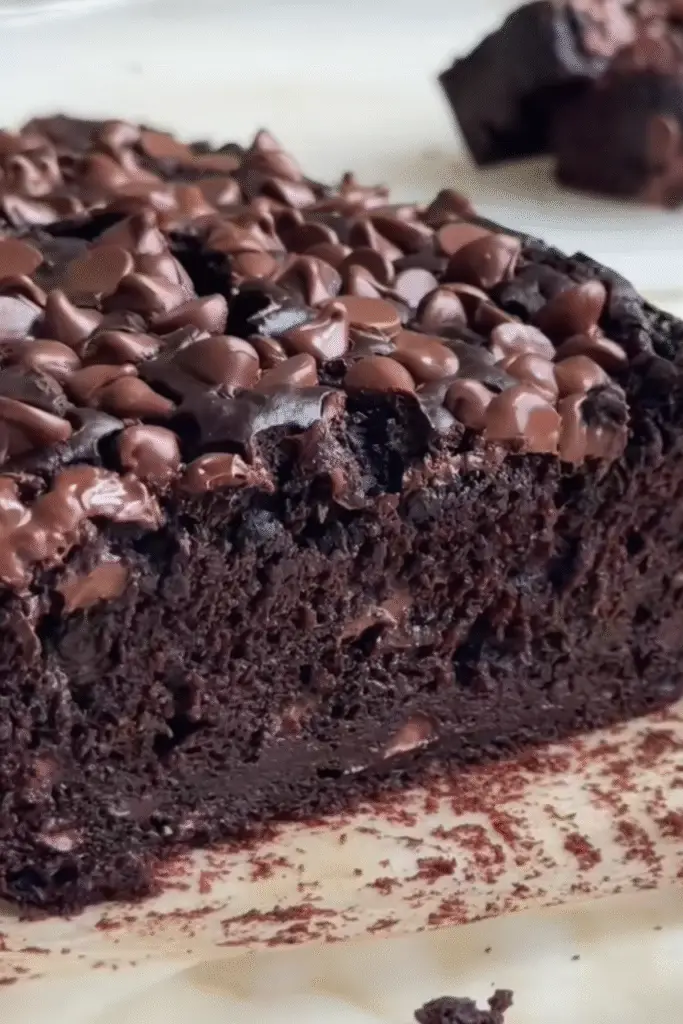
- Prepare the crust: Mix cookie crumbs with melted butter, then press firmly into the bottom of a springform pan or a lined 9×9-inch pan. Chill in the freezer for 10 minutes to set.
- Add the ice cream layer: Scoop softened ice cream over the chilled crust and smooth it out evenly with a spatula. Return to the freezer for at least 30 minutes.
- Layer frosting: Spread whipped cream or marshmallow fluff over the firm ice cream layer. Don’t worry if it’s not perfectly smooth; it will still taste amazing.
- Optional toppings: Sprinkle crushed cookies, chocolate chips, or fruit on top for a festive touch.
- Freeze until firm: Let your cake sit in the freezer for at least 4 hours, ideally overnight, to make slicing clean and easy.
I like to run a warm knife under hot water before slicing—it gives the cleanest pieces without melting the cake. The first time I tried slicing straight from the freezer, it was a crumbly mess, and everyone laughed while scraping pieces from the plate.
Serving Ideas That Impress
One of my favorite moments is seeing the cake come out of the freezer and watching everyone’s eyes light up. I love slicing it into generous pieces and serving it on colorful plates to make the presentation feel celebratory. A few simple touches take it to the next level:
- Drizzle chocolate or caramel sauce over each slice for extra indulgence.
- Top with fresh berries or mint leaves for a pop of color and freshness.
- Pair with coffee or a sparkling soda for a dessert experience that feels like a treat at a café.
I remember the first time I served it with a scoop of raspberry sorbet on the side—my sister declared it “pure summer magic.” Even simple touches like this can elevate a homemade dessert without much extra effort.
Pro Notes & Mistakes to Avoid
Making ice cream cake at home is fun, but a few small mistakes can throw things off. Here’s what I’ve learned from trial and error:
- Softening the ice cream: Don’t let it melt completely. Softened ice cream spreads easily, but melted ice cream creates a mess and soggy layers.
- Crust consistency: Press the cookie crust firmly into the pan. A loose crust leads to crumbling slices.
- Layering order: Always chill each layer before adding the next. This ensures clean slices and prevents layers from blending together.
- Toppings caution: Avoid adding fruit that releases a lot of juice until right before serving; otherwise, the cake can become soggy.
The first time I skipped chilling the ice cream layer, the frosting sank into it, leaving a ripple effect that looked more “modern art” than dessert. The lesson? Patience pays off.
Storage & Make-Ahead Tips
Ice cream cake is ideal for make-ahead celebrations. Here’s how I handle it:
- Freezer storage: Keep in an airtight container or tightly wrapped with plastic wrap to prevent freezer burn.
- Long-term storage: Up to a week works best, but flavors are most vibrant in the first 3–4 days.
- Serving tip: Let the cake sit out for 10–15 minutes before slicing for the perfect texture.
I often prepare this cake the night before a birthday or summer party. The next day, it slices beautifully and serves like a dessert straight from a gourmet bakery.
Frequently Asked Questions
Can I use store-bought ice cream?
Absolutely! Choose a high-quality brand for the best flavor and texture.
How do I prevent the layers from mixing?
Chill each layer in the freezer until firm before adding the next. Patience is key.
Can I make it in advance for a party?
Yes! Make it 1–2 days ahead and store in the freezer. Remove 10–15 minutes before serving.
What if I want a chocolate cake base instead of cookies?
You can bake a thin chocolate cake layer or use brownies as the base. Just chill well before adding the ice cream.