How To Make Homemade Graham Crackers?
There’s something special about recreating a childhood favorite right in your own kitchen. For me, homemade graham crackers bring back memories of after-school snacks, campfire s’mores, and that nostalgic crunch that always felt comforting. Instead of reaching for a store-bought box, I wanted to try making my own from scratch something with real, wholesome ingredients that tastes fresher and more flavorful.
If you’ve ever wondered whether you can make graham crackers at home, the answer is a resounding yes. And once you taste the buttery, slightly sweet, and perfectly crisp result, you may never go back to store-bought again. These crackers are more than just a snack they’re a reminder that sometimes, the simplest recipes hold the most joy.
What Makes This Graham Crackers Special?
The first time I made these graham crackers, I was genuinely surprised at how easy they were. They don’t require fancy techniques or special equipment, yet the results feel gourmet compared to what you’ll find in the store. What makes this recipe special is the balance of flavors—warm honey, a touch of molasses, and the nutty richness of whole wheat flour. Together, they create a cracker that’s crisp yet tender, sweet but not overly sugary.
I love this recipe because it’s so versatile. You can eat these crackers on their own, pair them with cheese, crush them into a pie crust, or sandwich them with chocolate and marshmallows for s’mores. They’re kid-friendly, but adults appreciate the deeper, more complex flavor as well. And the best part? You know exactly what goes into them—no preservatives or artificial flavors, just real ingredients.
It’s the kind of recipe that makes you feel connected to homemade traditions. It’s not just about baking—it’s about slowing down, savoring the process, and creating something you’ll actually be proud to share.
What Goes Into Homemade Graham Crackers
When I first looked into making graham crackers, I was surprised by how straightforward the ingredient list really is. You don’t need anything unusual or hard to find, just a few pantry staples and some natural sweeteners to give the crackers their iconic flavor.
Here’s what makes this recipe shine:
- Whole Wheat Flour – The heart of graham crackers. Whole wheat flour gives that rustic texture and nutty taste. If you can find graham flour, that’s even better, but regular whole wheat works beautifully.
- All-Purpose Flour – To balance the heaviness of whole wheat flour, I like to add a little all-purpose flour. This helps keep the crackers light and crisp.
- Brown Sugar – Adds sweetness with a hint of molasses. It’s richer than white sugar and complements the honey flavor perfectly.
- Honey – The star of the recipe. Honey provides that classic graham cracker taste you can’t skip. Choose a mild honey so it doesn’t overpower.
- Butter – Unsalted butter works best here. It gives a subtle richness and helps the crackers achieve their signature crisp bite.
- Baking Soda – Just enough to keep the texture light and airy.
- Salt – A pinch of salt balances all the sweetness and enhances flavor.
- Cinnamon – Optional, but highly recommended. It adds warmth and depth, making the crackers extra inviting.
- Vanilla Extract – A splash of vanilla brings everything together with a soft aromatic finish.
These ingredients might look simple, but when combined, they create that golden-brown, toasty cracker we all know and love.
How to Make This Homemade Graham Crackers
Making these crackers is simpler than it sounds. Once you try it, you’ll wonder why you didn’t start sooner. Here’s my step-by-step guide:
Step – 1: Mix the Dry Ingredients
In a large mixing bowl, whisk together the whole wheat flour, all-purpose flour, baking soda, salt, and cinnamon. This ensures the leavening agent and spices are evenly distributed.
Step – 2: Cream the Butter and Sugar
In another bowl, beat the softened butter and brown sugar until light and fluffy. This step adds air to the dough, helping the crackers bake up crisp.
Step – 3: Add the Honey and Vanilla
Mix in the honey and vanilla extract. The dough will start to smell amazing at this point—sweet, warm, and comforting.
Step – 4: Combine Wet and Dry
Gradually add the dry mixture to the butter mixture, mixing until everything comes together. The dough should be slightly sticky but manageable.
Step – 5: Chill the Dough
Shape the dough into a flat disc, wrap it in plastic wrap, and chill in the refrigerator for at least 30 minutes. This makes rolling it out much easier.
Step – 6: Roll and Cut
On a lightly floured surface, roll the dough to about 1/8-inch thick. Use a sharp knife or pastry cutter to cut into rectangles. For the classic look, poke small holes in the dough with a fork.
Step – 7: Bake the Crackers
Preheat your oven to 350°F (175°C). Place the dough pieces on a parchment-lined baking sheet, leaving a little space between them. Bake for 15–20 minutes, or until golden brown and firm to the touch.
Step – 8: Cool Completely
Allow the crackers to cool on a wire rack. They will crisp up even more as they cool, so don’t worry if they seem slightly soft when they first come out.
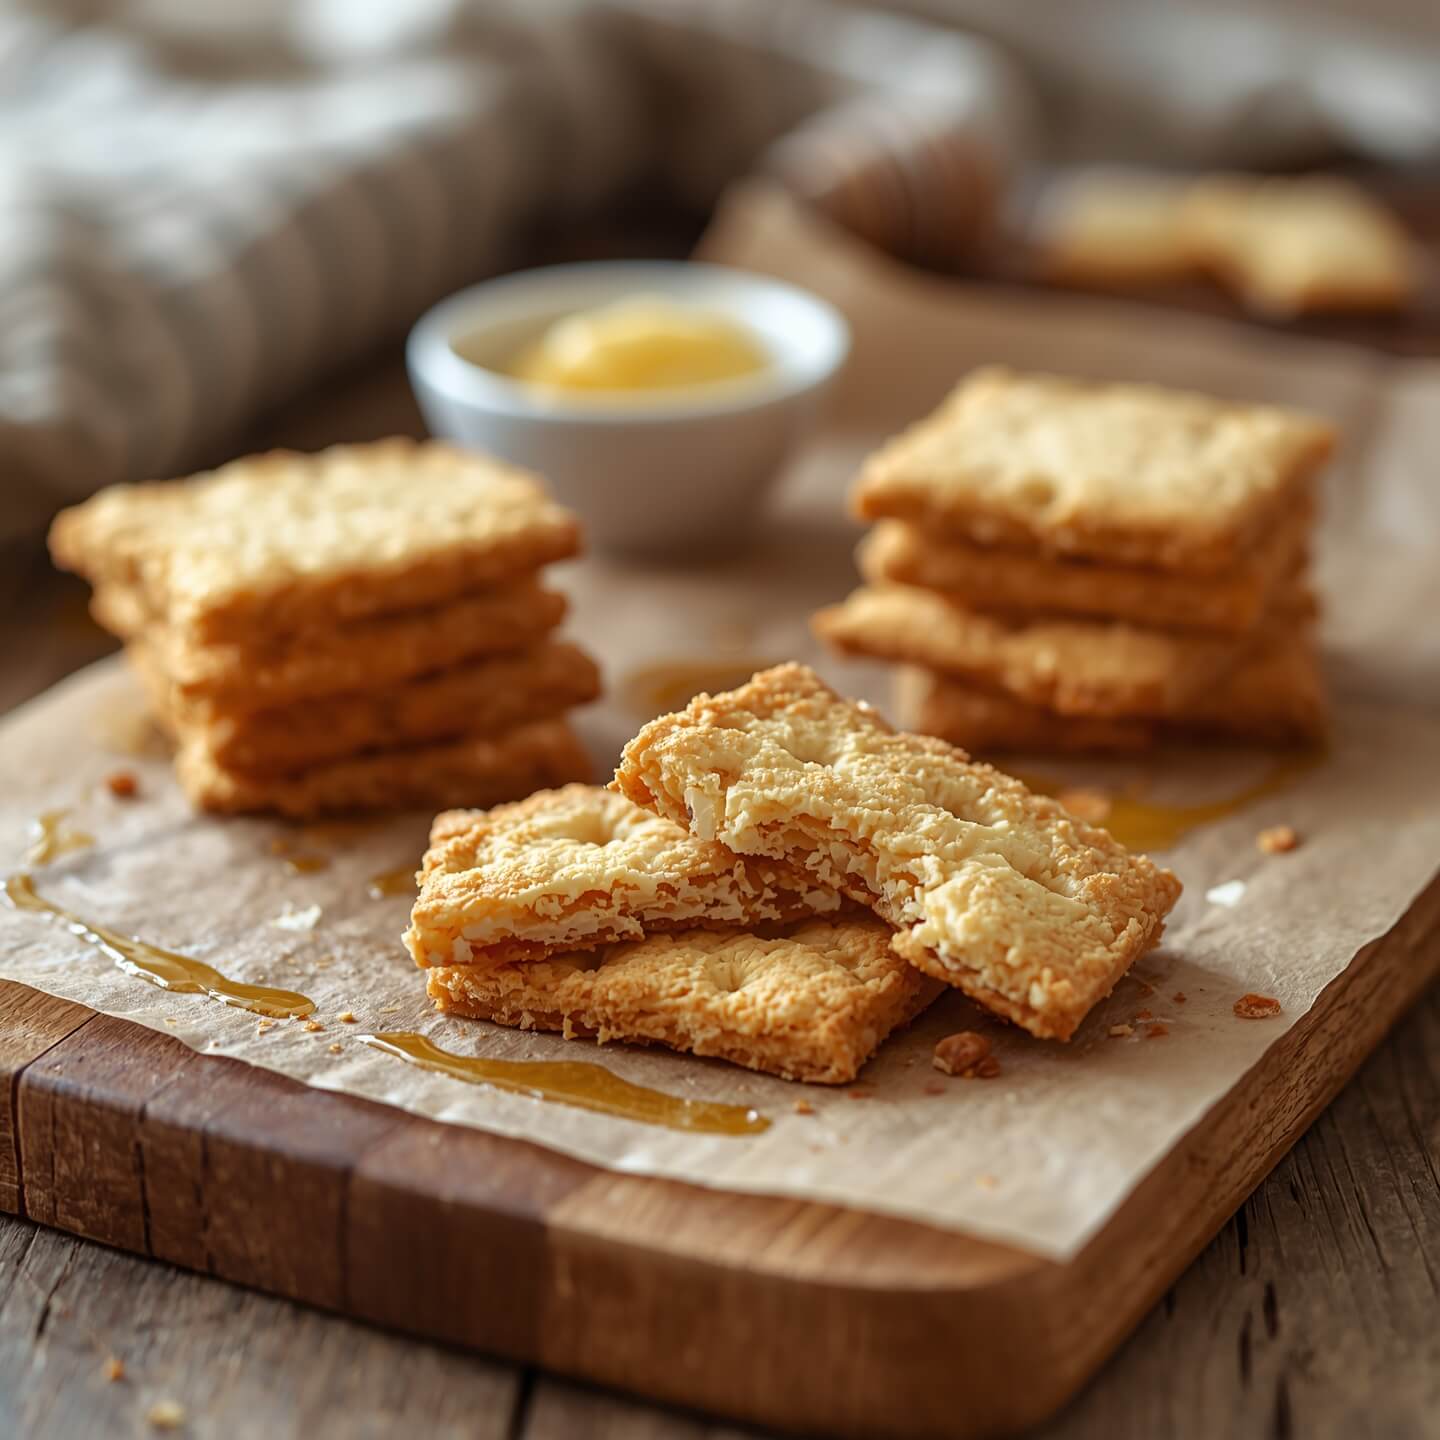
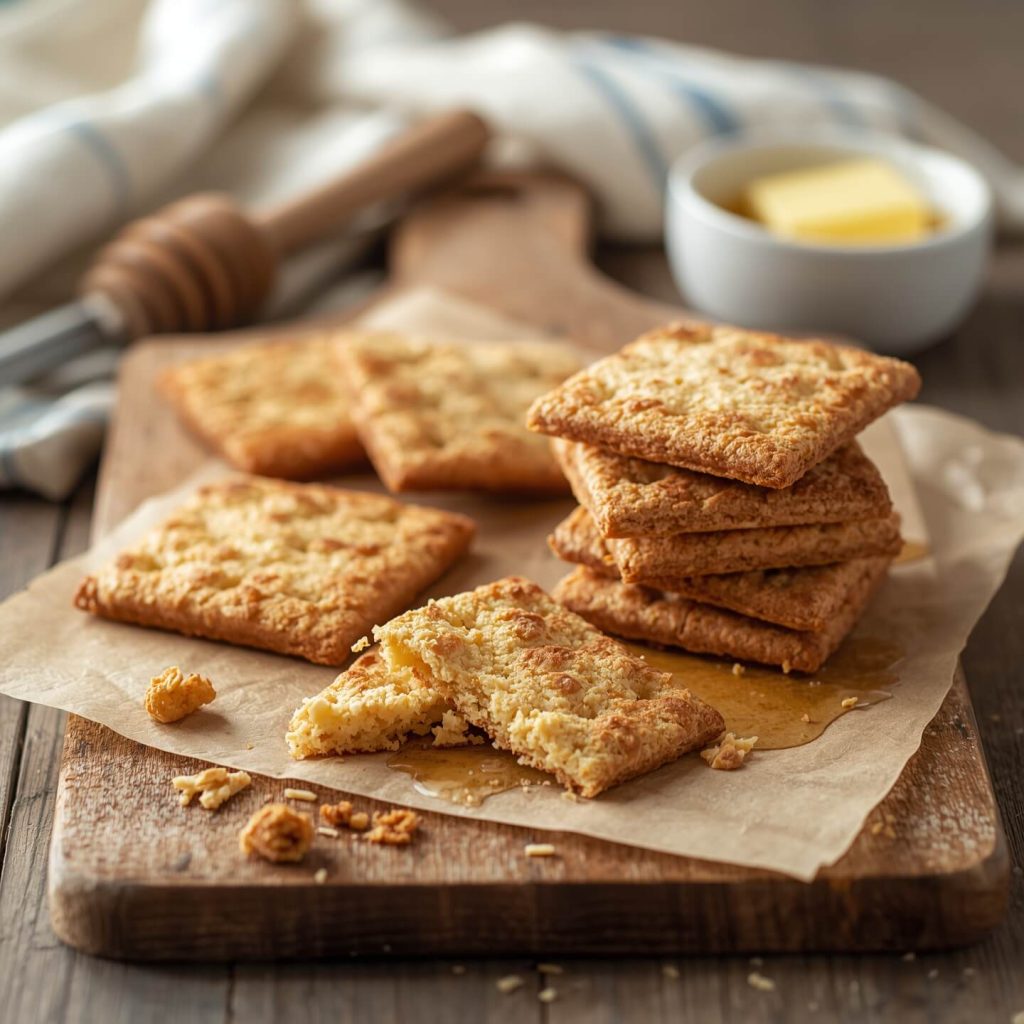
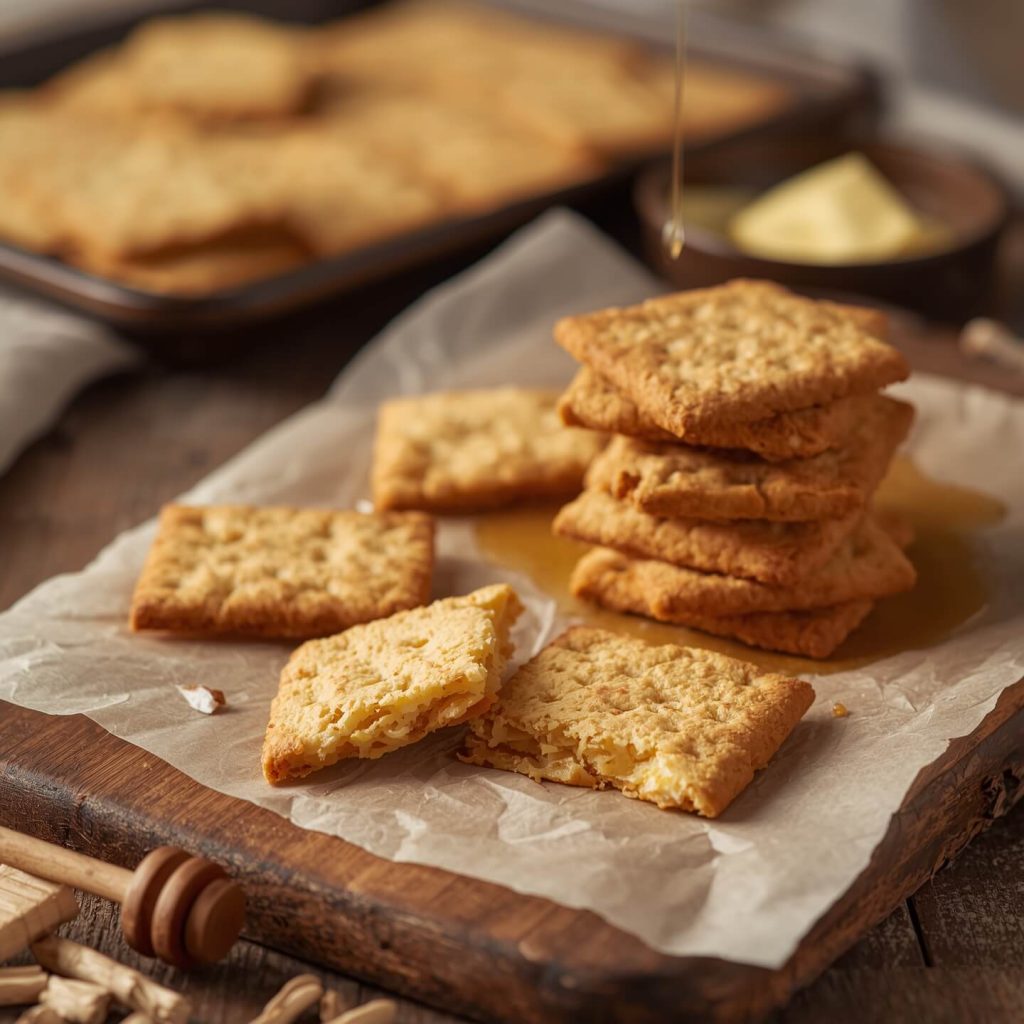
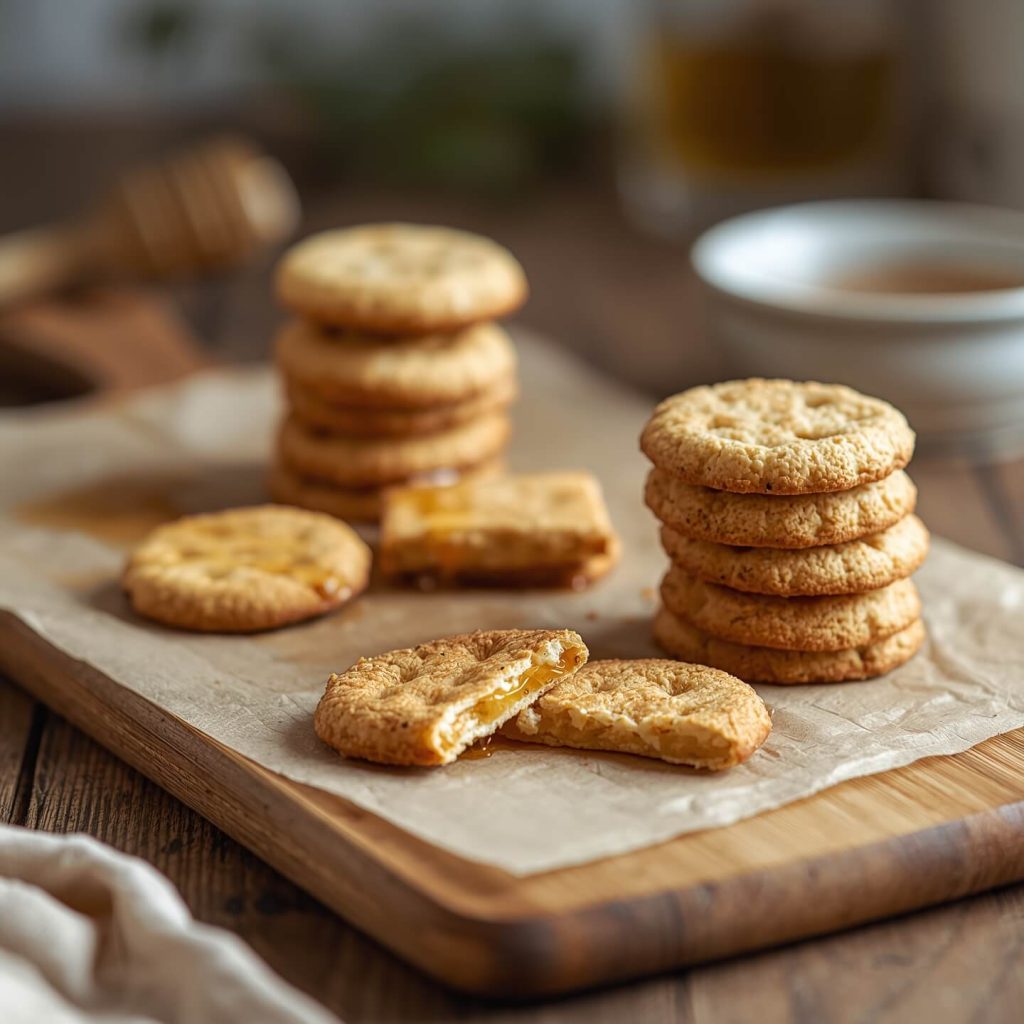
By the end, you’ll have a tray full of golden, toasty graham crackers that look just as good—if not better—than store-bought.
Print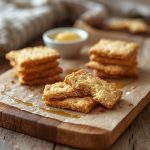
Homemade Graham Crackers
- Total Time: 1 hour 15 minutes (including chill time)
- Yield: 24 1x
- Diet: Vegetarian
Description
Homemade graham crackers are crisp, lightly sweet, and so much better than anything you’ll find in a box. With wholesome ingredients like whole wheat flour, honey, and butter, these crackers strike the perfect balance between rustic and indulgent. Whether you enjoy them on their own, crumble them into a pie crust, or use them for s’mores, they bring a touch of nostalgia to every bite. Once you see how easy they are to make, you’ll want to keep a batch on hand at all times.
Ingredients
- 1 cup whole wheat flour
- 1 cup all-purpose flour
- ½ cup brown sugar
- ½ cup unsalted butter, softened
- ¼ cup honey
- ½ teaspoon baking soda
- ½ teaspoon cinnamon (optional)
- ¼ teaspoon salt
- 1 teaspoon vanilla extract
Instructions
- Whisk together whole wheat flour, all-purpose flour, baking soda, salt, and cinnamon in a bowl.
- In a separate bowl, cream butter and brown sugar until fluffy.
- Mix in honey and vanilla extract until smooth.
- Gradually add dry mixture to the wet ingredients and combine into a dough.
- Wrap the dough and chill for 30 minutes.
- Roll dough to 1/8-inch thickness, cut into rectangles, and poke holes with a fork.
- Bake at 350°F (175°C) for 15–20 minutes until golden brown.
- Cool completely on a wire rack before storing.
Notes
- For dairy-free crackers, use coconut oil instead of butter.
- For a richer flavor, try substituting part of the honey with molasses.
- The crackers will crisp up as they cool, so don’t worry if they feel soft at first.
- Prep Time: 20 minutes
- Cook Time: 15–20 minutes
- Category: Snack/Dessert
- Method: Baking
- Cuisine: American
Nutrition
- Serving Size: 24
- Calories: 85
- Sugar: 5g
- Sodium: 45mg
- Fat: 3.5g
- Saturated Fat: 2g
- Unsaturated Fat: 1.3g
- Trans Fat: 0g
- Carbohydrates: 1.3g
- Fiber: 1g
- Protein: 1.5g
- Cholesterol: 10mg
Best Side Dish of Homemade Graham Crackers
Graham crackers may be delicious on their own, but pairing them with the right foods can elevate the experience. Here are three ideas to make snack time even better:
- Fresh Fruit and Cheese Board – Serve graham crackers alongside apple slices, grapes, and a soft cheese like brie. The sweet and savory contrast is delightful.
- Homemade Yogurt Dip – A tangy yogurt and honey dip pairs perfectly with the mild sweetness of the crackers. It’s a great option for kids’ snacks.
- Hot Chocolate – There’s nothing better than dunking a crispy graham cracker into a warm cup of hot cocoa. It’s cozy, nostalgic, and irresistible.
Serving and Presentation Tips
Homemade graham crackers may look simple, but with the right presentation, they can feel downright elegant. When I serve them, I love to highlight their rustic charm—those golden edges, the neat fork holes, and the gentle scent of honey.
One of my favorite ways to present them is by stacking them in a small tin or basket lined with parchment paper. It gives a cozy, homemade bakery vibe. If I’m hosting, I’ll often tie a bundle of crackers with twine for a sweet, edible party favor. They also look stunning placed on a dessert platter next to chocolate squares, toasted marshmallows, and berries for a DIY s’mores station.
For everyday enjoyment, I sometimes crumble them over vanilla ice cream and serve in glass bowls. It turns a humble cracker into a beautiful topping that looks like it came straight from a café.
Mistakes I Made (So You Don’t Have to)
Making graham crackers isn’t difficult, but a few insider tips can really elevate the final result. I’ve picked these up through trial and error, and they make a world of difference.
First, don’t skip the chilling step. Cold dough rolls out smoother and bakes without spreading. If the dough feels sticky while rolling, dust the rolling pin with flour, but don’t overdo it or the crackers may turn out tough.
Another trick is to use a pizza cutter or pastry wheel to cut even rectangles quickly. It saves time and keeps the edges straight. For that authentic look, make the fork holes deep enough—they’re not just decorative; they help the crackers bake evenly.
Lastly, keep a close eye while baking. These crackers can go from perfectly golden to overbaked in just a couple of minutes. Pull them out when they’re just turning crisp, and they’ll finish firming up as they cool.
How to Store It
The beauty of homemade graham crackers is that they store really well—if you can resist eating them all at once. Once completely cooled, place them in an airtight container. They’ll stay fresh and crisp at room temperature for about 7–10 days.
For longer storage, you can freeze them. Simply place the cooled crackers in a freezer-safe bag, squeeze out as much air as possible, and freeze for up to 3 months. When you’re ready to enjoy, just thaw them on the counter—no reheating required.
If you’re planning to use them for pie crusts or toppings, you can even crush them before freezing. That way, you have ready-to-use graham cracker crumbs whenever you need them.
FAQ
Can I make these gluten-free?
Yes, you can substitute a good-quality gluten-free flour blend for the regular flour. Just keep in mind that the texture might be slightly softer.
Do I need graham flour for this recipe?
No, regular whole wheat flour works wonderfully. Graham flour is more traditional, but it’s not always easy to find.
Can I make the dough ahead of time?
Absolutely. You can prepare the dough, wrap it tightly in plastic wrap, and store it in the fridge for up to 2 days before baking.
What if I don’t have honey?
Honey gives graham crackers their signature flavor, but maple syrup or golden syrup can be used in a pinch. The taste will be slightly different but still delicious.
Why aren’t my crackers crispy?
If your crackers turn out soft, they may not have baked long enough or were rolled too thick. Bake until lightly golden and allow them to cool fully before storing.