Halloween Cinnamon Rolls Recipe

There’s something about October that always brings out my inner baker. The air feels cooler, pumpkins crowd every porch, and my kitchen practically begs for cinnamon and butter. I remember one Halloween morning a few years ago — the kind that starts foggy and ends in laughter — when I decided to make something sweet before my kids headed out for trick-or-treating. I had cinnamon rolls on my mind, but I wanted them to feel like Halloween: playful, a little spooky, and full of warmth.
The first batch was a bit of a disaster. I got too excited about the orange icing, added too much food coloring, and ended up with rolls that looked like construction cones. My daughter called them “pumpkin ghosts,” which somehow made them even more lovable. The second time around, I toned it down, piped tiny spiderwebs on top with a simple cream cheese frosting, and realized I’d stumbled upon a new Halloween tradition.
Now, every year, these Halloween cinnamon rolls make their way to the breakfast table — soft, sticky, fragrant with cinnamon, and dressed up with just enough spooky flair to make everyone grin before the candy rush begins.
Ingredients in Context
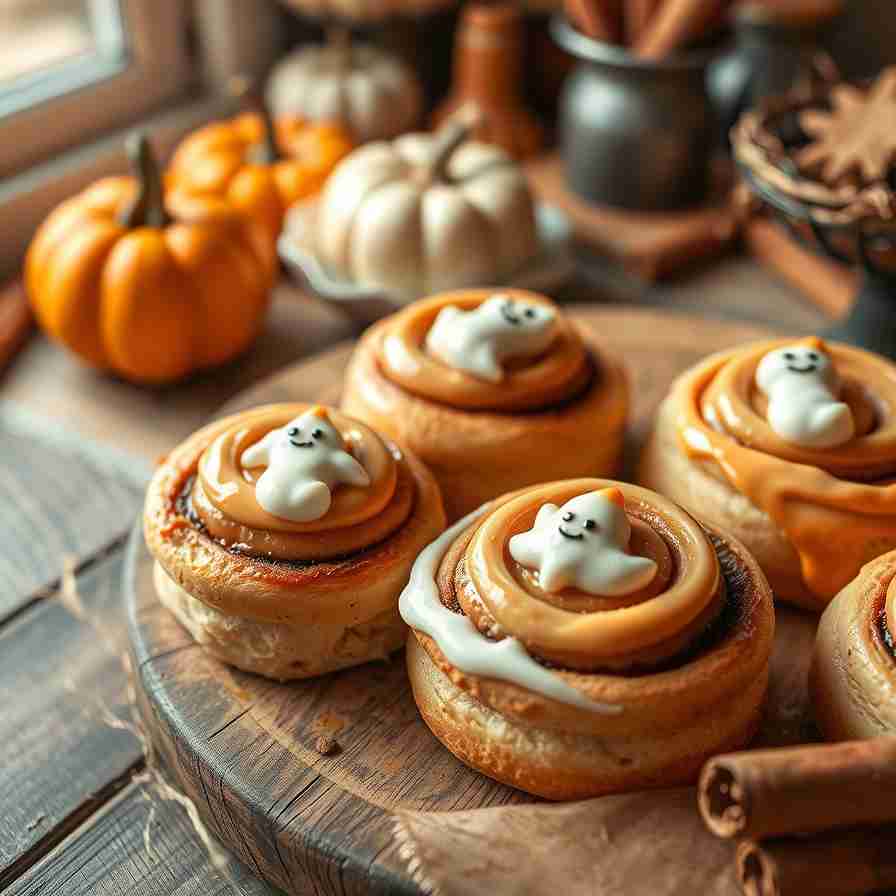
Let’s talk ingredients — because for these cinnamon rolls, each one brings something special to the party.
The dough:
You can use homemade dough if you love the process (like me), but refrigerated pizza or crescent dough works beautifully for busy mornings. I’ve done both, and honestly, the difference isn’t night and day — the magic comes from the filling and frosting.
The filling:
Classic cinnamon sugar is non-negotiable. I mix soft butter with brown sugar, a generous spoonful of cinnamon, and just a hint of nutmeg for a touch of fall warmth. If you want to get extra seasonal, a dash of pumpkin pie spice fits right in.
The frosting:
Cream cheese frosting is my go-to — rich, tangy, and perfect against the sweet dough. For Halloween flair, I divide the frosting into two bowls: tint one orange with gel food coloring and leave the other white. When you swirl them together or pipe on little ghosts or spiderwebs, they look instantly festive without being over the top.
Extras and add-ins:
You can fold in crushed pecans or mini chocolate chips for texture. Sometimes I sprinkle a few candy eyes on top after frosting — a hit with kids and adults alike. And if you want a shortcut version, you can use orange-colored icing instead of food coloring in the frosting.
The beauty of this recipe is its flexibility — it feels special but never fussy. It’s the kind of baking project you can do in your coziest sweater, with a mug of cider nearby and maybe a Halloween playlist humming in the background.
The Flavor Balance
What makes these cinnamon rolls so irresistible isn’t just the spice — it’s the balance of cozy and playful. The cinnamon-sugar swirl gives that familiar warmth, but the Halloween twist adds something unexpected.
When the rolls bake, the aroma alone could convince anyone that Halloween magic exists. The butter melts into the cinnamon filling, creating that caramelized edge where the sugar meets the pan — my favorite part. The cream cheese frosting cuts through the sweetness just enough, creating that perfect bite where tang, spice, and sweetness meet.
If you’re making them for a brunch or party, try serving them warm, right out of the oven. The icing slightly melts into the swirls, and you get that dreamy glossy finish that looks like it came straight from a bakery window.
I’ve learned that a pinch of salt in the dough and a splash of vanilla in the frosting make all the difference — small details that bring everything into harmony. Halloween recipes can be fun and whimsical, but when they taste this good, they become traditions.
Cooking Time Snapshot
Here’s a quick look at how your kitchen time breaks down:
| Step | Time |
|---|---|
| Dough Prep (or ready-made dough) | 15 minutes |
| Filling & Assembly | 10 minutes |
| Rising (if homemade dough) | 1 hour |
| Baking | 20–25 minutes |
| Cooling & Decorating | 15 minutes |
Total active time: around 30–40 minutes, depending on the dough you choose.
If you’re using store-bought dough, you can have these ready in about an hour — start to spooky-finish. Perfect for a Halloween morning breakfast before costumes take over the house.
Step-by-Step Instructions
Step 1: Prepare your dough.
If you’re making it from scratch, combine warm milk, yeast, and a pinch of sugar, then let it bloom until foamy. Add melted butter, egg, and flour until a soft dough forms. Knead for about 5 minutes, then let it rise until doubled. If you’re using pre-made dough, you can skip right to rolling it out.
Step 2: Make the filling.
In a small bowl, mix softened butter, brown sugar, cinnamon, and a touch of nutmeg. It should resemble a thick paste. The smell alone will start to fill your kitchen with that familiar fall coziness.
Step 3: Roll and spread.
On a lightly floured surface, roll the dough into a rectangle about ¼ inch thick. Spread the cinnamon filling evenly, reaching the edges. I like to leave just a small border so the filling doesn’t spill when you roll it.
Step 4: Roll up and slice.
Starting from the long side, roll the dough tightly into a log. Use unflavored dental floss (yes, really!) or a sharp knife to cut even rolls — about 1 to 1.5 inches thick. Place them in a greased baking dish, leaving a bit of space for expansion.
Step 5: Bake.
Bake at 350°F (175°C) for 20–25 minutes, or until golden brown and puffed. The edges should be slightly caramelized but not crisp. When you open the oven, that wave of butter and spice is pure comfort.
Step 6: Frost and decorate.
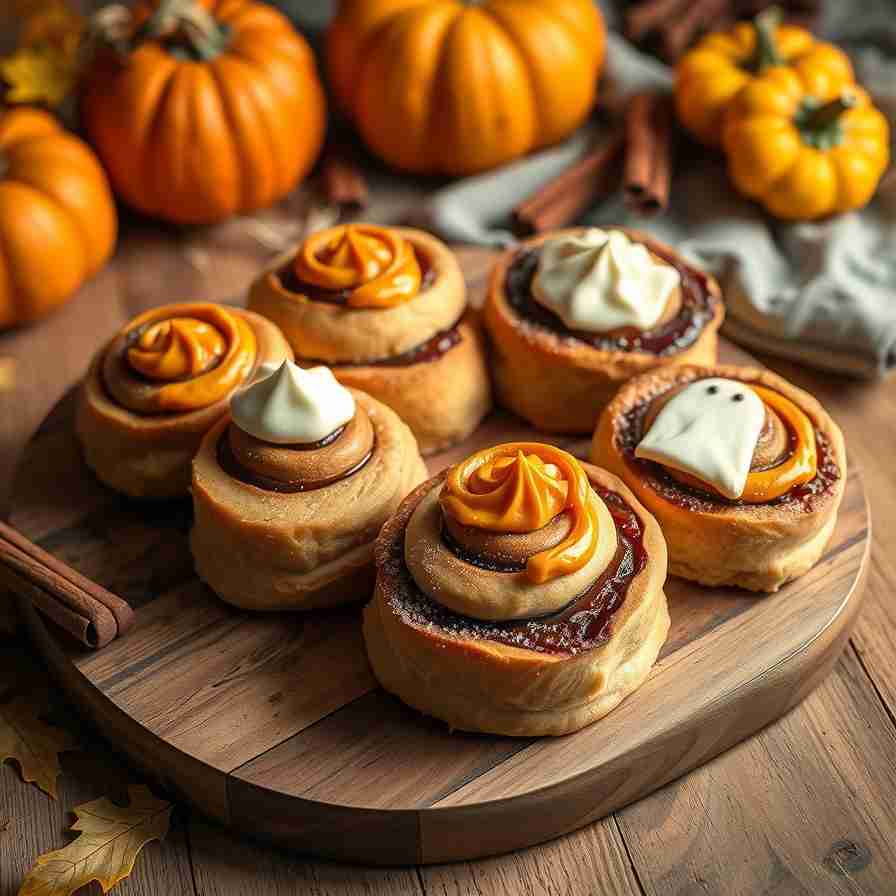
While they cool slightly, whip together cream cheese, butter, powdered sugar, vanilla, and a splash of milk. Divide it into two bowls — tint one orange, leave the other white. Spread, drizzle, or pipe it however you like: ghosts, spiderwebs, or a messy swirl that looks charmingly spooky.
Sometimes I drizzle a dark chocolate “spiderweb” over the orange frosting using a toothpick. It’s quick, easy, and makes the rolls look like they came straight from a Halloween bakery window.
Substitutions & Adaptations
One of the best things about these cinnamon rolls is how adaptable they are.
- Vegan option: Use plant-based butter and cream cheese (they’re easier to find than ever). Almond milk or oat milk works perfectly in both the dough and frosting.
- Gluten-free: Opt for a 1:1 gluten-free flour blend or pre-made gluten-free pizza dough. The texture will differ slightly, but the flavor stays rich and cozy.
- Low sugar: Replace half the brown sugar with coconut sugar or use a reduced-sugar powdered blend for the frosting.
- Kid-friendly: Skip the orange coloring if you prefer, or let little ones decorate with Halloween sprinkles instead of icing.
The key is to have fun with it — these aren’t meant to be perfect bakery rolls. They’re meant to be memorable, fragrant, and delicious, with a little touch of Halloween mischief.
Serving & Presentation Ideas
There’s a certain kind of joy in serving these Halloween cinnamon rolls warm, with the frosting still slightly melting into every spiral. I like to place them on a dark slate platter or a wooden cutting board — the contrast makes the orange and white icing pop beautifully.
For a Halloween brunch or breakfast spread, I’ll often dust the platter lightly with powdered sugar (like a ghostly mist) and scatter a few candy eyeballs or plastic spiders for fun. The kids think it’s hilarious, and honestly, it always makes for great photos.
If you’re hosting a party, you can go mini — slice the rolls thinner before baking so they come out bite-sized. Then drizzle them with orange glaze and serve them on toothpicks as “spooky cinnamon bites.” They disappear faster than candy corn.
Pair them with mugs of hot apple cider or pumpkin spice lattes for a cozy October morning, or with a scoop of vanilla ice cream if you’re serving them as a dessert after dinner. These rolls bridge the gap between breakfast and treat — perfectly indulgent, yet comforting.
Pro Notes & Mistakes to Avoid

Let’s be honest — cinnamon rolls can be a little tricky if you’re not used to working with dough, but a few simple tweaks make all the difference.
1. Don’t rush the rise.
If you’re making homemade dough, give it time to double in size. I once baked a batch too early because the kids were impatient, and they came out dense instead of fluffy. Now I let the dough rise near the oven with a damp towel on top — the warmth helps it along beautifully.
2. Don’t overfill the rolls.
It’s tempting to slather on extra butter and sugar (I’ve done it too), but too much filling will leak out during baking and burn at the bottom. Spread it evenly, and you’ll get that perfect caramelized swirl without the mess.
3. Cool before frosting.
I know — waiting is hard when the smell is that good. But if you frost too soon, the icing will melt right off. Let them cool for at least 10 minutes so the frosting softens just enough to cling to the top while still melting into the cracks.
4. Taste your frosting.
A tiny splash of vanilla or even a touch of orange zest can transform the frosting from ordinary to unforgettable. I once added a few drops of maple extract, and it turned into something straight out of a fall bakery.
5. Keep an eye on oven time.
Every oven runs differently. Around the 18-minute mark, start peeking. When the tops are golden and the edges slightly browned, they’re done. Any darker, and you’ll lose that soft, pillowy texture that makes cinnamon rolls irresistible.
Storage & Make-Ahead Tips
Cinnamon rolls are best enjoyed fresh, but these Halloween versions reheat beautifully.
- Room Temperature: Keep them in an airtight container for up to 2 days. Pop them in the microwave for 10–15 seconds before serving — the frosting softens up just right.
- Refrigerator: Store for up to 5 days. I prefer this method if I’ve used cream cheese frosting. Warm in the oven at 300°F for about 8 minutes before serving.
- Freezer: You can freeze baked, unfrosted rolls for up to 2 months. Thaw overnight in the fridge, reheat, and then frost before serving.
If you want to prep ahead, assemble the rolls and refrigerate overnight before baking. In the morning, just set them on the counter for 30 minutes, then bake — you’ll have freshly made cinnamon rolls without the early-morning chaos.
FAQs
Can I use store-bought cinnamon rolls for this recipe?
Absolutely. If you’re short on time, just bake the canned rolls and decorate them with orange and white icing. You’ll still get that festive Halloween feel without the extra prep.
What’s the best way to get bright orange frosting?
Use gel food coloring instead of liquid — it gives a more vibrant hue without watering down your frosting. Start with a toothpick amount and build up slowly.
Can I make these without cream cheese?
Yes! A simple vanilla glaze made from powdered sugar, milk, and a splash of vanilla works perfectly. You can tint it orange or drizzle with chocolate for a Halloween twist.
How can I make the spiderweb design?
Pipe orange frosting over the rolls first. Then drizzle thin circles of chocolate glaze and drag a toothpick from the center outward to form a web pattern. It’s simple but looks like something straight out of a bakery.
Are these rolls overly sweet?
Not at all — the tangy frosting keeps the balance just right. If you prefer less sweetness, reduce the sugar in the filling slightly or skip the glaze drizzle.

Halloween Cinnamon Rolls Recipe
- Total Time: 1 hour 30 minutes
- Yield: 12 1x
- Diet: Vegetarian
Description
These soft, buttery Halloween cinnamon rolls are filled with cinnamon sugar, topped with creamy orange-and-white frosting, and decorated with a spooky twist. Perfect for a cozy Halloween breakfast or fall dessert.
Ingredients
1. For the dough:
- 3 cups all-purpose flour
- 2 ¼ tsp instant yeast
- ¾ cup warm milk
- ¼ cup unsalted butter, melted
- ¼ cup granulated sugar
- 1 egg
- ½ tsp salt
2. For the filling:
- ½ cup brown sugar
- 2 tbsp granulated sugar
- 2 ½ tsp ground cinnamon
- ⅛ tsp nutmeg (optional)
- ¼ cup unsalted butter, softened
3. For the frosting:
- 4 oz cream cheese, softened
- 3 tbsp unsalted butter, softened
- 1 cup powdered sugar
- ½ tsp vanilla extract
- 1–2 tbsp milk
- Orange gel food coloring
Instructions
- In a bowl, mix warm milk, yeast, and 1 tsp sugar. Let it sit for 5–10 minutes until foamy.
- Add melted butter, egg, remaining sugar, and salt. Stir in flour gradually until a soft dough forms. Knead 5–7 minutes, then let rise 1 hour until doubled.
- Mix filling ingredients into a spreadable paste.
- Roll dough into a 12×18-inch rectangle. Spread filling evenly, leaving a small border.
- Roll tightly, cut into 12 pieces, and place in a greased baking dish.
- Bake at 350°F (175°C) for 20–25 minutes until golden and puffed.
- Beat frosting ingredients until smooth. Tint half with orange food coloring.
- Spread, drizzle, or pipe frosting on cooled rolls. Add chocolate drizzle for spiderwebs or candy eyes for fun.
Notes
- For a faster version, use store-bought dough.
- For vegan rolls, use plant-based butter and cream cheese.
- For gluten-free, use a 1:1 gluten-free flour blend.
- Prep Time: 25 minutes
- Cook Time: 25 minutes
- Category: Breakfast, Dessert
- Method: Baking
- Cuisine: American
Nutrition
- Serving Size: 12
- Calories: 310
- Sugar: 20g
- Sodium: 160mg
- Fat: 12g
- Saturated Fat: 7g
- Unsaturated Fat: 4g
- Trans Fat: 0g
- Carbohydrates: 44g
- Fiber: 2g
- Protein: 5g
- Cholesterol: 35mg


