Grilled Corn on the Cob

There’s something truly magical about summer evenings when the smoky aroma of grilled corn drifts through the air. For me, this recipe isn’t just about food—it’s about memories of backyard barbecues, family gatherings, and that satisfying crunch when you bite into sweet, buttery corn straight off the grill.
I started making grilled corn on the cob because I wanted something simple, fresh, and delicious that everyone—from kids to adults—would enjoy. Over time, I realized this dish has a way of bringing people together. It’s rustic, wholesome, and versatile enough to dress up for a fancy dinner or keep casual for a quick weekend cookout.
If you’ve only ever boiled corn, you’re in for a treat. The grill transforms this humble vegetable, charring it lightly while locking in sweetness. With just a touch of butter, seasoning, or maybe even a sprinkle of cheese, you’ll see why grilled corn is a recipe worth keeping in your rotation.
Why You’ll Love My Recipe
What I love most about grilled corn on the cob is how effortless it is. You don’t need complicated marinades or hours in the kitchen. A few fresh ears of corn, some butter, a dash of seasoning, and a hot grill are all it takes.
The real specialty of this recipe lies in its smoky flavor and the texture you just can’t replicate with boiling or baking. The kernels stay juicy but take on a beautiful char that makes every bite a mix of sweetness and smokiness. It feels like a celebration of summer itself.
Another reason this recipe is special is its versatility. You can enjoy it plain with butter and salt, or you can take it to the next level with spices, fresh herbs, lime juice, or even crumbled cheese. It adapts to your mood, your menu, and your guests.
For anyone who loves entertaining, grilled corn is also a crowd-pleaser. You can cook several cobs at once, set them on a platter, and let everyone customize their own with different toppings. It becomes more than just food—it’s an experience.
Ingredients for Grilled Corn on the Cob
To make this recipe, you don’t need a long grocery list. In fact, the beauty of it is that it’s built on just a few simple ingredients. But those few ingredients are what make all the difference.
The essentials you’ll need are:
- Fresh corn on the cob – The fresher the corn, the sweeter and juicier the result. I always recommend buying corn with the husks still on, as it keeps the kernels protected and moist until grilling.
- Butter – Unsalted butter is best so you can control the seasoning. It melts beautifully and enhances the corn’s natural sweetness.
- Salt – A sprinkle of coarse sea salt or kosher salt helps balance the sweetness.
- Black pepper – Optional, but it adds a little warmth and depth.
Those are the basics, but here’s where the fun begins—you can easily customize. Some people love adding a squeeze of lime, a sprinkle of chili powder, or even parmesan cheese for a bold twist.
When you gather your ingredients, think about whether you want to keep it simple or try something new. That’s the beauty of grilled corn—it’s a blank canvas for flavor.
How Much Time Will You Need
This recipe is wonderfully quick and easy. From start to finish, you’ll need about 25–30 minutes.
Here’s how it breaks down:
- Prep time: 10 minutes (shucking corn and preparing butter or seasoning).
- Cooking time: 12–15 minutes on the grill, depending on the heat and your preferred level of char.
That means you can easily make this on a busy weeknight, or add it to your weekend grilling lineup without spending all day in the kitchen.
How to Make This Grilled Corn on the Cob
Here’s a step-by-step guide that walks you through everything you need to do.
Step – 1: Prepare the corn
Start by removing the husks and silk from each ear of corn. Rinse them gently under cool water to wash away any remaining strands. If you prefer a softer texture, you can soak the corn in cold water for 10 minutes before grilling, but this step is optional.
Step – 2: Preheat the grill
Heat your grill to medium-high, around 400°F (200°C). You want it hot enough to sear the corn but not so hot that it burns before cooking through.
Step – 3: Season the corn
Brush each ear of corn lightly with melted butter. Sprinkle with salt and pepper, or keep it plain if you’d rather add seasoning later.
Step – 4: Place the corn on the grill
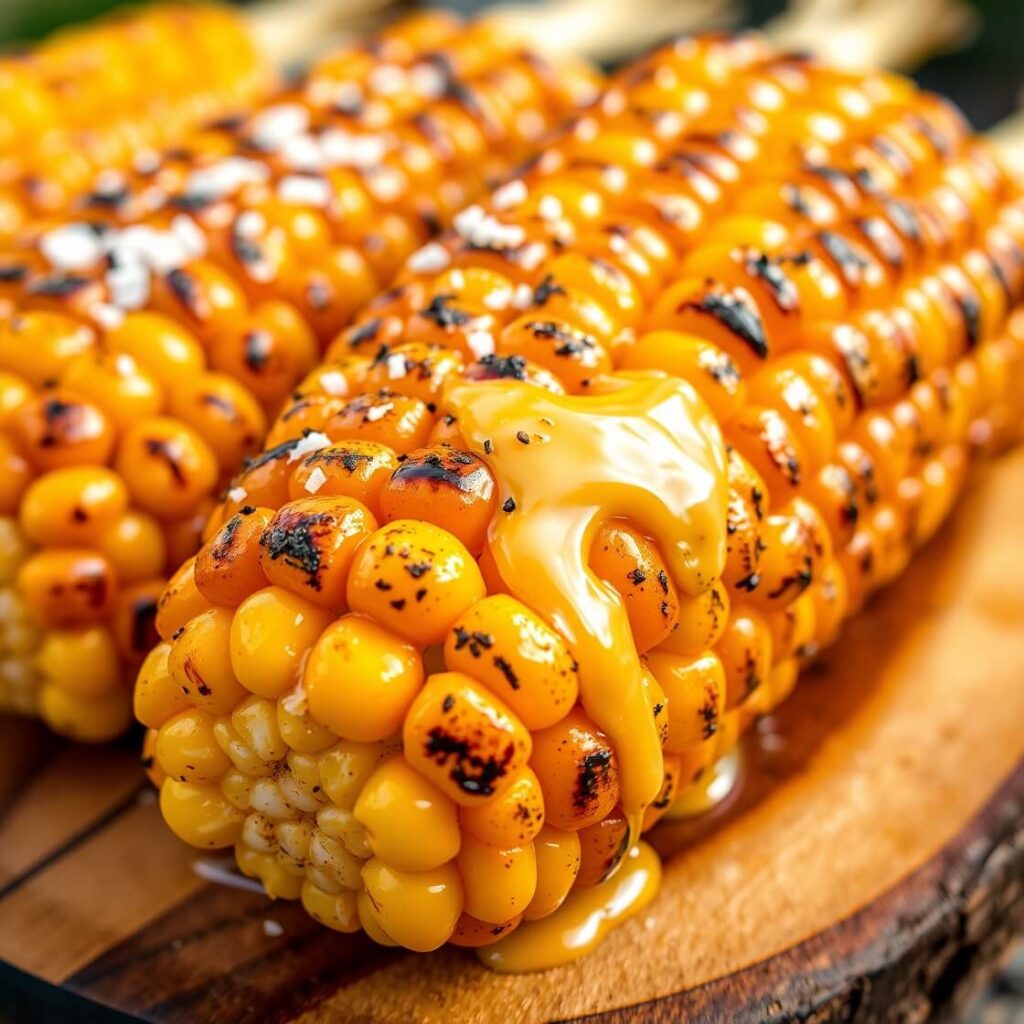
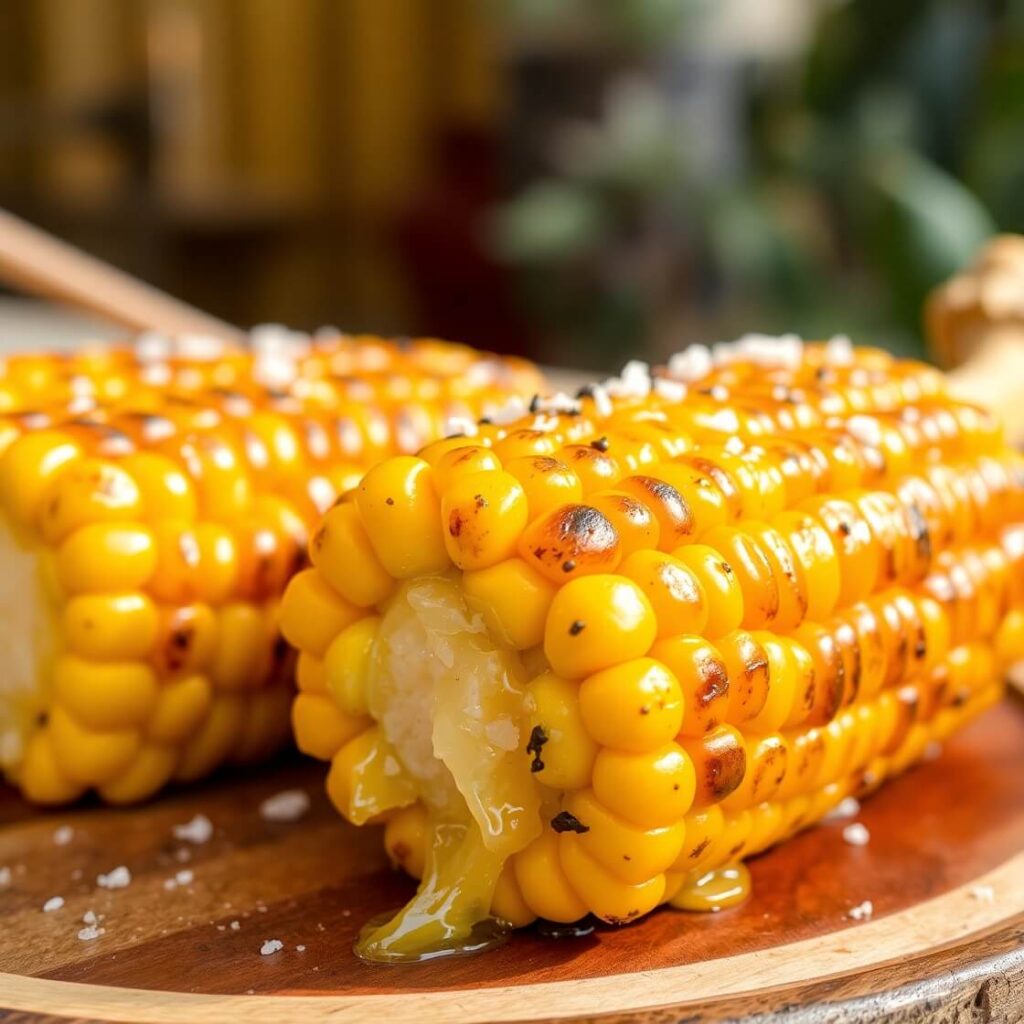
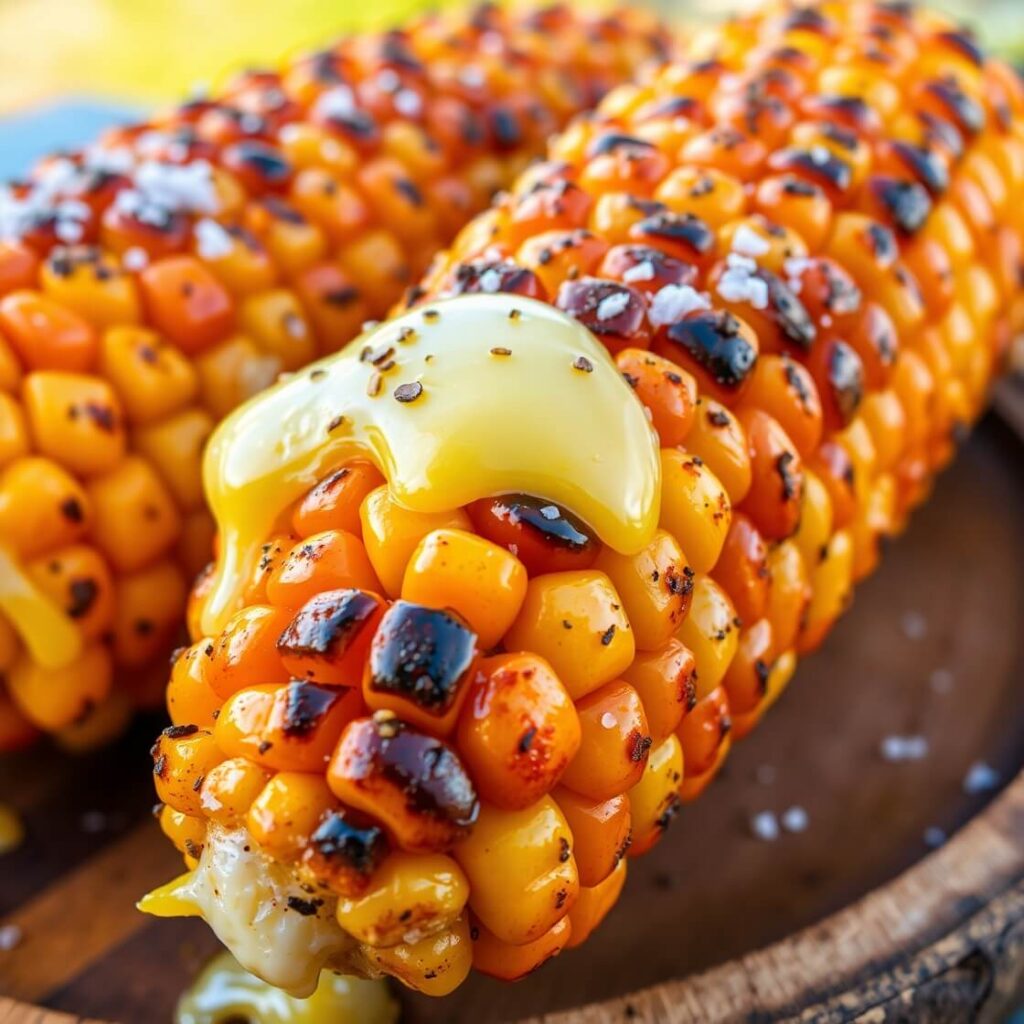
Lay the corn directly on the grates. Close the lid and cook for about 10–12 minutes, turning every few minutes to ensure even charring. The kernels should be tender and lightly browned in spots.
Step – 5: Add finishing touches
Once the corn is grilled, brush on a little more melted butter while it’s still hot. This is also the time to add any extra toppings, like chili powder, lime juice, or grated cheese.
Step – 6: Serve immediately
Grilled corn is best enjoyed fresh off the grill, when it’s still steaming and the butter melts into every kernel.
Best Side Dish of Grilled Corn on the Cob
Grilled corn is fantastic on its own, but it pairs beautifully with a variety of side dishes. Here are three options that elevate the meal:
- Grilled chicken or steak – A hearty protein that balances the sweetness of the corn.
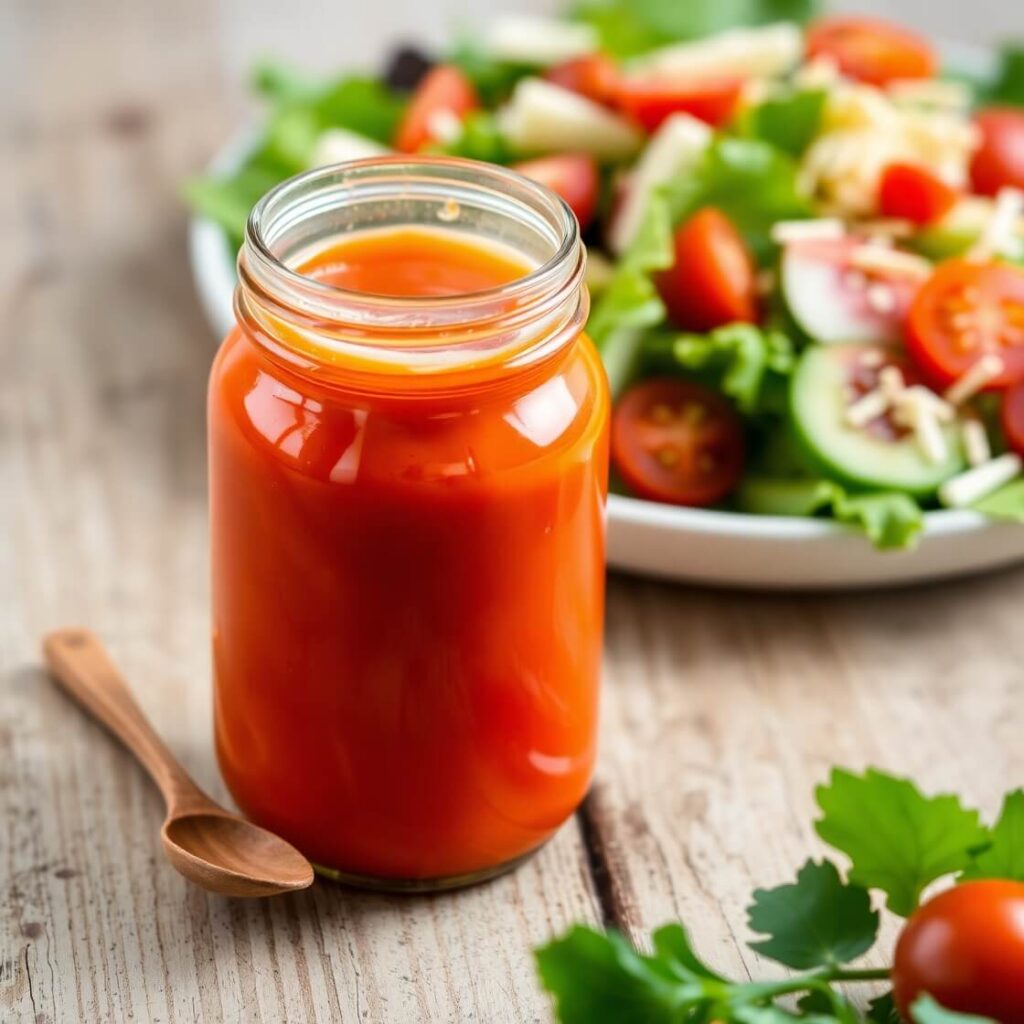
- Fresh garden salad – Crisp, refreshing greens with a light vinaigrette make the meal feel complete without being too heavy.
- Baked potatoes – Creamy, fluffy potatoes complement the smoky corn and give you a satisfying, comforting combination.
Tips From the Expert (That’s Me!)
Even a simple recipe like grilled corn can be elevated with a few tricks:
- Keep the husks on while grilling for a softer, slightly steamed texture. Peel back the husks only at the end to brush with butter.
- Soak corn in cold water for 10 minutes before grilling to prevent burning and retain moisture.
- Rotate the corn frequently to achieve an even char and avoid blackened spots.
- Experiment with flavored butters—garlic, lime, or smoked paprika butter can transform the flavor.
- Try finishing the corn with a squeeze of fresh lime juice and a sprinkle of cheese for a vibrant, Mexican-style elote twist.
These simple adjustments can make your grilled corn more flavorful and memorable, even if you’re cooking for just a few people.
How to Store It
Grilled corn is best enjoyed immediately, but leftovers can be stored for later:
- Let the corn cool completely, then wrap each ear individually in plastic wrap or place in an airtight container.
- Refrigerate for up to 3 days. Reheat gently in the microwave or on a skillet to avoid drying out the kernels.
- You can also freeze cooked corn. Remove the kernels from the cob and store in freezer-safe bags for up to 3 months. Reheat by steaming or sautéing lightly.
Proper storage ensures you can enjoy this smoky, buttery goodness even after your barbecue is over.
FAQ
Can I grill corn without a grill?
Yes! You can roast corn in the oven at 425°F (220°C) for 15–20 minutes or use a stovetop grill pan. You’ll still get that lovely char.
Should I remove the husks before grilling?
It depends on the texture you want. Removing husks gives a smoky, charred flavor. Leaving them on creates a softer, slightly steamed result.
Can I make this recipe vegan?
Absolutely! Simply replace butter with olive oil or a plant-based margarine. You’ll still get a deliciously rich flavor.
How do I know when the corn is done?
The kernels should be tender but not mushy, and lightly browned or charred in spots. Rotate frequently to cook evenly.
Can I add spices before grilling?
Yes! You can sprinkle spices like paprika, chili powder, or garlic powder directly on the corn or mix them with melted butter.

Grilled Corn on the Cob
- Total Time: 25 minutes
- Yield: 4–6 1x
- Diet: Vegetarian
Description
There’s something undeniably satisfying about biting into smoky, buttery grilled corn. Perfect for summer barbecues, casual dinners, or just a quick weekday treat, this recipe highlights the natural sweetness of corn while adding a touch of char and flavor. It’s simple to make, versatile, and loved by everyone. With just a few ingredients and minimal prep, you can elevate a humble cob into a delicious centerpiece.
Ingredients
- 4–6 ears of fresh corn, husked
- 3–4 tbsp unsalted butter, melted
- Salt to taste
- Black pepper to taste
- Optional: chili powder, paprika, lime juice, parmesan cheese
Instructions
- Preheat the grill to medium-high heat.
- Brush corn with melted butter and season with salt and pepper.
- Place corn on the grill and cook 10–12 minutes, turning every few minutes.
- Remove from the grill and brush with additional butter.
- Add optional toppings like spices, lime, or cheese.
- Serve hot and enjoy!
Notes
- For softer corn, soak husked corn in water for 10 minutes before grilling.
- Rotate corn frequently to avoid burning.
- Customize with your favorite spices or flavored butter.
- Prep Time: 10 minutes
- Cook Time: 12–15 minutes
- Category: Side Dish
- Method: Grilling
- Cuisine: American
Nutrition
- Serving Size: 4–6
- Calories: 150
- Sugar: 6g
- Sodium: 200mg
- Fat: 7g
- Saturated Fat: 4g
- Unsaturated Fat: 3g
- Trans Fat: 0g
- Carbohydrates: 20g
- Fiber: 2g
- Protein: 3g
- Cholesterol: 15mg