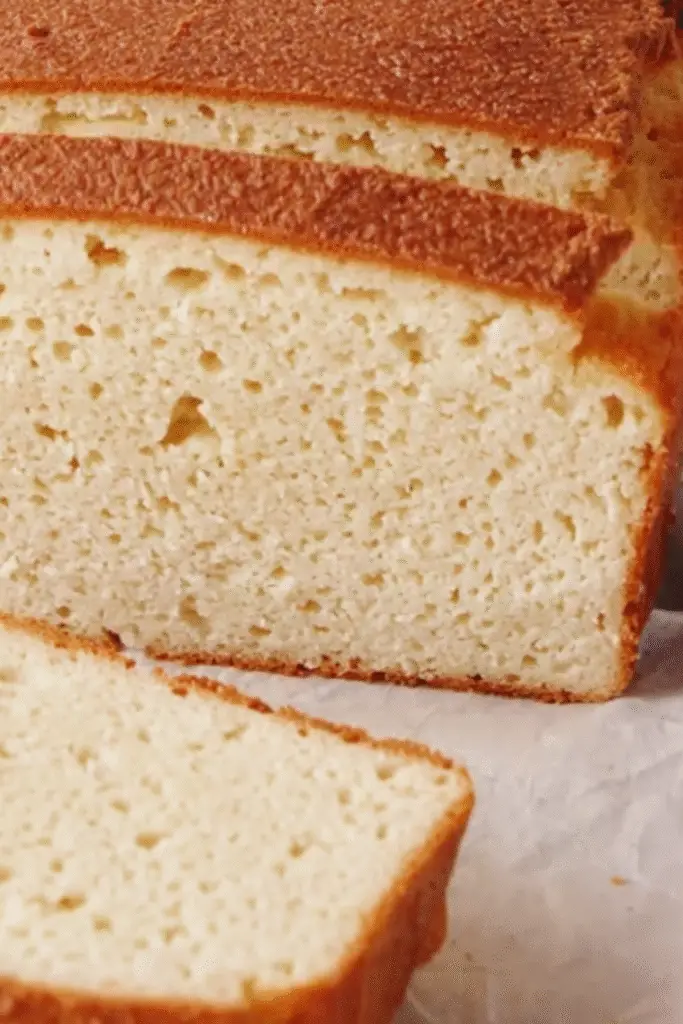
Easy Gluten Free Bread
The first time I baked gluten-free bread at home, I wasn’t sure what to expect. A chilly Sunday morning and a bag of gluten-free flour turned into both a challenge and a revelation. My first loaf was far from perfect sticky, dense, and uneven but it filled the kitchen with the same warm, comforting aroma I love about fresh bread.
That early attempt taught me something valuable: gluten-free bread isn’t about copying traditional loaves it’s about embracing unique textures and flavors. With the right balance of ingredients and a little patience, it can be every bit as satisfying, and perhaps even more rewarding, than the classic wheat loaf.
Ingredients
Gluten-free bread has its own set of rules, and knowing your ingredients is half the battle. Here’s what I use in my favorite loaf:
- Gluten-free all-purpose flour – Look for a blend that already includes xanthan gum. If it doesn’t, you’ll need to add about 1 teaspoon per cup of flour.
- Warm water – Essential for activating yeast.
- Active dry yeast – The backbone of that classic bread rise.
- Honey or maple syrup – Just a touch to feed the yeast and add subtle sweetness.
- Olive oil or melted butter – Keeps the crumb soft and adds richness.
- Salt – Enhances flavor and balances the sweetness.
- Optional: seeds, nuts, or dried fruit for texture and flavor.
When I shop, I gravitate toward brands that keep their flour light and airy. Gluten-free flour blends can sometimes be heavy, so avoid anything that’s labeled strictly “dense” unless that’s the texture you prefer.
Everything You Need to Make the Best Garlic Bread
Baking gluten-free bread requires attention, but it’s wonderfully forgiving if you trust your senses. Here’s how I approach it:
- Activate the yeast – In a small bowl, mix warm water with honey and yeast. Let it sit for 5–10 minutes until foamy. The smell of yeast blooming is always a little magical.
- Mix the dry ingredients – In a large bowl, combine your flour and salt. If your blend doesn’t include xanthan gum, add it here.
- Combine wet and dry – Pour the yeast mixture and olive oil into the flour. Stir until smooth. Gluten-free dough is sticky, so don’t be alarmed.
- First rise – Cover with a damp cloth and let the dough rise in a warm spot for about an hour. It won’t double like wheat dough, but it should feel puffier.
- Shape and second rise – Transfer the dough into a greased loaf pan. Smooth the top with a wet spatula, cover, and let it rise for another 20–30 minutes.
- Bake – Preheat your oven to 375°F (190°C). Bake for 35–45 minutes. The top should be golden, and the loaf should sound hollow when tapped.
- Cool – Let it cool completely before slicing. Gluten-free bread continues to firm up as it cools, so patience pays off.
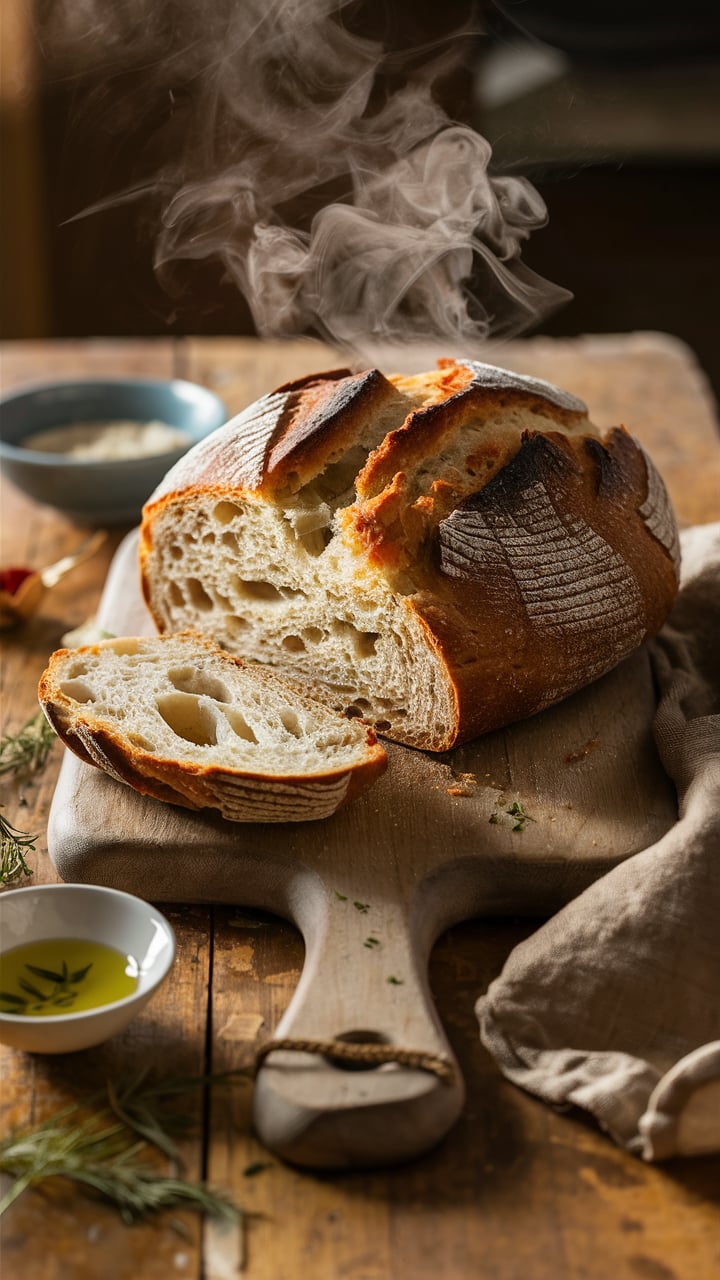
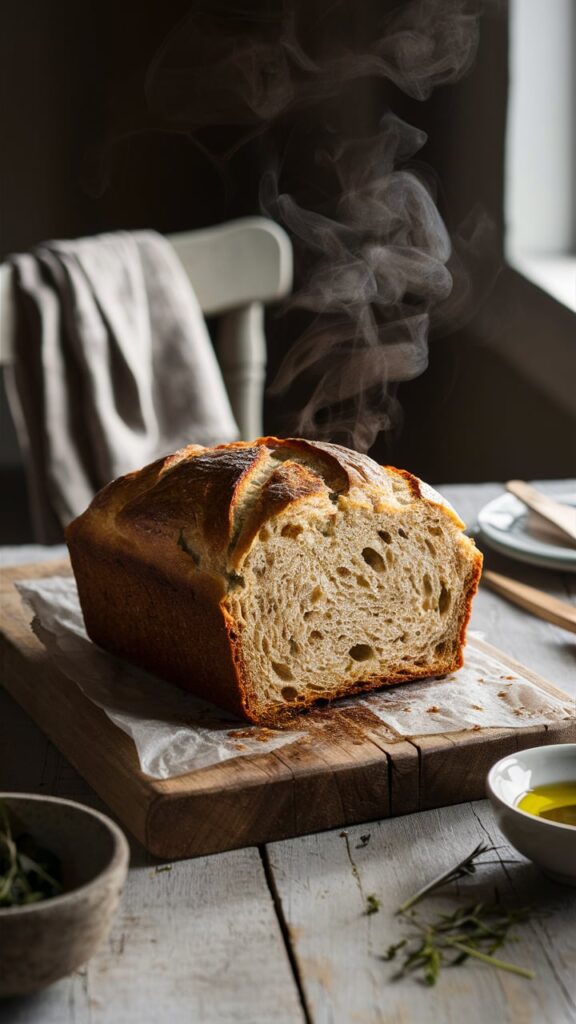
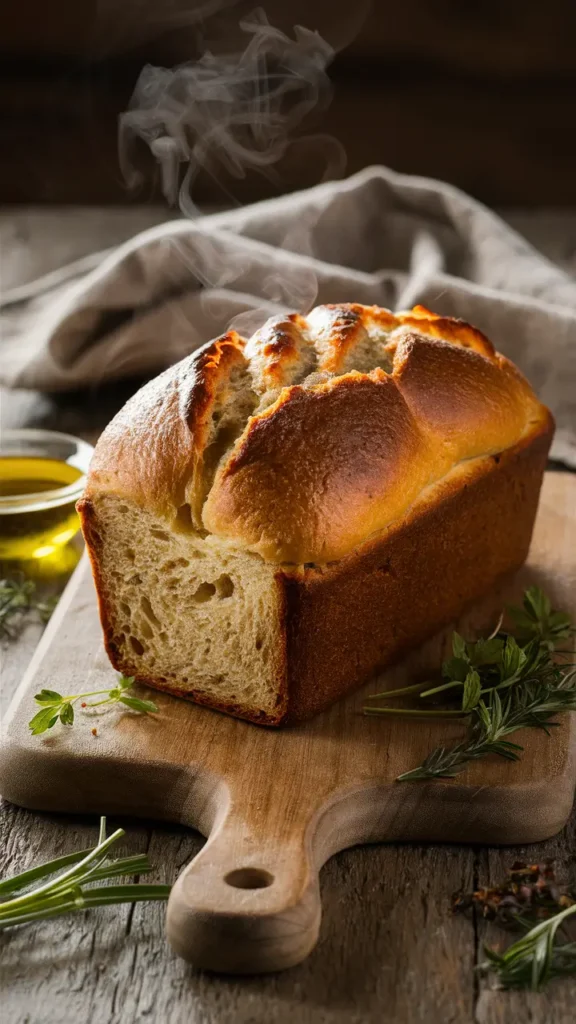
I love watching the loaf come out of the oven, still warm, the crust gently crackling. It’s the kind of moment that makes the kitchen feel like a little sanctuary.
Serving Suggestions
Gluten-free bread shines best when it’s part of a meal rather than just a loaf on the counter. One of my favorite ways to enjoy it is simply toasted with a smear of creamy almond butter and a drizzle of honey. The warmth brings out a subtle sweetness, and the crunchy edges give just enough texture contrast.
For a savory twist, I often use thick slices for open-faced sandwiches with roasted vegetables, fresh herbs, and a sprinkle of feta. It holds up beautifully without crumbling, which is a common concern with gluten-free loaves. Another favorite at breakfast is using it as a base for avocado toast, topped with a pinch of chili flakes and a squeeze of lemon—the bright flavors balance the bread’s mild sweetness perfectly.
I’ve even turned this loaf into a quick stuffing for holiday meals. Cubes of lightly toasted gluten-free bread mixed with sautéed onions, celery, herbs, and a touch of broth create a savory side that everyone, gluten-free or not, enjoys.
Pro Notes & Mistakes to Avoid
Baking gluten-free bread comes with its quirks, and learning a few pro tips can save you frustration:
- Patience with rising: Gluten-free dough doesn’t behave like wheat dough. It won’t double in size, but it should look slightly puffed. Rushing this step can result in a dense loaf.
- Moisture matters: Too much flour can make it dry; too little makes it sticky and difficult to shape. Use your hands to gauge consistency—it should feel like a thick, slightly sticky batter.
- Check your oven temperature: Gluten-free loaves can brown quickly. If the crust gets too dark before the center is baked, tent the loaf with foil.
- Cool completely: Slicing too early is a classic mistake. The loaf continues to set as it cools; cutting it too soon can make it gummy.
I remember the first time I ignored this advice—I cut into my loaf right out of the oven, and the center stuck to every knife and plate. A valuable lesson learned!
Storage and Make-Ahead Tips
Gluten-free bread is at its peak in the first 24–48 hours. To extend freshness:
- Room temperature: Store in an airtight container for 1–2 days.
- Freezing: Slice the loaf and wrap portions in parchment or freezer-safe bags. Toast slices directly from frozen for a near-fresh taste.
- Make-ahead: You can mix the dough the night before, refrigerate it, and bake the next morning. Allow the dough to come to room temperature before baking for best results.
A little planning goes a long way, especially if you like having fresh bread available without daily baking.
Print
Gluten Free Bread
- Total Time: 2 hours 30 minutes
- Yield: 1 loaf 1x
- Diet: Gluten Free
Description
This gluten free bread is soft, sliceable, and tastes like the real thing. With a golden crust and airy crumb, it’s perfect for sandwiches, toast, or enjoying fresh from the oven. Whether you’re gluten intolerant or just exploring new baking territory, this bread offers the satisfaction of homemade loaves—without any wheat. Made with pantry staples and minimal fuss, it’s beginner-friendly, customizable, and delicious.
Ingredients
- 2½ cups gluten free all-purpose flour blend (with xanthan gum)
- 1 tbsp psyllium husk powder
- 2¼ tsp instant yeast
- 1¾ cups warm water (around 110°F)
- ¼ cup olive oil
- 2 large eggs, room temperature
- 1 tbsp honey or maple syrup
- 1 tsp apple cider vinegar
- 1 tsp salt
Instructions
-
Mix warm water with honey and yeast. Let sit until foamy (about 5–10 minutes).
-
In a large bowl, whisk flour, psyllium husk, and salt.
-
Add the eggs, oil, vinegar, and yeast mixture to the dry mix.
-
Beat on medium-high for 3–4 minutes until the dough becomes thick and sticky.
-
Spoon into a greased or parchment-lined loaf pan. Smooth the top.
-
Cover and let rise in a warm area until doubled (about 60–75 minutes).
-
Bake at 375°F (190°C) for 45–50 minutes until golden and cooked through.
-
Cool completely on a wire rack before slicing.
Notes
For best results, use a flour blend that contains xanthan gum.
Let the bread cool fully before slicing to maintain structure.
For richer flavor, substitute part of the water with unsweetened plant milk.
- Prep Time: 20 minutes
- Cook Time: 50 minutes
- Category: Bread
- Method: Baking
- Cuisine: American
Nutrition
- Serving Size: 1 slice (1/10 of loaf)
- Calories: 185
- Sugar: 1g