Dark Chocolate Mousse Recipe
I remember the first time I made dark chocolate mousse vividly—it was one of those quiet evenings when the house finally exhaled after a long day. The rain had been tapping on the kitchen window, and I was craving something indulgent but soothing. I didn’t want cake, or cookies, or even brownies. I wanted something that melted like silk and whispered, “You deserve this.”
Back then, I had no idea that a perfect mousse was all about balance—between air and cream, between rich darkness and delicate sweetness. My first attempt was clumsy; I overwhipped the cream, folded too hard, and ended up with what I lovingly called “chocolate foam.” Still, the flavor was promising enough to try again.
A few weeks later, I made another batch—this time taking my time, listening to the chocolate as it melted slowly, watching the cream reach that glossy, cloud-like peak. When I finally dipped my spoon in and tasted it, the world stood still for a moment. Smooth. Bitter. Sweet. Deep.
That second attempt became the standard in my kitchen. Now, whenever I make it for friends or family, I still get that same sense of calm luxury. My husband calls it “the dessert version of a cashmere blanket,” and honestly, I can’t think of a better description.
Gathering What Matters: The Ingredients
The beauty of dark chocolate mousse lies in its simplicity—just a few quality ingredients come together to create something truly special. But because there are so few, each one matters.
Here’s how I think about each component when I shop or prepare:
Dark Chocolate (70% cocoa or higher)
This is where the magic begins. I like to use a rich bar of dark chocolate rather than chips, since bars tend to melt more smoothly. The better the chocolate, the more complex and velvety the mousse will taste. If you prefer something slightly less bitter, you can mix half dark and half semisweet.
Eggs (room temperature)
Eggs give mousse its lift and creamy body. The yolks add richness, while the whites make it airy and light. Using fresh, room-temperature eggs makes whipping easier and gives a smoother texture.
Sugar (granulated or superfine)
You’ll only need a small amount—enough to balance the intensity of the chocolate without making it overly sweet. If you have superfine sugar on hand, it dissolves faster when whipping egg whites.
Heavy Cream (cold)
Cold cream whips better, so keep it refrigerated until the moment you need it. This adds the luscious, creamy texture that makes mousse feel indulgent and silky.
Butter (unsalted)
A touch of butter gives the mousse extra richness and helps the melted chocolate stay glossy when combined with the eggs and cream.
A Pinch of Salt + Vanilla Extract
Just a pinch of salt brings out the chocolate’s depth, while vanilla rounds off any sharp edges of bitterness.
You don’t need anything fancy—no stabilizers or thickeners. The magic is in technique and patience.
Step-by-Step: How I Make My Dreamy Dark Chocolate Mousse
Every time I make this mousse, I move slowly and deliberately. It’s not a recipe to rush. The whole process feels like meditation in motion—the stirring, folding, and gentle layering of textures until it becomes something almost ethereal.
Step 1: Melt the Chocolate and Butter
Start by chopping the dark chocolate into fine pieces—it melts more evenly that way. Place it in a heatproof bowl along with the butter.
Set the bowl over a pot of simmering water (double boiler style), making sure the bottom doesn’t touch the water. Stir occasionally until the chocolate is smooth, glossy, and fully melted.
Remove from heat and let it cool slightly—just warm to the touch, not hot. If the chocolate is too warm when you add the eggs later, it could scramble them, so this step matters.
Step 2: Whip the Egg Whites
Separate the eggs carefully—no yolk should sneak into the whites or they won’t whip properly.
In a clean, dry bowl, start whipping the whites on medium speed. When they begin to foam, sprinkle in the sugar a little at a time and increase the speed. Keep beating until you get soft peaks—fluffy, glossy, and able to hold their shape when you lift the whisk.
This part always reminds me of childhood baking sessions with my mother. She’d tilt the bowl upside down to show me when the whites were ready—if they didn’t fall, they were perfect. It still makes me smile when I do that now.
Step 3: Whip the Cream
In another chilled bowl, whip the heavy cream until it holds soft peaks. You want it to be firm enough to add body, but not overwhipped. If it starts looking grainy, you’ve gone too far. I find that stopping the mixer just when the cream looks cloud-like and slightly glossy gives the best texture later.
Step 4: Combine the Yolks and Chocolate
Whisk the egg yolks into the slightly cooled melted chocolate. The mixture will thicken and darken—don’t worry, that’s a good sign. The yolks add richness and stability.
Step 5: Fold It All Together
This step is where the mousse truly comes to life—and where patience pays off.
First, take about a third of your whipped egg whites and gently fold them into the chocolate mixture. This lightens the base. Then, add the rest in two more additions, folding gently with a spatula. Use a light hand—scoop from the bottom and fold over the top to keep as much air as possible.
Finally, fold in the whipped cream just until no streaks remain. The texture should be smooth, airy, and slightly glossy. Overmixing here can deflate it, so resist the urge to keep stirring.
Step 6: Chill and Set
Spoon the mousse into serving glasses or bowls, cover with plastic wrap, and refrigerate for at least 3 hours. Overnight is even better. The mousse will firm up slightly while staying luxuriously creamy.
When you finally dig your spoon in, you’ll feel that perfect resistance—the way it yields just enough before melting on your tongue. It’s the kind of dessert that makes silence fall around the table.
Notes from My Kitchen: Lessons Learned the Hard Way
I’ve made this recipe enough times to have learned a few valuable lessons along the way—some the easy way, others through trial and error.
Don’t rush the melting chocolate.
If the chocolate overheats, it seizes, turning grainy and stiff. Keep the water simmering gently and stir often.
Cool the chocolate before adding eggs.
Too warm, and the eggs will curdle. I like to touch the bowl—it should feel slightly warm, never hot.
Fold, don’t stir.
The lightness of mousse depends on the air in the whipped whites and cream. Use a slow, deliberate folding motion.
Chill thoroughly.
Even if it looks set after an hour, resist. The flavor deepens and the texture improves after at least three hours of chilling.
Use real dark chocolate.
Cocoa powder doesn’t work here—it lacks the cocoa butter that gives mousse its smooth, melt-away quality.
Keeping It Fresh: Storage and Make-Ahead Tips
One of the best things about dark chocolate mousse—aside from how divine it tastes—is how beautifully it keeps. I’ve learned over time that mousse actually improves after resting. The flavors mellow and deepen, and the texture becomes silkier by the hour.
Here’s how I handle it for different occasions:
Refrigerator Storage
Once you’ve spooned the mousse into serving dishes, cover each with plastic wrap. I press the wrap gently against the surface so no condensation forms. Stored this way, the mousse stays fresh for up to 3 days.
The flavor is at its absolute peak between 12 and 36 hours after chilling. I often make it the night before a gathering—it saves time and tastes even better.
Freezer Option
If you ever find yourself with leftovers (rare, but it happens), you can freeze the mousse for up to a month. When ready to serve, move it to the refrigerator and let it thaw slowly overnight. It won’t be quite as airy as freshly made, but it turns into something close to a frozen chocolate truffle cream—still utterly irresistible.
Make-Ahead for Guests
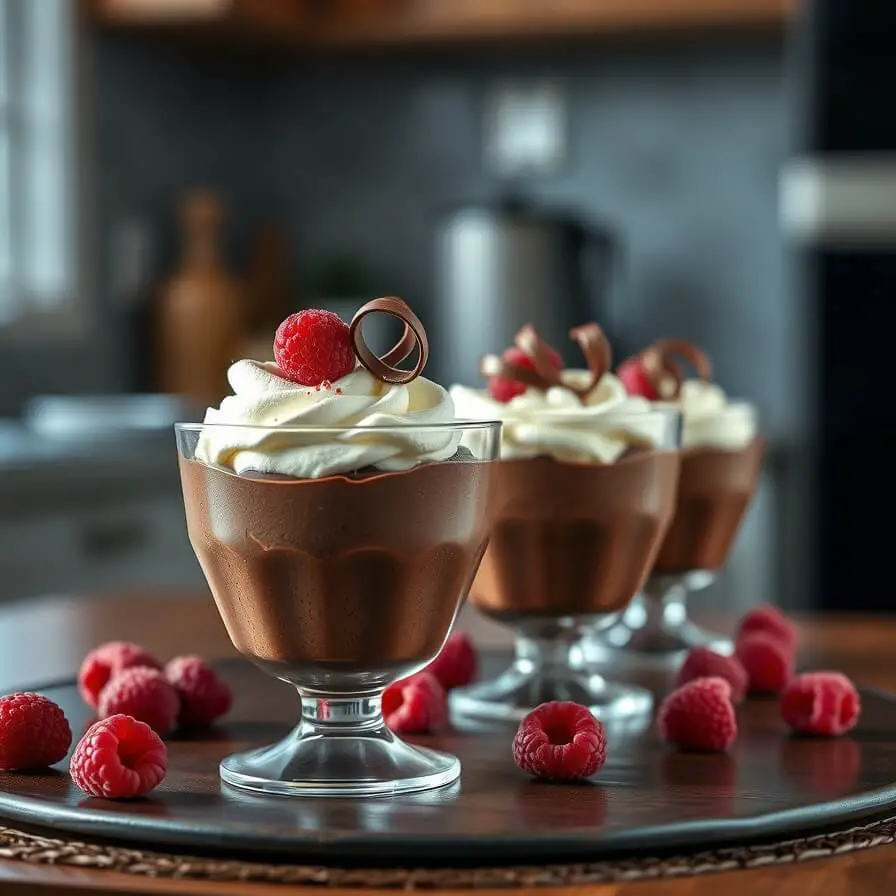
When entertaining, I portion the mousse into small glass jars or espresso cups, top them with a thin layer of plastic wrap, and refrigerate overnight. Just before serving, I add the garnish—whipped cream, grated chocolate, or a few fresh berries. This way, you can focus on the meal and let dessert simply appear like magic.
Substitutions and Adaptations
Every kitchen has its quirks, and every cook their preferences. Over the years, I’ve tried a few variations of this mousse—some for dietary needs, others just for fun. Here’s what I’ve learned works (and what doesn’t).
For a Dairy-Free Version:
Replace the heavy cream with chilled full-fat coconut cream. Whip it just as you would dairy cream (scoop the solid part from a refrigerated can, leaving the liquid behind). The result will have a light coconut undertone that actually complements dark chocolate beautifully.
For a Vegan Version:
Skip the eggs and use aquafaba (the liquid from canned chickpeas) to mimic whipped egg whites. Three tablespoons of aquafaba equal one egg white. Whip it with a little sugar until glossy peaks form. Combine this with melted dark vegan chocolate and coconut cream for a surprisingly luscious mousse.
If You Don’t Have Dark Chocolate:
You can use semisweet or bittersweet chocolate, but reduce the sugar slightly. Avoid milk chocolate—it tends to be too sweet and won’t set as firmly.
For a Liqueur Twist:
A splash (1–2 tablespoons) of coffee liqueur, rum, or orange liqueur turns this into a more grown-up dessert. Add it to the chocolate after melting but before folding in the eggs. It adds warmth and depth—especially nice for winter evenings.
For a Sugar-Free Option:
Use stevia or erythritol instead of granulated sugar, and a high-quality dark chocolate sweetened with stevia. The texture remains silky if you whip everything gently.
My Pro Notes: What Experience Has Taught Me

Making mousse has become almost ritualistic for me—something I do when I need grounding. But even now, I still pay attention to a few details that separate a good mousse from a transcendent one.
1. The Temperature Matters More Than You Think
Chocolate that’s too hot can ruin everything. Once melted, it should feel just barely warm. I’ve ruined a few batches by being impatient here—egg bits floating in chocolate are not the look you’re going for.
2. Whipping Is a Balancing Act
Undermixed cream makes mousse heavy; overmixed makes it grainy. When in doubt, stop a few seconds earlier—soft peaks blend more smoothly and hold air better.
3. Use Glass or Metal Bowls Only
Plastic bowls retain oil residue that can sabotage your egg whites. A clean glass or stainless-steel bowl guarantees a stable whip every time.
4. Always Fold Slowly
Think of folding as coaxing rather than mixing. My trick? I use a large spatula and rotate the bowl slowly as I fold. The goal is to keep those air bubbles alive—each one is a tiny cushion of lightness.
5. Quality Over Quantity
Because the recipe uses so few ingredients, splurging on good chocolate and real vanilla extract makes a world of difference. I once made this with a cheap bar in a pinch—the texture was fine, but the flavor lacked that lingering richness. Lesson learned.
Frequently Asked Questions
Can I use pasteurized eggs instead of raw ones?
Yes, absolutely. Pasteurized eggs work beautifully and make the recipe safer for everyone. They whip the same way and taste identical once combined.
Why did my mousse turn grainy?
Most likely, the chocolate got too hot or the cream was overwhipped. Next time, let the chocolate cool longer before adding eggs, and stop whipping the cream earlier.
Can I flavor this with coffee or spices?
Definitely. Espresso powder intensifies the chocolate flavor—try adding half a teaspoon to the melted chocolate. A hint of cinnamon or chili also works wonderfully for a subtle kick.
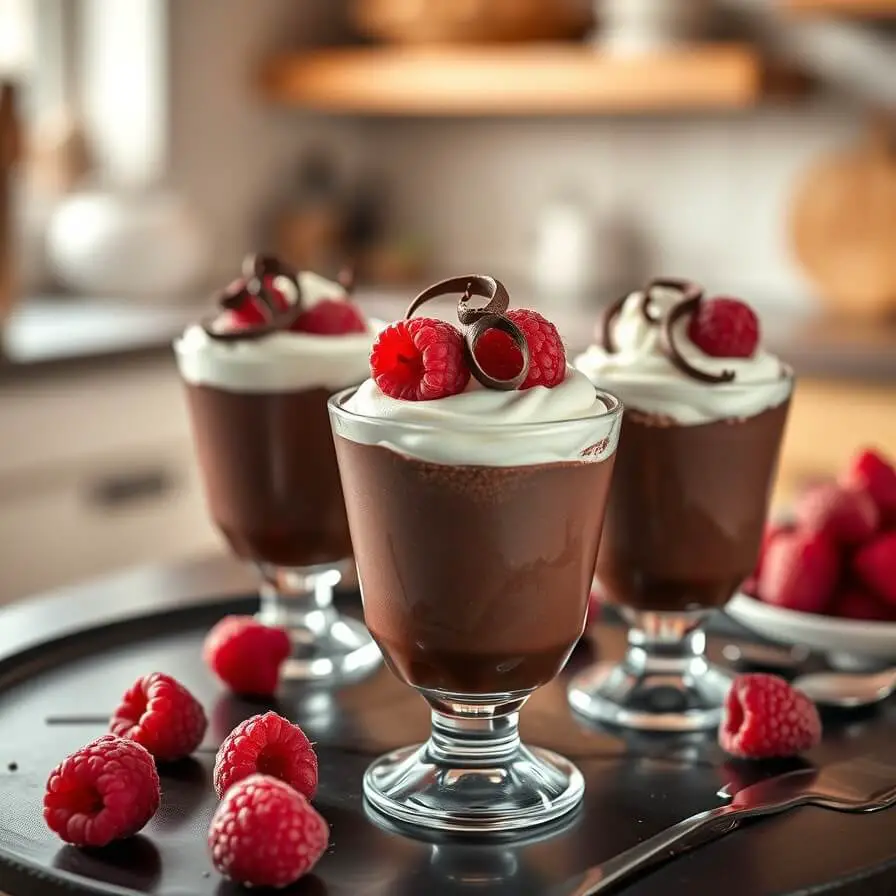
What’s the best topping for serving?
A dollop of whipped cream, dark chocolate curls, raspberries, or even sea salt flakes. Keep it simple; the mousse should always be the star.
How long should I chill it before serving?
At least 3 hours. I find that overnight gives the most luxurious texture.

Dark Chocolate Mousse Recipe
- Total Time: 3 hours 35 minutes
- Yield: 4–6 1x
- Diet: Vegetarian
Description
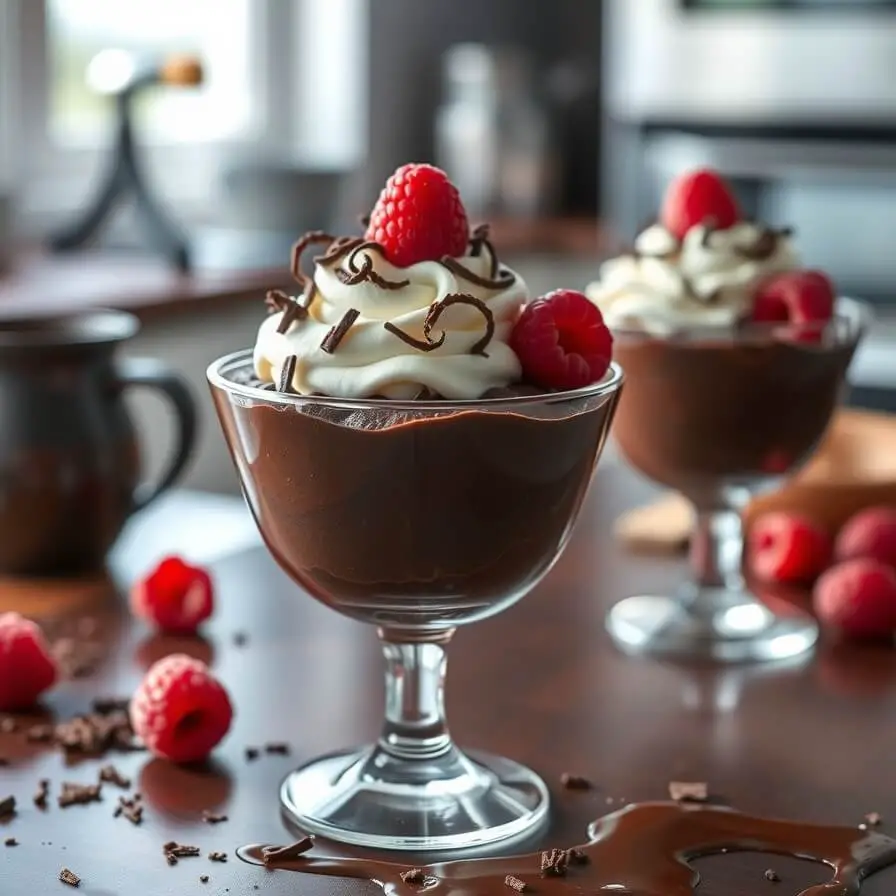
This dark chocolate mousse is pure elegance in a cup—velvety, airy, and deeply chocolatey without being cloying. It’s the kind of dessert that feels extravagant yet refreshingly simple to make. With just chocolate, eggs, cream, and a few pantry staples, you can create a restaurant-worthy dessert right in your own kitchen.
Ingredients
- 6 oz (170 g) dark chocolate (70% cocoa or higher), chopped
- 2 tbsp unsalted butter
- 3 large eggs, separated
- 3 tbsp sugar
- ¾ cup (180 ml) heavy cream, cold
- ½ tsp pure vanilla extract
- Pinch of salt
Instructions
- Place chopped chocolate and butter in a heatproof bowl over simmering water. Stir until smooth, glossy, and melted. Remove from heat and cool slightly.
- In a clean bowl, beat egg whites until foamy. Gradually add sugar and continue beating until soft, glossy peaks form.
- In another chilled bowl, whip heavy cream and vanilla until soft peaks form. Keep refrigerated.
- Whisk egg yolks into the cooled melted chocolate until smooth and thickened.
- Gently fold whipped egg whites into the chocolate mixture in three additions. Then fold in whipped cream until no streaks remain.
- Spoon mousse into glasses or ramekins. Cover and refrigerate for at least 3 hours or overnight.
- Top with whipped cream, chocolate curls, or fresh berries before serving.
Notes
- For a dairy-free version, use coconut cream.
- To make it boozy, add 1 tbsp of liqueur (rum, Kahlúa, or Grand Marnier) to the melted chocolate.
- Always use room-temperature eggs for the smoothest texture.
- Prep Time: 25 minutes
- Cook Time: 3 hours
- Category: Dessert
- Method: Whipped and chilled
- Cuisine: French-inspired
Nutrition
- Serving Size: 4–6
- Calories: 340
- Sugar: 16g
- Sodium: 48mg
- Fat: 27g
- Saturated Fat: 16g
- Unsaturated Fat: 10g
- Trans Fat: 0g
- Carbohydrates: 20g
- Fiber: 3g
- Protein: 6g
- Cholesterol: 125mg