Chicken Kabobs in the Oven Recipe
When I first made chicken kabobs in the oven, I was surprised by how flavorful and easy they turned out. Most people think of kabobs as a grill-only recipe, but baking chicken kabobs in the oven is a total game-changer. It’s simple, mess-free, and gives you tender, juicy chicken paired with perfectly roasted vegetables—all on one skewer.
This oven-baked chicken kabobs recipe is quick enough for weeknights yet impressive enough for guests. You can swap in your favorite seasonings and veggies, making it versatile for meal prep or family dinners. The best part? You get all the smoky, savory flavors of traditional grilled kabobs without needing a grill.
If you’ve been searching for a foolproof way to make juicy, restaurant-quality chicken kabobs at home, this recipe will become your go-to. Let’s dive in and turn simple ingredients into a colorful, flavorful feast.
Why You’ll Love It
What I love about oven-baked chicken kabobs is that they’re both simple and impressive. There’s something magical about the combination of juicy chicken pieces paired with crisp, caramelized vegetables. Every bite feels balanced—tender meat, slightly charred edges, and bursts of flavor from peppers, onions, and spices.
This recipe is special because it’s adaptable. You can switch up the vegetables based on seasonality or personal preference. You can even marinate the chicken in a variety of spices, yogurt, or citrus juices to create different flavor profiles. Making chicken kabobs in the oven also means you don’t have to worry about unpredictable weather or messy charcoal grills.
For me, it’s not just about cooking—it’s about creating a meal that feels festive, colorful, and nourishing. There’s something about threading the ingredients onto skewers that turns cooking into an experience, not just a chore. Plus, leftovers reheat beautifully for a quick lunch or dinner the next day.
What You’ll Need for Chicken Kabobs in the Oven
To make this recipe, you’ll need a handful of fresh, wholesome ingredients. Don’t worry, nothing complicated—just things you might already have in your kitchen. Here’s the breakdown:
- Chicken breast or thighs: I prefer boneless, skinless chicken breast for a leaner option, but thighs are juicier and forgiving if slightly overcooked. Cut into uniform chunks for even cooking.
- Vegetables: Bell peppers, red onions, zucchini, and cherry tomatoes work beautifully. You can mix and match your favorites, but aim for veggies that hold their shape in the oven.
- Olive oil: A light coating helps the chicken and veggies roast nicely while keeping them tender.
- Garlic: Minced garlic adds depth and aroma.
- Lemon juice: Brightens the flavors and tenderizes the chicken.
- Spices: A combination of smoked paprika, cumin, salt, black pepper, and a pinch of chili flakes gives warmth and subtle heat.
- Fresh herbs: Parsley or cilantro for garnish adds a burst of freshness at the end.
Having quality ingredients makes a huge difference, especially for a dish like this where every element is highlighted.
How Much Time Will You Need
The total time commitment for these oven-baked chicken kabobs is surprisingly minimal. Here’s a rough estimate:
- Prep time: 15–20 minutes for chopping chicken and vegetables, marinating, and threading skewers.
- Cook time: 20–25 minutes in the oven, depending on your chicken size and oven.
- Total time: About 45 minutes from start to finish.
This makes it perfect for a weeknight dinner when you want something special without spending hours in the kitchen.
How to Make Chicken Kabobs in the Oven
Step-by-step, here’s how I make my oven-baked chicken kabobs, keeping everything juicy, flavorful, and visually appealing.
Step – 1: Prepare the chicken
Cut your chicken into evenly sized chunks, around 1 to 1.5 inches each. This ensures they cook uniformly. Place the chicken in a mixing bowl and drizzle with olive oil, lemon juice, garlic, and spices. Toss well to coat every piece. Let it marinate for at least 15 minutes—or up to 2 hours if you have the time.
Step – 2: Prepare the vegetables
While the chicken marinates, chop your vegetables into bite-sized pieces. Keep bell peppers and zucchini chunks similar in size to the chicken. Toss them lightly with olive oil, a pinch of salt, and pepper.
Step – 3: Assemble the kabobs
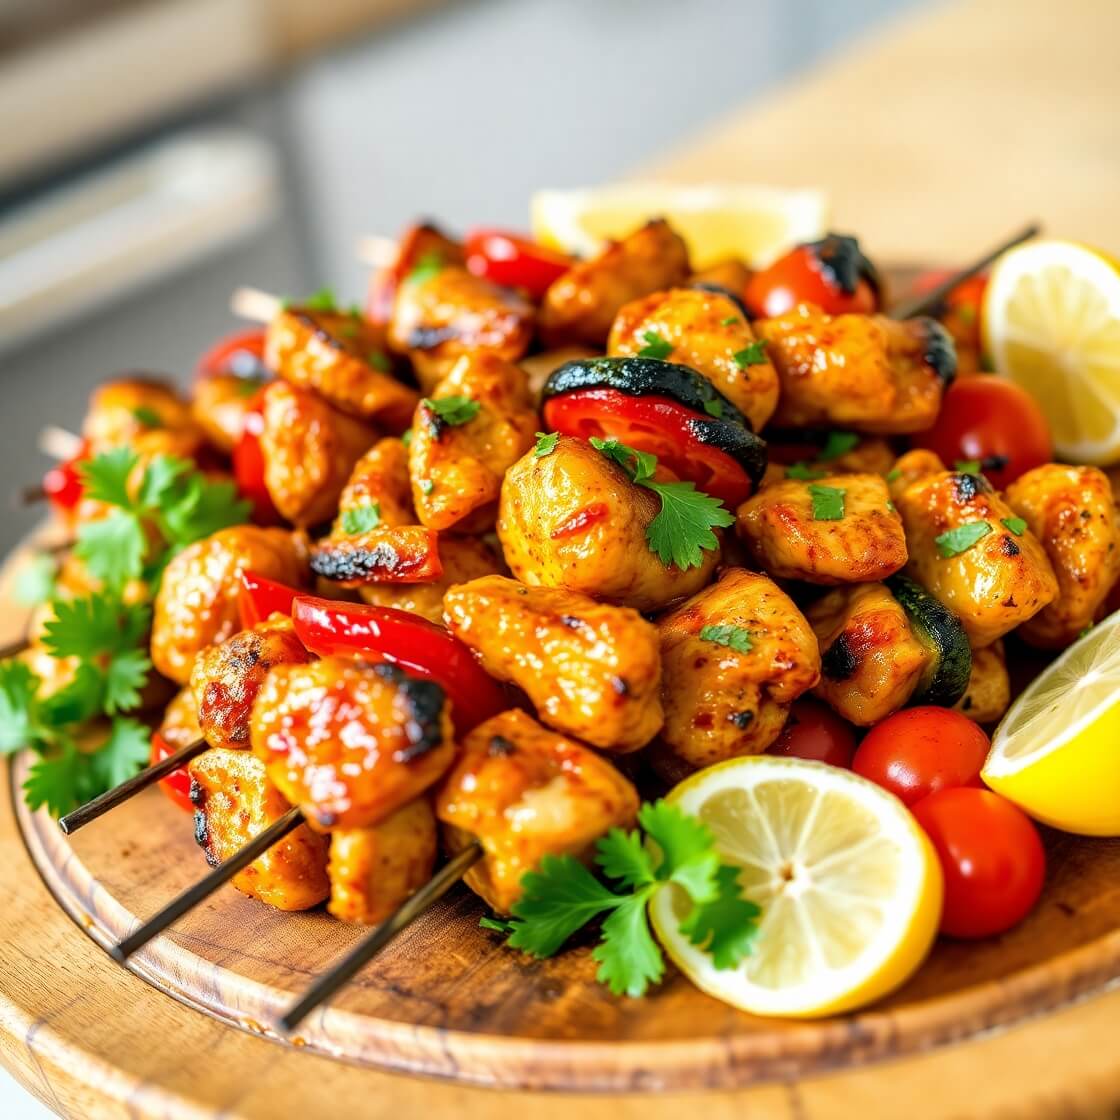
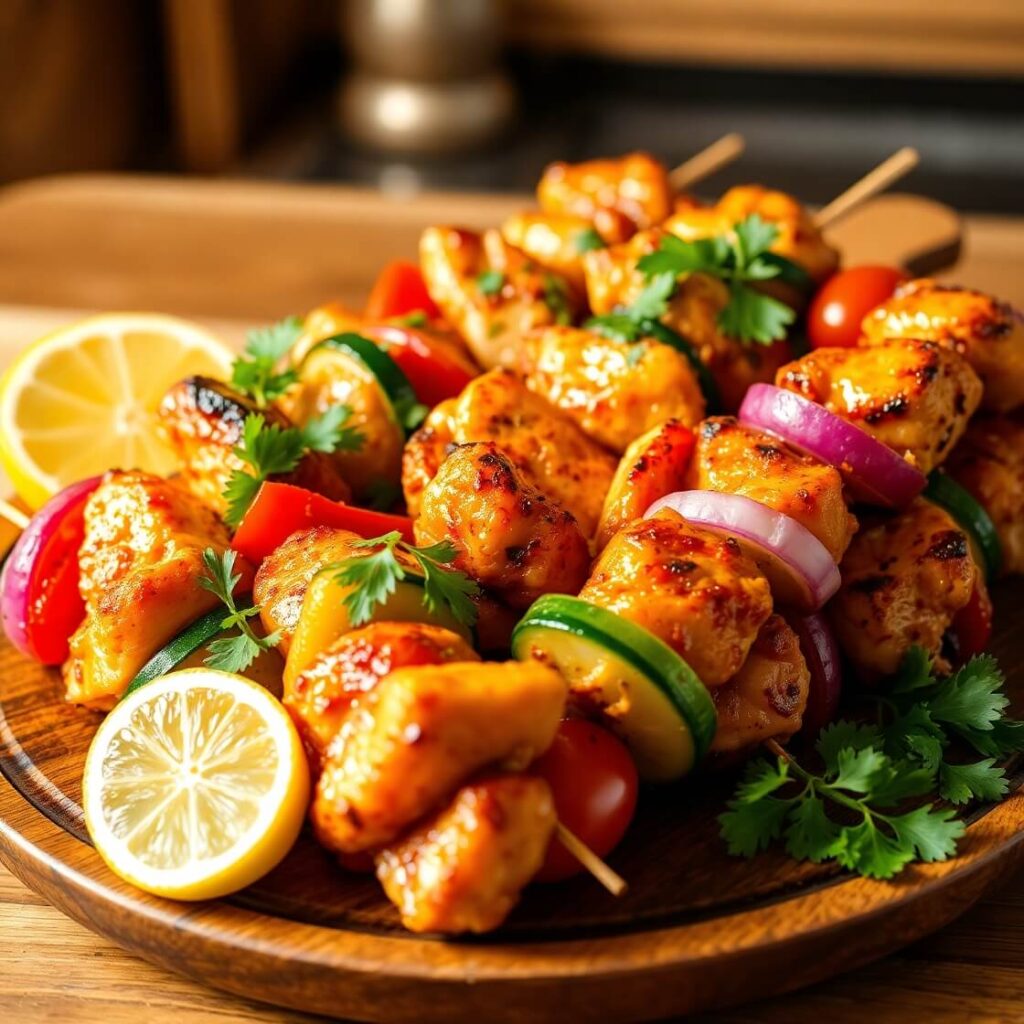
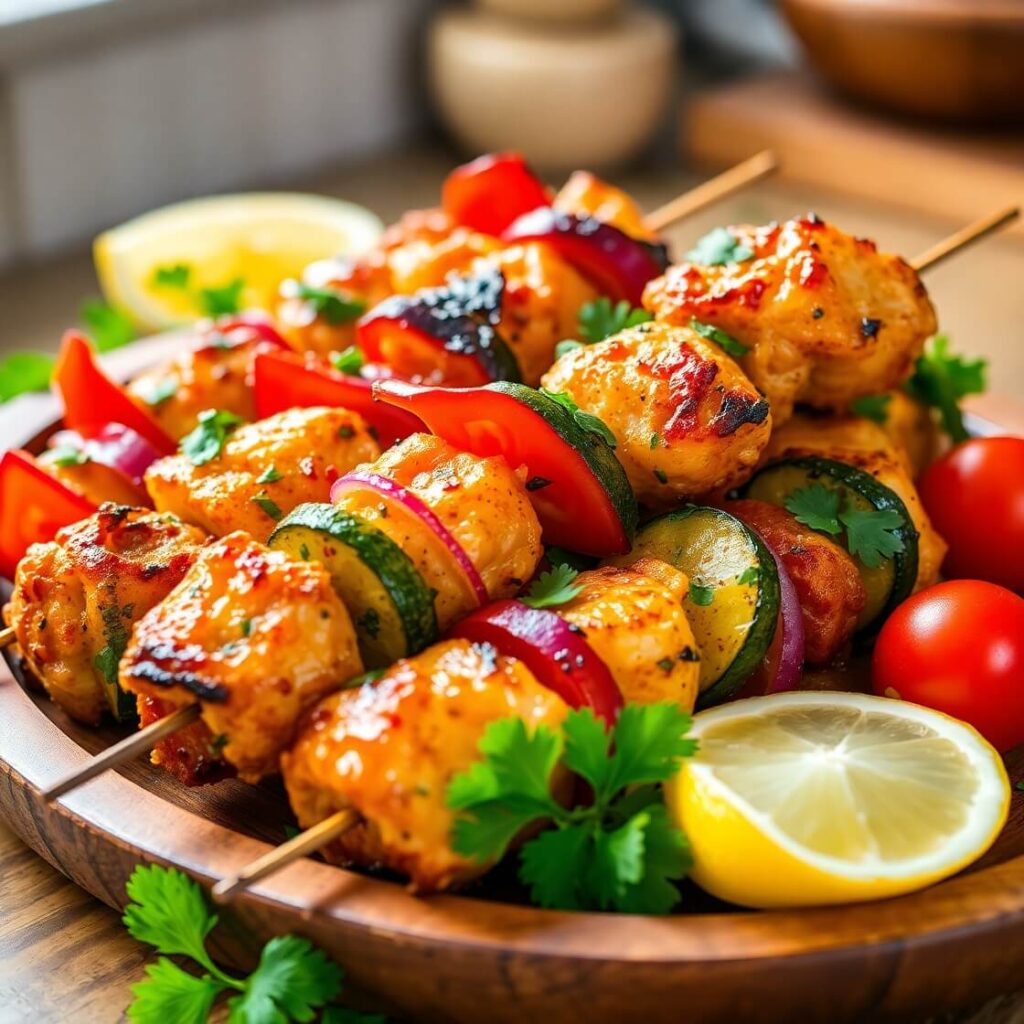
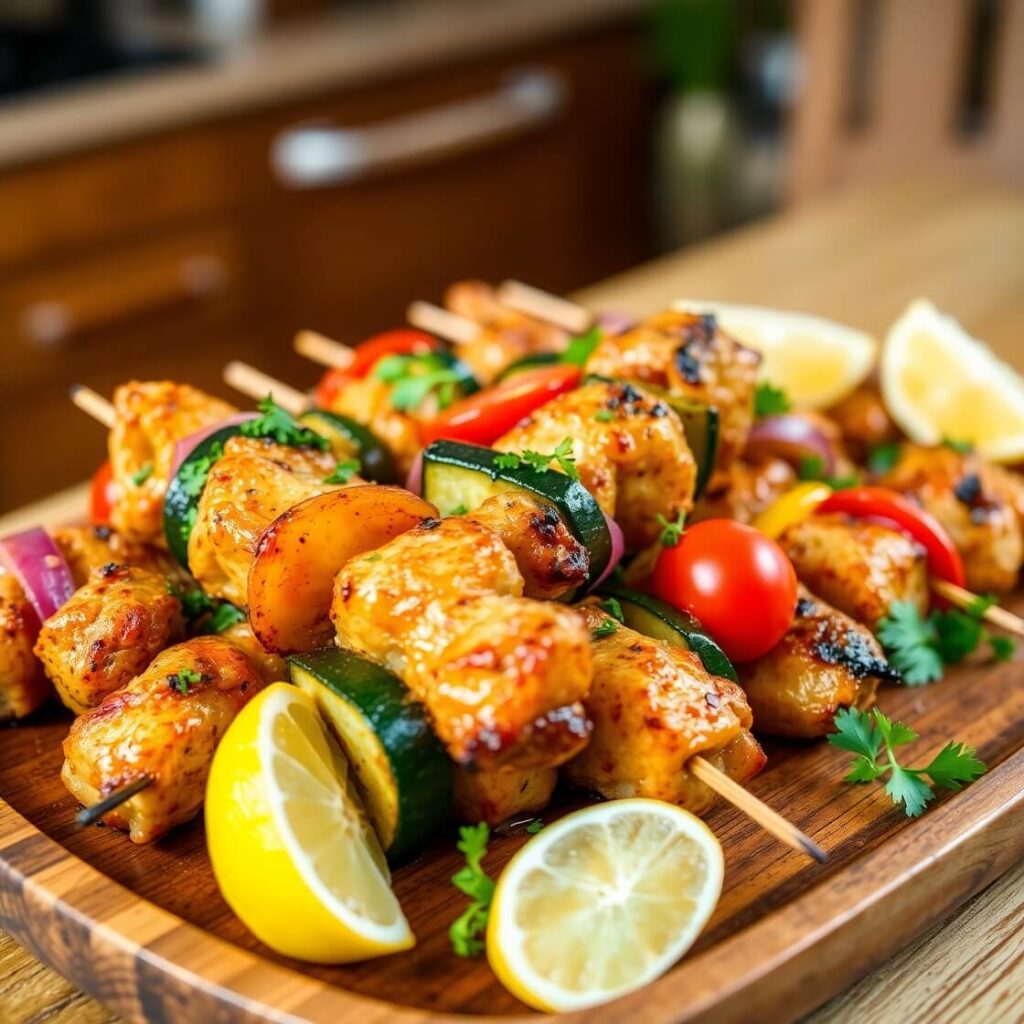
Thread the chicken and vegetables onto skewers, alternating between pieces for a colorful, balanced presentation. For example, start with a chicken piece, then a pepper, followed by onion and zucchini. Continue until the skewer is full, leaving a little space at the ends so the heat can circulate evenly.
Step – 4: Preheat the oven
Preheat your oven to 400°F (200°C). Line a baking sheet with aluminum foil or parchment paper, and place a wire rack on top if you want extra airflow to crisp the edges.
Step – 5: Bake the kabobs
Place the skewers on the prepared sheet or rack. Bake for 20–25 minutes, flipping halfway through for even browning. You want the chicken to reach an internal temperature of 165°F (74°C).
Step – 6: Garnish and serve
Once cooked, sprinkle the kabobs with fresh herbs and a little extra lemon juice if desired. Serve hot, straight from the oven.
Substitutions and Variations
Don’t worry if you don’t have exactly what the recipe calls for—there are plenty of substitutions that work beautifully.
- Chicken: You can swap for turkey breast or even firm tofu for a vegetarian option.
- Vegetables: Eggplant, mushrooms, or cherry peppers are great alternatives. Avoid watery vegetables that get soggy.
- Spices: Curry powder or Italian seasoning can be used instead of paprika and cumin for a different flavor profile.
- Acid: Lemon juice can be replaced with lime juice, vinegar, or yogurt for marination.
Experimenting with substitutions can help you create your own signature version of this dish while keeping the cooking process easy.
What to Serve With Chicken Kabobs in the Oven
To make your meal complete, I always pair these kabobs with side dishes that complement the flavors:
- Garlic butter rice: Absorbs all the kabob juices and adds comfort to every bite.
- Greek salad: Fresh, crisp, and tangy—balances the warmth of the roasted chicken.
- Roasted potatoes: Crispy on the outside, fluffy inside, perfect for soaking up flavors.
Serving and Presentation Tips
There’s something truly satisfying about serving food that looks as good as it tastes, and chicken kabobs are no exception. I love arranging the skewers on a long, elegant platter, alternating colors to highlight the vibrancy of the vegetables alongside the golden-brown chicken. You can sprinkle a few fresh herbs over the top, like parsley or cilantro, and add a few lemon wedges on the side.
For a casual family meal, place the skewers on individual plates over a bed of fluffy rice or couscous. For a dinner party, consider using mini skewers for a fun appetizer-style presentation. Even simple touches like drizzling a light garlic or yogurt sauce over the skewers can make the dish feel gourmet without extra fuss.
Presentation isn’t just about looks—it’s about enhancing the eating experience. When the kabobs look inviting, everyone at the table feels excited to dig in.
Tips From the Expert (That’s Me!)
I’ve learned a few tricks over the years to elevate oven-baked chicken kabobs:
- Marinate longer: Even 30 minutes gives the chicken more flavor, but if you can, let it sit for a few hours in the fridge. The longer marination allows the chicken to absorb the spices and lemon juice, resulting in juicier, more flavorful meat.
- Uniform cutting: Make sure your chicken and vegetables are cut into roughly the same size. This ensures even cooking and prevents some pieces from drying out while others are underdone.
- Soak wooden skewers: If you’re using wooden skewers, soak them in water for 30 minutes before threading the kabobs. This prevents burning in the oven.
- Don’t overcrowd: Give each skewer space on the baking tray so heat can circulate around each piece, producing crisp edges without steaming the chicken.
- Finish under the broiler: For extra char and a grill-like finish, place the kabobs under the broiler for 1–2 minutes at the very end. Keep a close eye on them to prevent burning.
Following these small tips can make a big difference in flavor, texture, and appearance.
Common Mistakes to Avoid
Even experienced cooks can run into problems with chicken kabobs, so here are a few pitfalls to watch out for:
- Skipping the marinade: Chicken without a marinade tends to be bland and dry. Even a short 15-minute marinade makes a noticeable difference.
- Uneven cuts: Cutting chicken or vegetables unevenly results in some pieces overcooking while others are underdone.
- Crowding the pan: Too many skewers too close together can steam the food rather than roast it, giving you soggy edges.
- Overcooking: Chicken dries out quickly, so monitor it closely and check for an internal temperature of 165°F (74°C).
- Ignoring seasoning: Salt and spices bring out the flavors. Don’t be shy with seasoning—you can always adjust to taste later.
Leftovers and Storage
Storing leftover chicken kabobs is easy and convenient:
- Refrigerator: Place cooled kabobs in an airtight container for up to 3–4 days. Separate chicken and vegetables if possible to avoid sogginess.
- Freezer: You can freeze cooked kabobs in a single layer on a baking sheet, then transfer them to a freezer-safe bag for up to 2 months. Reheat in the oven at 350°F (175°C) until warmed through.
- Reheating tips: Wrap kabobs loosely in foil to retain moisture while reheating. Avoid microwaving directly, as it can make the chicken dry and the vegetables mushy.

Chicken Kabobs in the Oven
- Total Time: 45 minutes
- Yield: 4–6 1x
- Diet: Gluten Free
Description
These oven-baked chicken kabobs are a colorful, flavorful, and easy-to-make meal. Juicy chunks of chicken alternate with crisp, caramelized vegetables, all seasoned with a fragrant blend of spices and lemon. Perfect for weeknight dinners, meal prep, or casual gatherings, these kabobs bring a taste of the grill right to your oven. Each skewer is a balanced combination of protein and veggies, finished with fresh herbs for brightness. Simple, wholesome, and utterly delicious, this recipe is one you’ll return to again and again.
Ingredients
- 1 lb boneless, skinless chicken breast or thighs, cut into chunks
- 1 red bell pepper, cut into chunks
- 1 green bell pepper, cut into chunks
- 1 red onion, cut into chunks
- 1 zucchini, cut into chunks
- 1 cup cherry tomatoes
- 2 tbsp olive oil
- 2 cloves garlic, minced
- Juice of 1 lemon
- 1 tsp smoked paprika
- 1 tsp cumin
- ½ tsp chili flakes (optional)
- Salt and pepper to taste
- Fresh parsley or cilantro for garnish
Instructions
- Toss chicken with olive oil, lemon juice, garlic, and spices. Marinate 15–120 minutes.
- Chop vegetables into bite-sized pieces and lightly season.
- Thread chicken and vegetables onto skewers, alternating for color.
- Preheat oven to 400°F (200°C). Line a baking sheet with foil and place skewers on top.
- Bake for 20–25 minutes, flipping halfway, until chicken reaches 165°F (74°C).
- Garnish with fresh herbs and serve with sides like garlic butter rice or roasted potatoes.
Notes
- Marinate longer for deeper flavor.
- Soak wooden skewers in water before baking.
- Finish under the broiler for extra char if desired.
- Prep Time: 20 minutes
- Cook Time: 25 minutes
- Category: Main Course
- Method: Oven-baked
- Cuisine: American
Nutrition
- Serving Size: 4–6
- Calories: 250
- Sugar: 4g
- Sodium: 280mg
- Fat: 8g
- Saturated Fat: 1.5g
- Unsaturated Fat: 6g
- Trans Fat: 0g
- Carbohydrates: 12g
- Fiber: 3g
- Protein: 30g
- Cholesterol: 70mg