Description
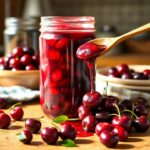
Sweet, glossy, and bursting with real cherry flavor, this homemade cherry pie filling is a delicious upgrade from the canned version. Whether you’re baking a classic cherry pie, making a cherry cheesecake, or spooning it over pancakes, this filling delivers that perfect blend of sweet and tart with a silky texture. It comes together in under 30 minutes and stores beautifully in the fridge or freezer, making it perfect for planning ahead or enjoying on the fly.
Ingredients
Scale
- 4 cups fresh or frozen cherries, pitted
- ¾ cup granulated sugar
- ¼ cup cornstarch
- ⅓ cup cold water
- 1 tablespoon lemon juice
- ½ teaspoon almond extract (optional)
Instructions
- Pit fresh cherries or thaw and drain frozen cherries.
- In a small bowl, mix cornstarch and cold water to create a slurry.
- In a medium saucepan, add cherries and sugar. Cook over medium heat until juicy.
- Pour in the cornstarch slurry, stirring constantly until thickened.
- Remove from heat and stir in lemon juice and almond extract.
- Let cool completely before storing or using.
Notes
- Adjust sugar depending on the sweetness of your cherries.
- Store in the fridge for up to 7 days or freeze for up to 3 months.
- For a thicker consistency, add a bit more cornstarch slurry during cooking.
- Prep Time: 15 minutes
- Cook Time: 10 minutes
- Category: Dessert
- Method: Stovetop
- Cuisine: American
Nutrition
- Serving Size: 2½
- Calories: 110
- Sugar: 18g
- Sodium: 2mg
- Fat: 0g
- Saturated Fat: 0g
- Unsaturated Fat: 0g
- Trans Fat: 0g
- Carbohydrates: 26g
- Fiber: 1g
- Protein: 0g
- Cholesterol: 0mg