Cake Pops Recipe

There’s something undeniably magical about cake pops. I remember the first time I made them—I had a few friends over for a casual afternoon tea, and I wanted something fun and unique. Instead of a regular cake, I decided to roll a few bites into little balls, stick them on sticks, and drizzle them with chocolate. The look of surprise and delight on everyone’s faces was priceless. They weren’t just tasty; they were playful, portable, and perfect for sharing.
Over the years, I’ve experimented with countless flavors and decorations, but one thing remains the same: cake pops have a way of turning an ordinary day into something special. They’re perfect for birthdays, holiday parties, or even just a cozy weekend treat. Whether you’re baking with kids or looking to impress guests with a homemade dessert, these little bites of joy never fail to charm.
Making cake pops might seem intimidating at first glance, especially with all the chocolate and sticks involved, but trust me—it’s easier than it looks. By the time you finish reading this, you’ll have a clear, step-by-step guide to creating your own bakery-style cake pops right in your kitchen.
Why I Love This Recipe
What makes this cake pops recipe so special is the perfect balance between cake and frosting. Many recipes end up being too dry or too sticky, but this one hits the sweet spot. The cake is moist and flavorful, while the frosting binds the crumbs just enough to form sturdy, bite-sized balls.
I also love how versatile this recipe is. You can choose your favorite cake flavor—classic vanilla, rich chocolate, or even red velvet—and pair it with complementary frosting. Then comes the fun part: decorating! From simple chocolate coating to colorful sprinkles and drizzles, every cake pop can have its own personality.
This recipe is perfect for anyone who loves creativity in the kitchen. It’s a hands-on dessert that turns baking into a playful activity. And the reactions? Absolutely priceless. Friends and family never fail to smile at the sight of these little treats. There’s a joy in watching someone take that first bite, and knowing that you made it with your own hands makes it even sweeter.
Ingredients for Cake Pops
To make these delicious cake pops, you’ll need ingredients that are simple but yield amazing results.
For the cake, you can either bake your own or use store-bought. I personally enjoy baking my own because it allows me to control the flavor and texture. You’ll need:
- All-purpose flour, for a soft and fluffy cake base
- Granulated sugar, for sweetness
- Baking powder and a pinch of salt, to make the cake rise beautifully
- Eggs, to bind everything together
- Unsalted butter, melted for moisture
- Vanilla extract, for a rich aroma
- Milk, to create a tender crumb
For the frosting that binds the cake crumbs together, you’ll need:
- Cream cheese or butter, depending on whether you want a tangy or classic flavor
- Powdered sugar, for sweetness without grittiness
- A splash of vanilla extract, to enhance the overall taste
For coating and decorating, you’ll need:
- Chocolate or candy melts, for a smooth finish
- Sprinkles, crushed nuts, or drizzle toppings, for that extra fun factor
- Lollipop sticks, to turn the cake balls into pops
The key is using quality ingredients. Real butter, fresh eggs, and high-quality chocolate make a noticeable difference.
How Much Time Will You Need?
This recipe does require a bit of patience, but it’s well worth it. You’re looking at about:
- 30 minutes to bake the cake
- 10–15 minutes to cool
- 15 minutes to mix the cake crumbs with frosting
- 20 minutes to shape and chill the cake balls
- 15–20 minutes for dipping and decorating
All in all, you’ll need roughly 1.5 to 2 hours from start to finish. The good news? Most of that time involves baking or chilling, so it’s not all active work. Plus, you can make the cake balls ahead of time and freeze them, which makes these cake pops great for planning ahead.
How to Make Cake Pops
Step – 1: Bake the Cake
Start by preheating your oven to 350°F (175°C). Grease and flour your cake pan, then prepare your batter. Mix the dry ingredients—flour, baking powder, salt—in one bowl. In another, whisk the wet ingredients—eggs, melted butter, sugar, milk, and vanilla. Gradually combine them until smooth. Pour into your pan and bake for 25–30 minutes, or until a toothpick comes out clean. Let it cool completely.

Step – 2: Crumble the Cake
Once cooled, crumble the cake into a large mixing bowl. You want fine, even crumbs so the cake balls hold together smoothly. Avoid lumps for a cleaner, more uniform pop.
Step – 3: Mix with Frosting
Add 1/2 cup of frosting to the cake crumbs. You can adjust based on how moist your cake is. Gently fold until the mixture sticks together but isn’t too wet. The goal is a moldable, slightly sticky dough.
Step – 4: Shape the Cake Balls
Scoop about 2 tablespoons of the mixture and roll into balls using your hands. Place them on a baking sheet lined with parchment paper. Pop them in the fridge for at least 20 minutes to firm up.
Step – 5: Prepare the Sticks
Melt a small amount of chocolate or candy melts. Dip the tip of each stick into the chocolate, then insert into each cake ball. This helps secure the stick inside the cake pop.
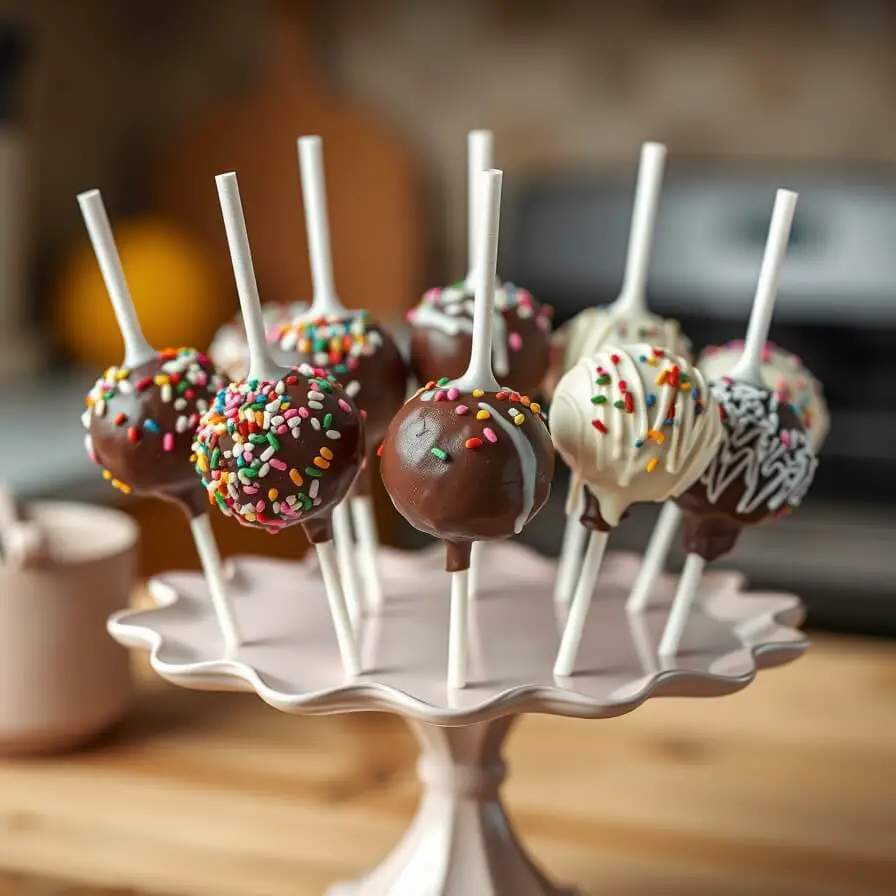
Step – 6: Coat the Cake Pops
Melt your chocolate or candy coating in a microwave or double boiler. Dip each cake pop into the chocolate, gently tapping off excess. Before it sets, decorate with sprinkles, crushed nuts, or drizzle with another chocolate color.
Step – 7: Set the Pops
Stick your cake pops upright in a styrofoam block or stand. Allow them to set completely at room temperature or in the fridge. Once firm, they’re ready to serve!
Substitutions
If you want to make this recipe even more flexible, there are a few substitutions you can try.
- Use gluten-free flour if you need a gluten-free option.
- Swap cream cheese frosting with peanut butter frosting for a nutty twist.
- Candy melts can be replaced with tempered chocolate or even yogurt coating for a lighter touch.
- Vanilla extract can be replaced with almond or coconut extract for unique flavor variations.
Experimenting with substitutions allows you to customize cake pops to your taste or dietary needs while still keeping them moist and delicious.
Best Side Dishes for Cake Pops
Cake pops are a treat on their own, but pairing them can elevate the experience. Here are my top picks:
- Fresh fruit skewers: Light and refreshing, they balance the sweetness of cake pops.
- Hot chocolate or coffee: A warm drink complements the rich, chocolatey coating.
- Mini sandwiches or savory finger foods: These make a perfect snack pairing for a party spread.
These combinations work beautifully, especially for kids’ parties or casual gatherings.
Serving and Presentation Tips
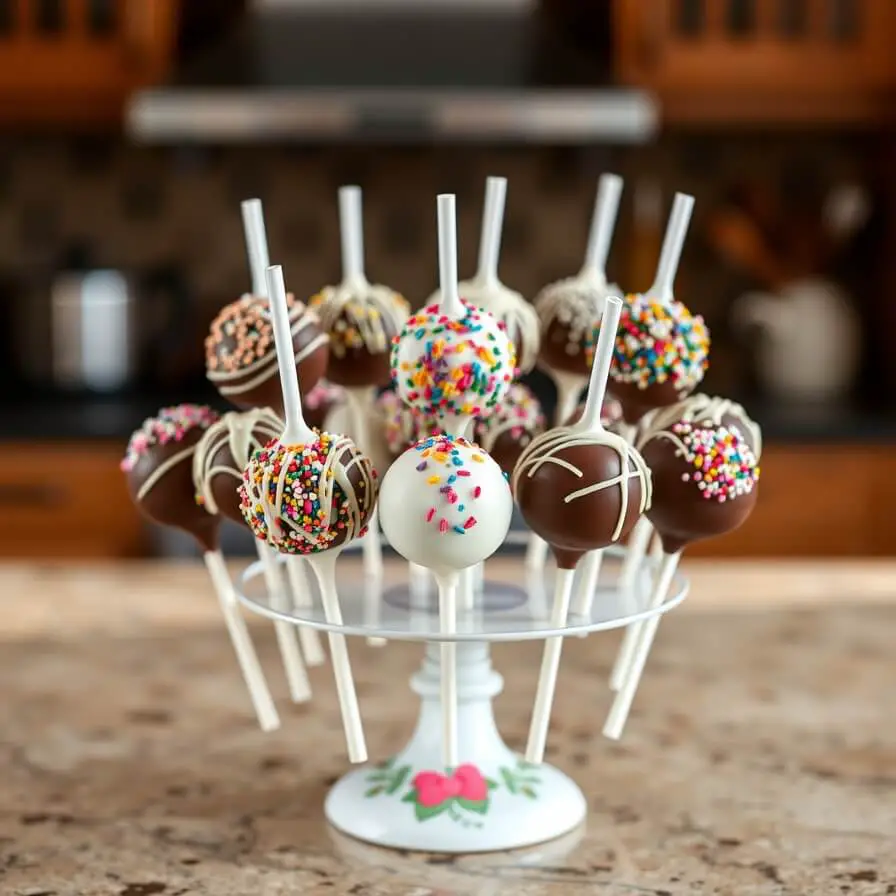
Cake pops are almost too cute to eat—but we all know we will! Presentation can turn a simple treat into a centerpiece that grabs attention at any party. I love arranging them in a colorful vase or a decorative styrofoam block, alternating colors or sprinkle patterns. If it’s for a birthday, try sticking themed toppers like tiny edible stars or hearts.
Another tip: use cupcake liners at the base for added stability, especially if the pops are slightly larger. You can also tie small ribbons around the sticks—it adds a charming, homemade touch that’s perfect for gifting. A tray of cake pops lined neatly on a platter, with sprinkles scattered around, instantly makes your dessert table feel festive and inviting.
Even simple decorations, like drizzling contrasting chocolate or sprinkling crushed nuts, create a wow factor. The key is to balance fun and elegance: your pops should be playful but polished enough to impress anyone who sees them.
Tips and Tricks to Make This Recipe Better
Here’s where I like to share a few secrets that make my cake pops stand out. First, chilling the cake balls before dipping is essential. Warm cake will crumble or lose shape when coated. I sometimes freeze them for 10 minutes, just to firm them up without over-hardening.
For smooth chocolate coating, tempering helps prevent cracking or dull finishes. If using candy melts, adding a tiny bit of vegetable shortening can improve the texture and make them glossy.
Another trick is rotating the pops while the coating sets. It ensures the chocolate dries evenly and prevents unsightly drips. And don’t be afraid to experiment with toppings—crushed cookies, edible glitter, or tiny candy pieces add texture and make your pops more visually appealing.
Finally, working in small batches prevents chocolate from cooling too fast and keeps each pop looking perfect.
Common Mistakes to Avoid
Even with a simple recipe, a few pitfalls can ruin your cake pops. One mistake is using too much frosting when mixing the cake crumbs. It makes the mixture too sticky and hard to shape. Conversely, using too little frosting will make the cake balls dry and crumbly.
Another common error is skipping the step of chilling the cake balls. Warm or soft balls will break apart when dipping. Also, avoid overheating the chocolate—it can seize and become unusable.
Finally, don’t forget to tap off excess coating after dipping. Thick chocolate layers take longer to set and can look clumpy. Attention to these small details ensures professional-looking cake pops every time.
How to Store Cake Pops
Cake pops store beautifully if done correctly. For short-term storage, keep them at room temperature in an airtight container for up to 2 days. Avoid direct sunlight or warm spots, as the chocolate coating can melt.
For longer storage, wrap each cake pop in plastic wrap or place them in individual cupcake liners and freeze for up to a month. When ready to serve, thaw at room temperature for about 30 minutes. Avoid refrigeration for long periods unless necessary—it can cause condensation, which may ruin the coating.
FAQ About Cake Pops
Can I make cake pops ahead of time?
Absolutely! Cake pops can be made a day or two in advance and stored in an airtight container. For longer storage, freeze them and thaw before serving.
Can I use store-bought cake?
Yes! Using a boxed cake or leftover cake works perfectly. Just crumble it finely and mix with frosting.
How do I prevent chocolate from cracking?
Ensure the cake balls are chilled before dipping, and avoid dipping when chocolate is too thick. Tempered chocolate or adding a little shortening can help.
Can I make cake pops without sticks?
You can, but sticks make them easier to serve and look more festive. You can also serve mini cake balls on a platter.
Can I use different coatings?
Definitely! Use chocolate, candy melts, yogurt coating, or even white chocolate. Mix and match colors and flavors to create unique combinations.

Cake Pops Recipe That Everyone Will Love Recipe
- Total Time: 1 hour 15 minutes
- Yield: 20–24 1x
- Diet: Vegetarian
Description
A delightful, bite-sized dessert that turns any occasion into a celebration. Moist cake, creamy frosting, and a perfect chocolate coating make these cake pops irresistible. Fun to decorate, easy to share, and perfect for parties, they bring joy with every bite.
Ingredients
- 1 cup all-purpose flour
- 1 tsp baking powder
- 1/4 tsp salt
- 1/2 cup unsalted butter, melted
- 1 cup granulated sugar
- 2 large eggs
- 1/2 cup milk
- 1 tsp vanilla extract
- 1/2 cup frosting (cream cheese or buttercream)
- 8 oz chocolate or candy melts
- Sprinkles, crushed nuts, or drizzles for decoration
- Lollipop sticks
Instructions
- Preheat oven to 350°F (175°C). Grease and flour a cake pan.
- Mix flour, baking powder, and salt in a bowl. In another bowl, whisk butter, sugar, eggs, milk, and vanilla. Combine gradually until smooth.
- Pour into pan and bake 25–30 minutes. Cool completely.
- Crumble cake into fine crumbs. Mix in frosting until a moldable dough forms.
- Roll into 2-tablespoon balls and chill for 20 minutes.
- Dip stick tips in melted chocolate and insert into each cake ball.
- Coat cake pops in chocolate and decorate with toppings. Allow to set.
Notes
- Chill cake balls for best results.
- Use tempered chocolate for a glossy finish.
- Experiment with toppings for fun variations.
- Prep Time: 45 minutes
- Cook Time: 30 minutes
- Category: Dessert
- Method: Baking and no-bake assembly
- Cuisine: American
Nutrition
- Serving Size: 20–24
- Calories: 180
- Sugar: 15g
- Sodium: 45mg
- Fat: 10g
- Saturated Fat: 6g
- Unsaturated Fat: 3g
- Trans Fat: 0g
- Carbohydrates: 20g
- Fiber: 1g
- Protein: 2g
- Cholesterol: 35mg