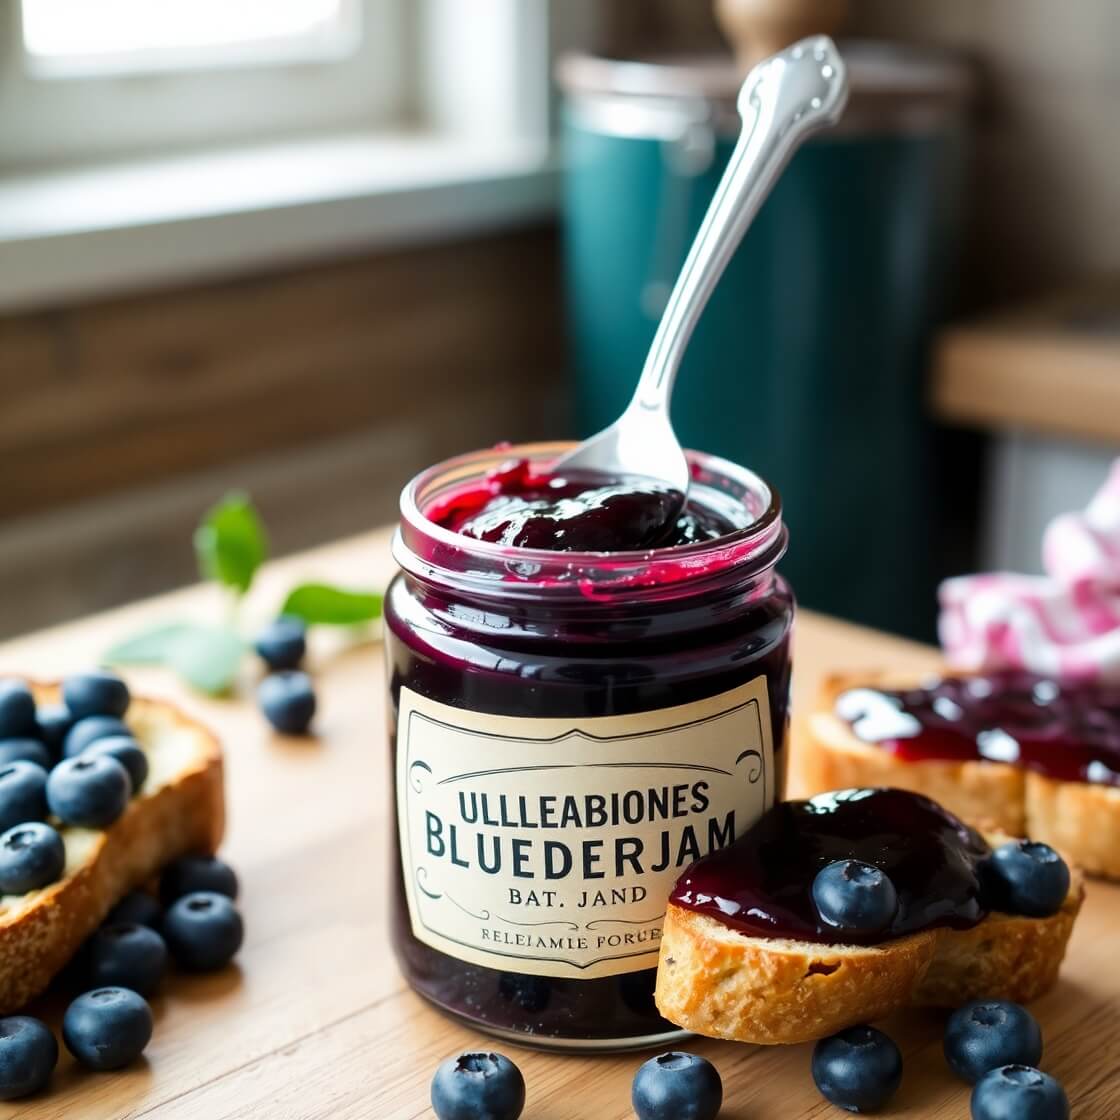
Blueberry Jam
I’ll never forget the first time I made blueberry jam. It was midsummer, and I’d wandered into our local farmers’ market on a whim, lured by the sight of tiny, jewel-like berries piled high in wooden crates. The sun was warm, the air smelled faintly of hay and honeysuckle, and the vendor offered me a taste of the sweetest blueberries I’d ever had. One bite, and I was hooked.
Back in my kitchen, I lined up my jars, pulled out the biggest saucepan I owned, and dove in with the kind of reckless enthusiasm only someone on a sugar high can muster. That batch wasn’t perfect—some berries burst too early, the sugar caramelized a touch too much—but it was magical in a way store-bought jam could never be. Every spoonful tasted like sunlight and summer, and my family devoured it in record time. From that day on, blueberry jam became a seasonal ritual, a little slice of joy preserved in glass.
What’s Makes This Jam Different?

What makes this blueberry jam special isn’t just the flavor—it’s the texture and the balance. You get the gentle sweetness of blueberries, the tartness that makes your taste buds perk up, and a jam that spreads beautifully without being runny. It’s simple, forgiving, and the kind of recipe you can tweak depending on whether you like a chunkier, fruit-forward version or a smoother, spoonable spread.
This jam also works for almost any skill level. Even if you’ve never cooked a preserve before, the steps are intuitive, and the visual cues—bubbling, thickness, color—tell you exactly what to do. And trust me, the aroma while it’s cooking? That alone is worth making a batch.
Ingredients
Freshness is everything here. I always pick blueberries that are plump, firm, and deeply colored. If you can find organic berries, that’s a bonus, but any high-quality fresh blueberries will shine. Frozen blueberries work too, though I recommend thawing and draining them first to avoid extra liquid diluting your jam.
Sugar is the next key player. I use granulated sugar, but you can experiment with cane sugar or even a bit of coconut sugar for a different depth of flavor. Lemon juice is the unsung hero: a splash brightens the jam and helps it set. Some recipes suggest pectin, but I find that with the natural pectin in blueberries and a good boil, it’s not necessary for small-batch jam.
Optional extras like a pinch of cinnamon or a vanilla bean can add warmth, but I usually keep it simple. This jam is about letting the blueberry shine.
Cooking Time
On an average day, this jam takes about:
- Prep: 10–15 minutes
- Cooking: 20–30 minutes (depending on your preferred thickness)
- Cooling and jarring: 20 minutes
It’s the kind of recipe where the kitchen fills with the scent of bubbling blueberries almost immediately, and you’ll find yourself hovering over the pot, sneaking tastes with a spoon.
Step-by-Step Instructions

Step – 1: Prep the Berries
Rinse your blueberries under cold water, picking out any stems or soft berries. Drain them well and place in a medium saucepan. If you’re using frozen berries, let them thaw and drain excess liquid.
Step – 2: Add Sugar and Lemon
Sprinkle sugar over the berries, then squeeze in fresh lemon juice. Stir gently until the sugar starts to coat the berries. Let it sit for about 5 minutes; this maceration step draws out juice and helps the jam thicken naturally.
Step – 3: Cook to Perfection
Bring the mixture to a gentle boil over medium heat. Stir frequently to prevent sticking. You’ll notice the berries start to burst and release their juices—this is exactly what you want. Use a spoon to mash some of the berries for a chunkier texture, or leave them whole for a more rustic feel.
Step – 4: Test the Consistency
After about 20 minutes, test the jam by placing a small spoonful on a chilled plate. Let it sit for a minute; if it wrinkles slightly when you push it with your finger, it’s ready. If not, keep cooking in short intervals, stirring regularly.
Step – 5: Jar and Cool
Once your jam reaches the desired thickness, remove it from heat. Carefully ladle into sterilized jars, leaving a little headspace. Let cool completely at room temperature, then refrigerate. Your jam is ready to enjoy within a few hours, though it tastes even better the next day.
Substitutions and Adaptations

- Vegan/Refined Sugar-Free: Use coconut sugar or maple syrup instead of granulated sugar. The flavor will be slightly deeper but still bright.
- Smooth Jam Lovers: Blend the cooked jam with an immersion blender for a silky texture.
- Extra Zing: Add a teaspoon of grated ginger or a splash of orange juice for a twist.
- Kid-Friendly: Keep it simple—just blueberries, sugar, and lemon. The natural sweetness usually wins over even picky eaters.
Pro Tips and Common Mistakes
Even though blueberry jam is forgiving, a few kitchen-tested tips make a huge difference:
- Don’t rush the boil: A rolling boil might seem faster, but it can scorch your jam or make it too thick. A gentle simmer lets the flavors develop and keeps the texture smooth.
- Stir, but not too aggressively: Constant stirring prevents sticking, but over-stirring can crush all the berries and make a purée rather than a chunkier jam.
- Use a wide pan: The more surface area, the faster the liquid evaporates, giving a thicker jam in less time.
- Check doneness visually: Don’t rely solely on the clock. The spoon test on a chilled plate is more reliable than any timer.
- Sugar tweaks: Reducing sugar too much can prevent the jam from setting properly. If you prefer less sweetness, consider using a small amount of pectin or adding extra lemon juice to help it gel.
I remember the first time I ignored these tips. My “quick jam” ended up more like a blueberry soup. But after a few tries, I got the hang of it—and those first sticky spoons and blueberry-stained fingers became some of my favorite kitchen memories.
Storage and Make-Ahead Tips
Proper storage extends the life and flavor of your jam:
- Refrigerator: Keeps for up to 3 weeks in a sealed jar. Always use a clean spoon to avoid contamination.
- Freezer: Pour jam into freezer-safe containers, leaving room for expansion. It lasts up to 6 months. Thaw in the fridge overnight before use.
- Canning: For long-term storage, consider water-bath canning. Properly sealed jars can last up to a year, making this jam a giftable treat.
Make-ahead tip: Cook a double batch and freeze half. That way, you have a ready-to-go summer flavor in the middle of winter.
FAQs About Blueberry Jam
Can I use frozen blueberries?
Yes! Thaw and drain them before cooking. The flavor is nearly as fresh, though frozen berries release a little extra liquid.
Do I need pectin?
Not necessarily. Blueberries have natural pectin, and cooking with sugar and lemon usually produces a firm jam. Pectin can help if you want a very thick set or are reducing sugar.
Can I make this jam sugar-free?
Absolutely. Use natural sweeteners like maple syrup or stevia blends, keeping in mind the texture may be slightly looser.
How do I prevent jam from molding?
Always use sterilized jars and clean utensils. Once opened, store in the fridge. Mold usually appears when air contaminates the jar.
Can I add other fruits?
Yes! Raspberries, blackberries, or a touch of orange zest complement blueberries beautifully. Just balance sweetness and acidity.

Blueberry Jam
- Total Time: 1 hour
- Yield: 2½ to 3 cups 1x
- Diet: Vegetarian
Description
Preserve the taste of summer with this easy and delicious blueberry jam. Made with just a few ingredients — fresh blueberries, lemon, and sugar — it’s the perfect way to enjoy blueberries all year round. This homemade jam is ideal for spreading on toast, swirling into yogurt, or pairing with cheese and crackers. Whether you’re a beginner or seasoned cook, this recipe guides you step-by-step so you’ll get a perfectly balanced jam with the right texture and flavor. It’s also great for gifting or batch-making during blueberry season. No pectin required — just pure fruit goodness in every spoonful.
Ingredients
- 4 cups fresh blueberries (or thawed frozen blueberries)
- 1½ cups granulated sugar
- 2 tablespoons fresh lemon juice
- 1 teaspoon lemon zest (optional)
- Splash of water (if needed)
Instructions
- Rinse and sort the blueberries, removing any stems or overripe berries.
- Add blueberries, sugar, lemon juice, and zest to a large saucepan. Let sit 5–10 minutes.
- Heat over medium, stirring frequently, until mixture begins to boil and berries release juice.
- Reduce heat and simmer 20–30 minutes, stirring often. Mash berries slightly for texture.
- Test for set using the cold plate method. When ready, remove from heat.
- Spoon hot jam into sterilized jars, leaving ¼-inch headspace. Seal and cool.
- Store in the fridge for short term or process in a water bath for long-term storage.
Notes
- If using frozen berries, drain well and increase cooking time slightly.
- Add a pinch of cinnamon or vanilla extract for a flavor twist.
- Don’t skip the lemon juice — it helps the jam set and enhances the flavor.
- Use a wide saucepan for faster evaporation and better consistency.
- Prep Time: 10 minutes
- Cook Time: 25–30 minutes
- Category: Condiment
- Method: Stovetop
- Cuisine: American
Nutrition
- Serving Size: 2½ to 3 cups
- Calories: 45
- Sugar: 10g
- Sodium: 0mg
- Fat: 0g
- Saturated Fat: 0g
- Unsaturated Fat: 0g
- Trans Fat: 0g
- Carbohydrates: 11g
- Fiber: 0.3g
- Protein: 0g
- Cholesterol: 0mg
Short Summary
This easy blueberry jam captures the essence of summer in every spoonful. Fresh blueberries, sugar, and a splash of lemon create a spreadable, fruity delight perfect for toast, yogurt, pancakes, or even ice cream. No fancy ingredients or complicated steps—just simple, seasonal flavor.