
I’ve always been fascinated by the simple joys of homemade food, and pickles are one of those small yet transformative delights. There’s something incredibly satisfying about taking fresh cucumbers from the garden—or even from your local market—and turning them into a tangy, crunchy treat that elevates any meal. Homemade dill pickles are more than just a condiment; they are a labor of love that captures the essence of fresh flavors and preserves them in a way store-bought pickles just can’t match.
I decided to create this recipe because, honestly, there’s nothing like biting into a crisp, perfectly seasoned pickle that sings with dill, garlic, and a subtle tang of vinegar. Making pickles at home also allows me to experiment with flavors, textures, and spice levels. Whether you’re a beginner or someone who has dabbled in pickling before, this guide will take you step by step into the world of homemade dill pickles.
Once you taste these, you’ll realize why making your own pickles is an art worth mastering. They are perfect for snacking, topping sandwiches, or adding a zesty punch to salads.
Why I Love This Recipe

One of the things I love most about this dill pickle recipe is how versatile and rewarding it is. It’s not just about preserving cucumbers; it’s about creating a burst of flavor that’s entirely your own. Every jar you make holds the potential for a perfect balance of sour, salty, and herbal notes.
People make this recipe because it’s simple, yet the results are extraordinary. The crispness of the cucumbers is maintained thanks to the right combination of vinegar, salt, and cold water. The dill infuses every bite with that unmistakable aromatic flavor, while garlic and optional spices add depth.
What sets this recipe apart is its adaptability. You can tweak the garlic intensity, experiment with different vinegars, or even add chili flakes for a hint of heat. It’s a recipe that allows creativity while still delivering a consistently delicious result. And let’s not forget the pride of serving something homemade to friends and family—they always notice the difference.
Making your own pickles also brings a connection to tradition. Many of us grew up with the smell of pickles in the kitchen, and recreating that nostalgic experience in a modern, controlled way is deeply satisfying.
Ingredients for Homemade Dill Pickles
For this recipe, you’ll need ingredients that are simple, fresh, and easy to source. The focus here is on quality because every element contributes to the final taste.
- Fresh cucumbers: Small to medium-sized pickling cucumbers work best. Look for firm, unblemished cucumbers for that crisp texture.
- Fresh dill: The star of the show. You can use dill sprigs or dill seeds. Fresh dill gives the best aroma, but seeds are fine if you don’t have fresh.
- Garlic cloves: Adds pungent, savory depth. Peel and slightly crush the cloves for maximum flavor infusion.
- Vinegar: White distilled vinegar is ideal for a classic tang, but apple cider vinegar works too if you prefer a slightly sweeter undertone.
- Water: Filtered water is best to avoid any off-flavors from tap water.
- Salt: Pickling or kosher salt is recommended. Avoid iodized table salt as it can cloud the brine.
- Optional spices: Black peppercorns, mustard seeds, red pepper flakes, bay leaves. These are optional but elevate the flavor complexity.
The beauty of this recipe is that the ingredients are few, but the flavor is immense. Each component has a role to play—from the crisp bite of the cucumber to the aromatic lift of fresh dill.
How Much Time Will You Need
Making homemade dill pickles doesn’t take long, but patience is key for the flavor to develop.
- Prep time: 20-30 minutes for washing, slicing, and assembling the ingredients.
- Pickling time: At least 24 hours for a mild pickle, but for full flavor and crunch, allow 3-5 days in the fridge.
- Total time: Roughly 1 hour of active work, but the pickles will reach peak flavor after several days.
This timeline makes it perfect for a weekend project. You do the prep once, then let nature and the brine work their magic.
How to Make Homemade Dill Pickles
Step-by-step guidance ensures that your pickles come out perfectly every time.
Step – 1: Wash and prepare the cucumbers. Trim the ends, and depending on your preference, leave them whole, slice into spears, or cut into rounds.
Step – 2: Prepare your jars. Sterilize them by boiling or washing in hot, soapy water. This prevents unwanted bacteria and helps preserve your pickles longer.
Step – 3: Make the brine. In a saucepan, combine vinegar, water, and salt. Bring it to a gentle boil, stirring until the salt dissolves completely. Let it cool slightly before pouring over cucumbers.
Step – 4: Layer your jars. Place dill sprigs, garlic cloves, and optional spices at the bottom of each jar. Then pack the cucumbers tightly but not too snugly to allow the brine to circulate.
Step – 5: Pour the brine over the cucumbers. Ensure all cucumbers are fully submerged. You can place a small weight or a clean piece of cabbage leaf on top to keep cucumbers under the liquid.
Step – 6: Seal the jars. Use clean lids and refrigerate. For quick pickles, let them sit at least 24 hours. For more developed flavors, refrigerate for 3-5 days.
Step – 7: Taste and enjoy. Once your pickles reach your preferred level of tang and flavor, they are ready to eat.
Substitutions
This recipe is flexible. If you want to experiment:
- Vinegar options: Apple cider or white wine vinegar adds unique nuances.
- Herbs: Tarragon, rosemary, or thyme can add a surprising twist.
- Garlic alternatives: Shallots or even onion slices for a milder taste.
- Spice variations: Add chili flakes, coriander seeds, or a pinch of allspice to tailor heat and aroma.
Experimenting with substitutions can make your homemade pickles truly unique, and it’s a great way to adapt to what you have in your pantry.
Best Side Dishes for Homemade Dill Pickles
Pickles are incredibly versatile. Three side dishes that pair beautifully include:
- Grilled sandwiches: The crunch and tang of pickles cut through melted cheese perfectly.
- Barbecue meats: Pickles balance smoky, fatty flavors.
- Charcuterie boards: Homemade dill pickles elevate a platter of cheeses, cured meats, and olives.
Pickles are like the magical accent that brings a meal to life, whether you are snacking or serving a full spread.
Serving and Presentation Tips
Serving homemade dill pickles is almost as important as making them. A beautiful presentation can make your pickles the centerpiece of any meal.
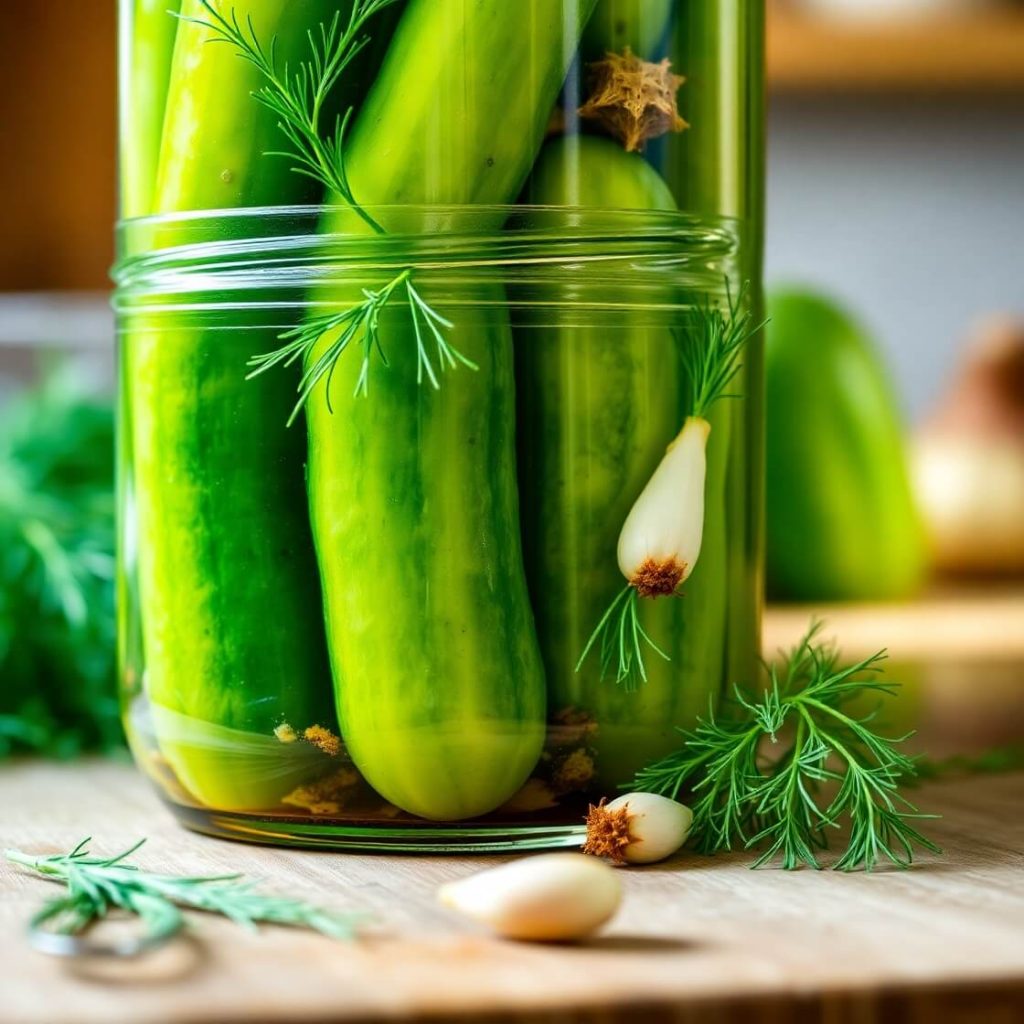
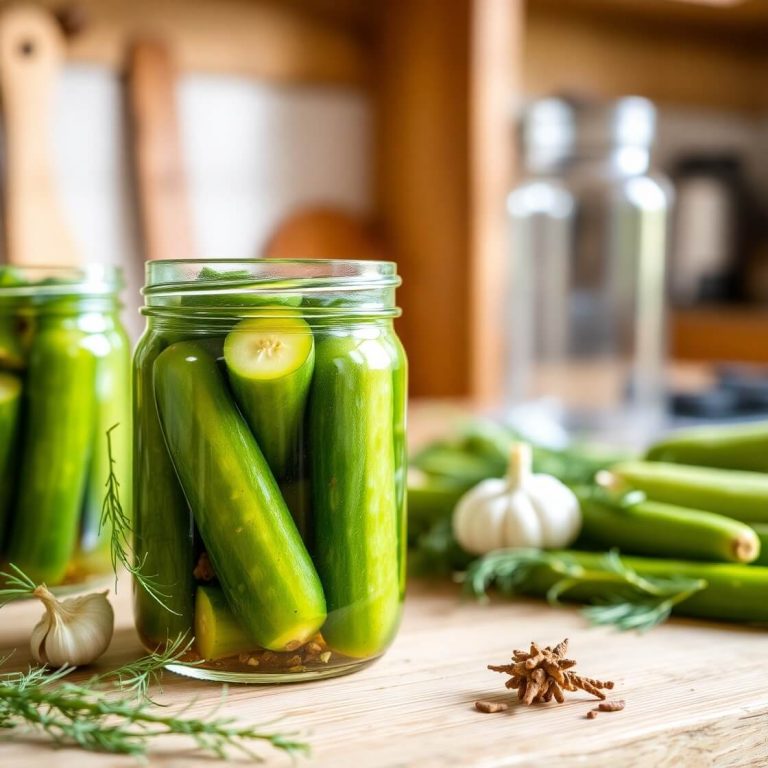
I love serving them in a clear glass jar or a small rustic bowl. The vibrant green of the cucumbers, the flecks of dill, and the specks of garlic make them visually appealing. For a more polished look, slice some cucumbers into spears and some into rounds, and arrange them in a jar or platter to showcase the variety. Garnishing with an extra sprig of fresh dill on top adds a professional touch.
Pickles pair wonderfully with sandwiches, burgers, or even a simple cheese plate. For parties, place a small tongs or fork beside the jar so guests can serve themselves neatly. The key is to highlight their color, texture, and freshness—people often “eat with their eyes” first, and your pickles should be irresistible at first glance.
Tips and Tricks to Make This Recipe Even Better
Making the perfect dill pickle takes a few subtle tricks that can elevate your results.
First, always use fresh, firm cucumbers. Overripe or soft cucumbers result in soggy pickles.
Second, keep the brine ratio consistent: the right balance of salt, vinegar, and water ensures crispness and flavor. Too much salt can overwhelm, while too little can make them bland.
Third, consider the temperature of the brine. Pouring warm brine over cucumbers helps them absorb flavors quickly, but don’t use boiling brine as it can soften them too much.
Finally, patience is your best friend. Allow the pickles to sit in the fridge for at least three days for a fully developed flavor. While they’re tempting, giving them time ensures the garlic, dill, and spices have penetrated every bite.
For an extra crunch, some people swear by adding a few grape leaves or horseradish leaves to the jar. The tannins in the leaves help maintain that satisfying crisp texture.
Common Mistakes to Avoid
Even experienced picklers make mistakes, so here’s what to watch out for:
- Using the wrong salt: Table salt can cloud your brine and affect flavor. Stick to pickling or kosher salt.
- Overcrowding jars: Cucumbers need space for the brine to circulate. Packed too tightly, they may soften unevenly.
- Skipping sterilization: Dirty jars can introduce bacteria, spoiling your pickles. Always wash and sterilize thoroughly.
- Impatience: Eating the pickles too early can mean they lack full flavor. Give them time to develop.
- Ignoring brine coverage: Cucumbers not fully submerged can turn mushy or moldy. Use weights or leaves to keep them submerged.
How to Store It
Proper storage is crucial for maintaining the crispness and flavor of your dill pickles.
- Refrigeration: Keep your pickles in the fridge in airtight jars. They can last for up to 2-3 months.
- Avoid direct sunlight: Sunlight can degrade flavor and color, so store in a cool, dark spot.
- Use clean utensils: Always use a clean fork or tongs when removing pickles to avoid contamination.
By following these storage tips, your homemade dill pickles will remain fresh, crunchy, and flavorful for weeks.
FAQ
What cucumbers are best for pickling?
Pickling cucumbers are small, firm, and dense. They absorb the brine well while staying crisp. Avoid large slicing cucumbers for this recipe.
Can I use vinegar other than white vinegar?
Yes, apple cider vinegar or white wine vinegar can be used. They add a slightly different flavor profile but work well.
How long do homemade pickles last?
When stored in the fridge properly, they can last 2-3 months. Flavor improves after a few days of pickling.
Do I need to peel the cucumbers?
No, the skin adds texture and color, but if you prefer, peeling is optional.
Can I make pickles spicy?
Absolutely! Add chili flakes, jalapeño slices, or mustard seeds to your jars for a spicy kick.
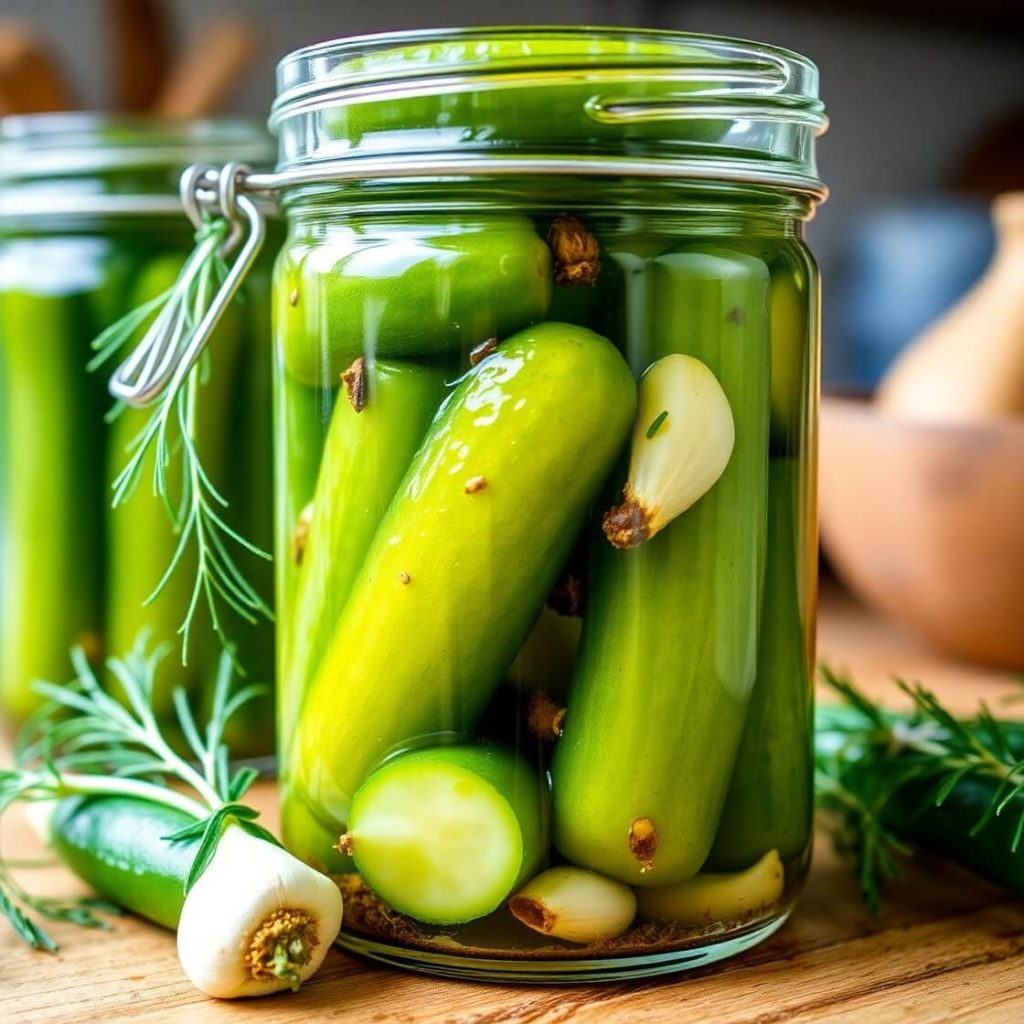
Homemade Dill Pickles
These homemade dill pickles are crisp, tangy, and bursting with flavor. Perfect as a snack, sandwich topping, or side for barbecue dishes, they combine fresh cucumbers with dill, garlic, and a perfectly balanced brine. Making them at home is simple, and the result is far superior to store-bought pickles.
- Total Time: 35 minutes (plus 3-5 days pickling time)
- Yield: 4-5
Ingredients
- 2 pounds pickling cucumbers
- 4–5 sprigs fresh dill (or 2 tsp dill seeds)
- 4–5 garlic cloves, peeled and crushed
- 2 cups water
- 1 cup white vinegar
- 2 tablespoons kosher salt
- Optional: black peppercorns, mustard seeds, red pepper flakes
Instructions
- Wash cucumbers and trim the ends. Slice or leave whole as preferred.
- Sterilize jars thoroughly.
- In a saucepan, combine water, vinegar, and salt; bring to a boil, then let cool slightly.
- Layer dill, garlic, and optional spices in jars. Pack cucumbers tightly.
- Pour brine over cucumbers until fully submerged.
- Seal jars and refrigerate for at least 3 days for optimal flavor.
- Enjoy as a snack or side dish.
Notes
- Add grape or horseradish leaves for extra crunch.
- Experiment with spices to customize flavor.
- Keep cucumbers fully submerged to avoid spoilage.
- Prep Time: 30 minutes
- Cook Time: 5 minutes (for brine)
- Category: Condiment / Snack
- Method: No-cook pickling
- Cuisine: American
- Diet: Vegetarian
Nutrition
- Serving Size: 4-5
- Calories: 5
- Sugar: 1g
- Sodium: 400mg
- Fat: 0g
- Saturated Fat: 0g
- Unsaturated Fat: 0g
- Trans Fat: 0g
- Carbohydrates: 1g
- Fiber: 0.5g
- Protein: 0g
- Cholesterol: 0mg