
There’s something irresistibly nostalgic about homemade vanilla ice cream. It’s the kind of recipe that instantly transports you back to lazy summer days, barefoot in the backyard, the soft churn of the ice cream maker humming in the background. I decided to recreate that magic in my own kitchen—not just for the memories, but for the pure joy of making something from scratch that’s creamy, rich, and so much better than store-bought.
This recipe came to life during a quiet Sunday afternoon. I had a few leftover egg yolks from a baking project and a fresh bottle of Madagascar vanilla extract. I thought, why not make a real custard-style vanilla ice cream that would knock everyone’s socks off? And let me tell you—it did.
If you’ve ever wondered whether homemade vanilla ice cream is worth the effort, the answer is absolutely yes. Keep reading to find out why this is the only vanilla ice cream recipe you’ll ever need.
Why I Love This Recipe

There’s vanilla ice cream—and then there’s this vanilla ice cream.
I love this recipe because it’s all about simplicity meeting sophistication. It uses classic ingredients, but the depth of flavor is next level. That’s thanks to a rich custard base made with egg yolks, whole milk, cream, and high-quality vanilla. This isn’t just a frozen dessert—it’s an experience. Silky, ultra-creamy, and speckled with fragrant vanilla, it’s the kind of treat you serve proudly to guests or savor slowly on your own.
What sets this recipe apart is its texture and flavor. The custard base gives it a luscious mouthfeel, while the vanilla shines as the true hero. It’s not icy or overly sweet—it’s balanced, luxurious, and deeply comforting. And while I’ve made dozens of ice cream recipes over the years, this is the one I come back to every single time.
If you’re new to making ice cream, don’t worry—this guide walks you through every step. And if you’re a seasoned home cook, you’ll appreciate the refined technique that elevates this classic dessert into something truly special.
Ingredients for Homemade Vanilla Ice Cream
To make the perfect homemade vanilla ice cream, you don’t need anything fancy—just a handful of high-quality ingredients and a little patience.
What I love most is that each ingredient plays an essential role in the final result. There’s nothing extra here—just honest, real ingredients coming together to create something magical.
Here’s what you’ll need:
- Heavy cream: This is what makes your ice cream rich and luxurious. I always use full-fat heavy cream for the creamiest texture.
- Whole milk: Balances the richness of the cream and adds body without making the ice cream too heavy.
- Egg yolks: These are the heart of the custard. They thicken the base and give it that velvety finish.
- Granulated sugar: Adds sweetness, but also helps keep the ice cream from freezing too hard.
- Vanilla extract: Choose pure vanilla extract, and if you can find Madagascar or Tahitian vanilla, even better. You can also use vanilla bean paste for those beautiful specks.
- Salt: Just a pinch brings out all the flavors and balances the sweetness.
Optional but recommended:
- Vanilla bean: If you want to go all-in, split a vanilla bean and steep it in the cream mixture. The flavor is incredible.
- Corn syrup or invert sugar: A small spoonful can help create a smoother texture, but this is totally optional.
This ice cream doesn’t cut corners—and once you taste it, you’ll see why every ingredient matters.
How Much Time Will You Need
Making homemade vanilla ice cream does take a bit of time, but it’s mostly hands-off. You’ll spend about 25 minutes prepping and cooking the custard base, then let it chill for at least 4 hours (or overnight) before churning. The churning takes about 20 to 30 minutes, and then you’ll need to freeze the churned ice cream for a few more hours to let it firm up.
Total time estimate:
- Prep & cook: 25 minutes
- Chilling the base: 4–12 hours
- Churning: 30 minutes
- Freezing before serving: 2–4 hours
So yes, this recipe takes some planning—but the result is more than worth it.
How to Make This Homemade Vanilla Ice Cream
Here’s a step-by-step guide to making your own velvety, rich vanilla ice cream from scratch.
Step – 1: Prepare the Custard Base
In a medium saucepan, combine 2 cups of whole milk and 1 cup of heavy cream. If using a vanilla bean, split it lengthwise and scrape out the seeds. Add both the seeds and the pod to the pan.
Heat the mixture over medium heat until it’s hot but not boiling—tiny bubbles should form around the edges. Remove from heat and let the vanilla steep for 10 minutes.
Step – 2: Whisk the Egg Yolks and Sugar
In a separate bowl, whisk 6 large egg yolks with ¾ cup of sugar until the mixture is pale and slightly thickened. This step is key—it helps create a smooth custard.
Step – 3: Temper the Egg Mixture
Slowly pour about 1 cup of the hot milk mixture into the egg yolks while whisking constantly. This prevents the eggs from scrambling.
Then, pour the tempered egg yolk mixture back into the saucepan with the remaining milk and cream.
Step – 4: Cook the Custard
Return the pan to the stove and cook over medium heat, stirring constantly with a wooden spoon or heatproof spatula. You’ll know it’s ready when it thickens enough to coat the back of the spoon—about 170–175°F.
Do not boil, or the eggs will curdle.
Step – 5: Strain and Chill
Remove from heat and pour the custard through a fine mesh strainer into a clean bowl to catch any solids or cooked egg bits.
Stir in 1 tablespoon of pure vanilla extract (if you didn’t use a vanilla bean earlier). Add a pinch of salt.
Cover the bowl and refrigerate until completely chilled—at least 4 hours, but overnight is best.
Step – 6: Churn the Ice Cream
Once the base is thoroughly chilled, pour it into your ice cream maker and churn according to the manufacturer’s instructions—usually about 25–30 minutes.
You’re looking for a soft-serve consistency.
Step – 7: Freeze to Firm
Transfer the churned ice cream into an airtight container. Press a piece of parchment paper directly onto the surface to prevent ice crystals from forming.
Freeze for 2–4 hours, or until scoopable and firm.
Substitutions
Let’s say you’re missing an ingredient or want to make this recipe suit your dietary needs—there’s room to adapt without sacrificing taste or texture.
If you’re out of heavy cream, you can use half-and-half, but the result won’t be quite as rich. For a dairy-free version, full-fat coconut milk makes an excellent substitute, though the flavor will lean tropical.
No vanilla bean? No problem. Just use high-quality vanilla extract or vanilla bean paste. The paste gives you the specks and flavor without needing the whole bean.
For a refined sugar-free version, try using maple syrup or honey, but be sure to adjust the amount and cook the custard a little longer to thicken.
If you’re watching your cholesterol, you can reduce the number of egg yolks to 4—but you may need to churn a bit longer to achieve the same creaminess.
This recipe is flexible—and with a little creativity, you can customize it to suit your pantry and your preferences.
Best Side Dish of Homemade Vanilla Ice Cream
Homemade vanilla ice cream is the ultimate blank canvas. It pairs beautifully with so many desserts and snacks. Here are a few of my favorites:
- Warm Apple Pie: The cool, creamy contrast of vanilla ice cream with tender spiced apples is simply iconic.
- Fresh Berries and Shortcake: Stack your scoop on a buttery shortcake with macerated strawberries or blueberries.
- Chocolate Lava Cake: That rich, gooey center meets cold ice cream? Yes, please.
These pairings take your vanilla ice cream from great to unforgettable.
Serving and Presentation Tips
Serving homemade vanilla ice cream is a joy—and when done with a little extra care, it becomes a showstopper. You don’t need elaborate plating skills, just a few thoughtful touches that elevate the experience.
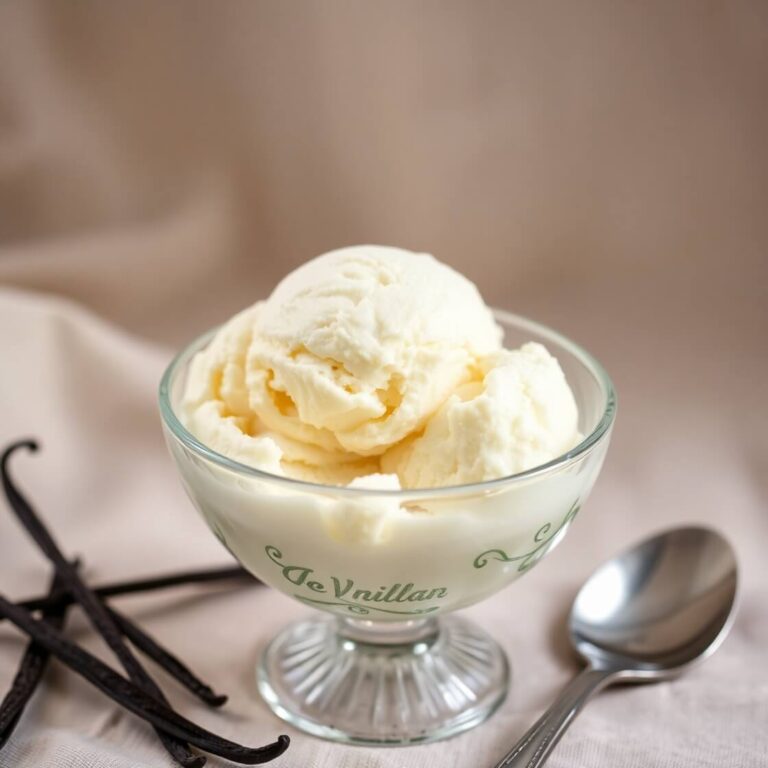
I like to scoop the ice cream into chilled bowls or vintage glass sundae dishes. It helps keep the texture firm and gives it that old-fashioned soda fountain charm. If you’re serving guests, a sprig of fresh mint or a drizzle of caramel or berry sauce over the top makes for a simple yet elegant presentation.
Another favorite of mine is pairing it with fresh seasonal fruit—think sliced peaches, roasted figs, or a scatter of pomegranate seeds. It adds color and freshness, and guests always love that touch.
Want to really impress? Serve it between warm cookies as an ice cream sandwich or nestled into a waffle cone you made yourself. Presentation is about delight—and with this ice cream, it doesn’t take much.
Tips and Tricks to Make This Recipe Better
There are a few little tricks I’ve learned over the years that can take your vanilla ice cream from great to truly gourmet.
First, don’t rush the chilling process. Letting the custard rest in the fridge overnight not only helps it churn better, but it also deepens the flavor.
Use the best vanilla you can find. If you can get your hands on a real vanilla bean or high-quality vanilla bean paste, you’ll taste the difference in every bite. Don’t underestimate that little pinch of salt either—it really brings out the creamy, sweet flavor.
If you like a smoother scoop, a small spoonful of light corn syrup or inverted sugar helps inhibit ice crystals and gives you a more velvety finish.
Lastly, make sure everything is cold before churning: the custard, the bowl of the ice cream maker, and even the storage container if you’re being extra careful. It helps the ice cream freeze faster and develop a better texture.
Common Mistakes to Avoid
Even the most straightforward recipes have their pitfalls. Here’s what to avoid so your vanilla ice cream turns out perfect every time.
Overcooking the custard is the most common mistake. It should be thick enough to coat a spoon but never come to a boil. If it gets too hot, the eggs will scramble.
Not straining the mixture after cooking is another one to watch out for. Even if everything looks smooth, a quick pass through a mesh strainer ensures a silky final texture.
Skipping the chill time can lead to ice cream that doesn’t set well or has an icy texture. The colder your base, the better your churn.
Using imitation vanilla will flatten the flavor. This recipe is all about the vanilla, so quality is key.
And finally, churning too little or too long can both ruin the texture. Follow your machine’s timing and check for that soft-serve stage before transferring it to freeze.
How to Store It
Homemade ice cream is best enjoyed within about a week of making it, though it can technically last up to two weeks if stored properly.
Always keep it in an airtight, freezer-safe container. I like to use shallow containers for faster freezing and easier scooping. Place a piece of parchment or wax paper directly on top of the ice cream before sealing the lid. This prevents ice crystals from forming on the surface.
Try to keep your freezer at a consistent, cold temperature—ideally below 0°F. Avoid storing the container in the freezer door, where temperatures fluctuate more.
When ready to serve, let it sit at room temperature for 5–10 minutes for the perfect scoop.
FAQ
Can I make this ice cream without an ice cream maker?
Yes, you can. After chilling the custard, pour it into a shallow pan and freeze. Every 30 minutes, stir vigorously with a fork or hand mixer. Do this for 2–3 hours until smooth and creamy.
Can I make this recipe dairy-free?
Absolutely. Use full-fat canned coconut milk in place of milk and cream. The texture will be slightly different, but still rich and delicious.
What’s the difference between using vanilla extract and vanilla bean?
Vanilla beans offer a deeper, more complex flavor and beautiful visual specks in your ice cream. Vanilla extract is more subtle but still delicious—just make sure it’s pure, not imitation.
Can I use egg substitutes?
Yes, but it may affect the texture. For a custard-free version, you can skip the eggs and use sweetened condensed milk with cream for a Philadelphia-style ice cream.
How do I make it less sweet?
Reduce the sugar slightly, but not too much or it may freeze harder. You can also use honey or maple syrup as alternative sweeteners—just reduce the quantity and adjust to taste.
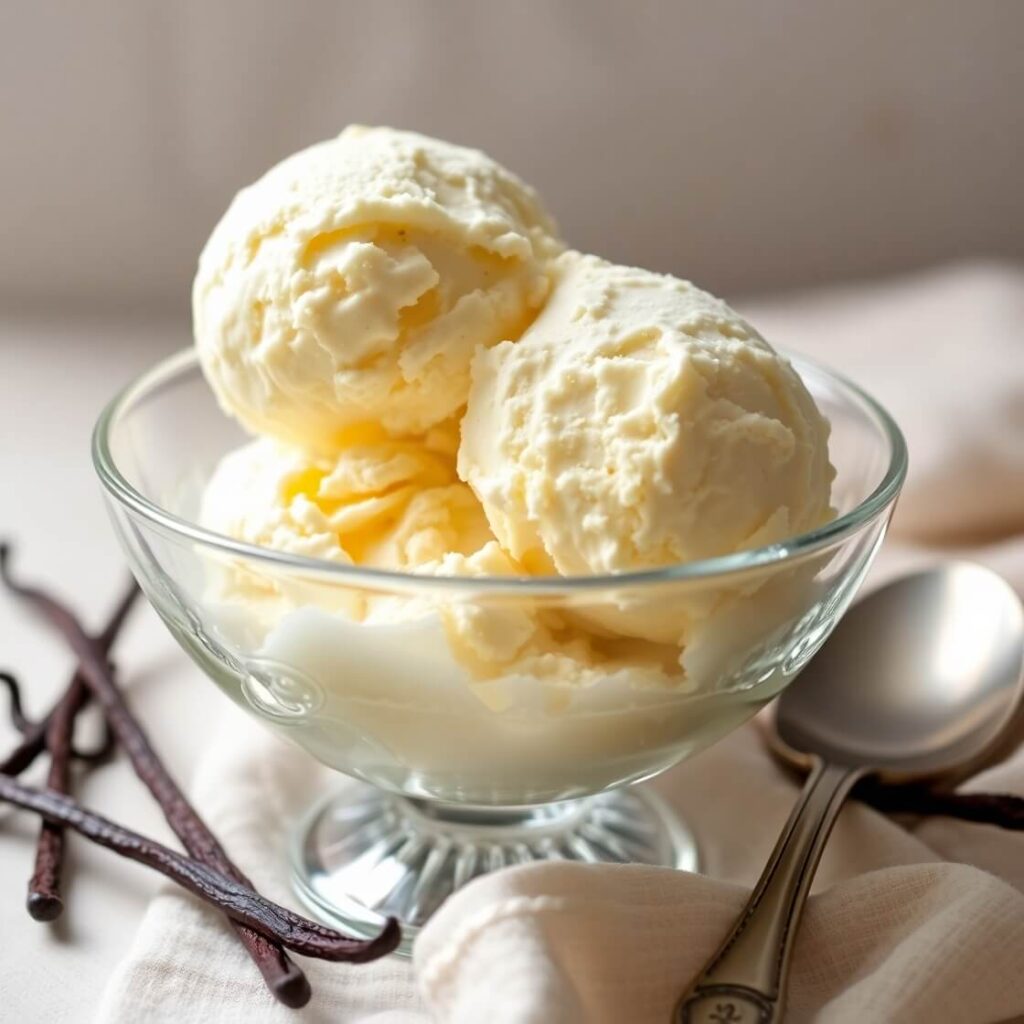
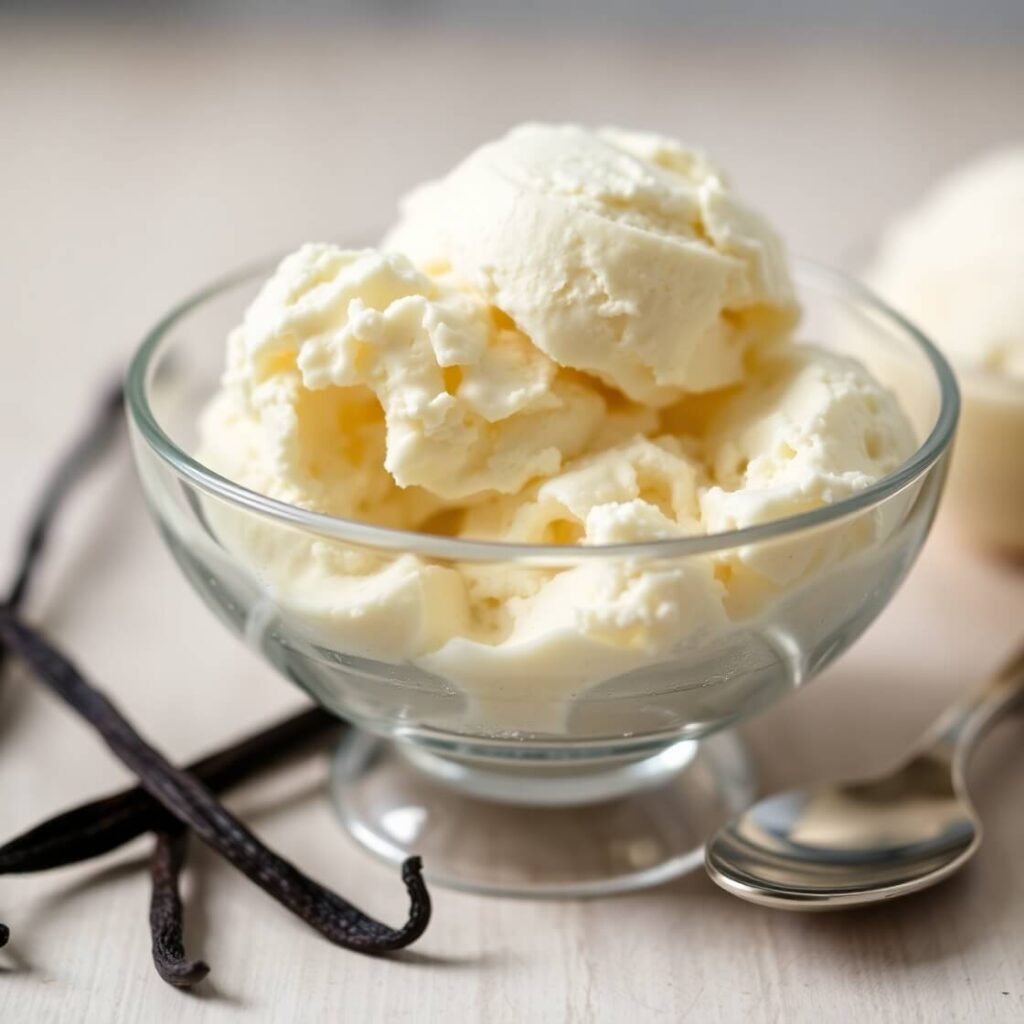
Homemade Vanilla Ice Cream Recipe
This homemade vanilla ice cream is rich, creamy, and packed with real vanilla flavor. Made with a classic custard base of milk, cream, egg yolks, and sugar, it churns up into a velvety smooth treat that’s far superior to anything from the store. Whether served on its own, paired with warm pie, or layered into sundaes, this ice cream is pure dessert perfection. With a little planning and some quality ingredients, you can bring that old-fashioned creamery taste right into your kitchen.
- Total Time: 6–12 hours (including chilling and freezing)
- Yield: 1.5
Ingredients
- 2 cups whole milk
- 1 cup heavy cream
- 6 egg yolks
- ¾ cup granulated sugar
- 1 tablespoon pure vanilla extract (or 1 vanilla bean)
- Pinch of salt
Instructions
- Heat milk and cream in a saucepan until hot but not boiling. Steep with vanilla bean if using.
- In a bowl, whisk egg yolks and sugar until pale.
- Slowly temper yolks with warm milk mixture, then return to saucepan.
- Cook over medium heat, stirring, until custard thickens (170–175°F).
- Strain into a bowl, stir in vanilla extract and salt, and chill completely.
- Churn in an ice cream maker until soft-serve consistency.
- Freeze for 2–4 hours until firm before serving.
Notes
- For a deeper flavor, chill the custard overnight before churning.
- Add vanilla bean paste for those classic specks.
- Always strain your custard for the silkiest texture.
- Prep Time: 25 minutes
- Cook Time: 15 minutes
- Category: Dessert
- Method: Churned
- Cuisine: American
- Diet: Vegetarian
Nutrition
- Serving Size: 1.5
- Calories: 210
- Sugar: 18g
- Sodium: 45mg
- Fat: 14g
- Saturated Fat: 8g
- Unsaturated Fat: 5g
- Trans Fat: 0g
- Carbohydrates: 20g
- Fiber: 0g
- Protein: 4g
- Cholesterol: 140mg