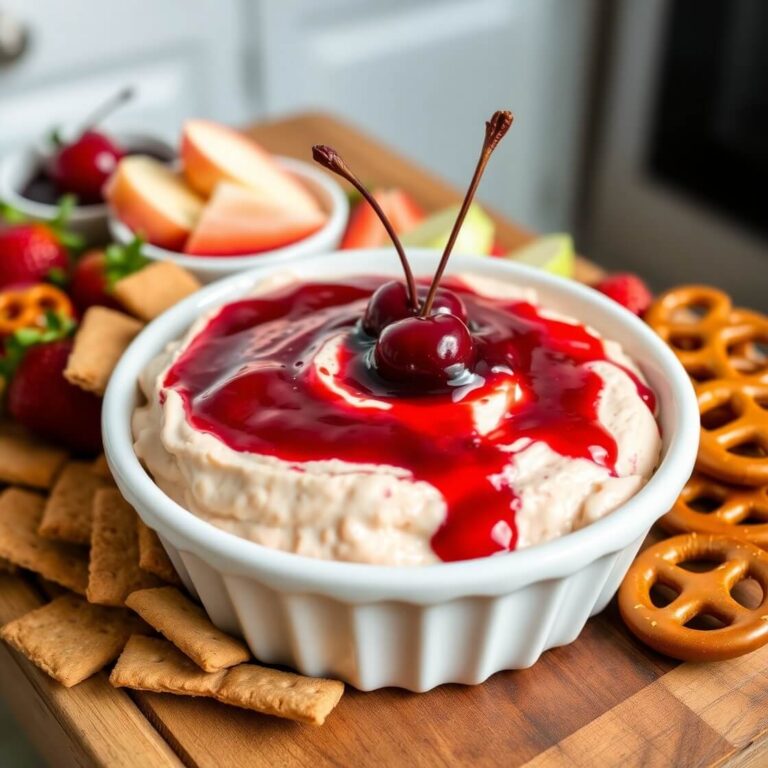

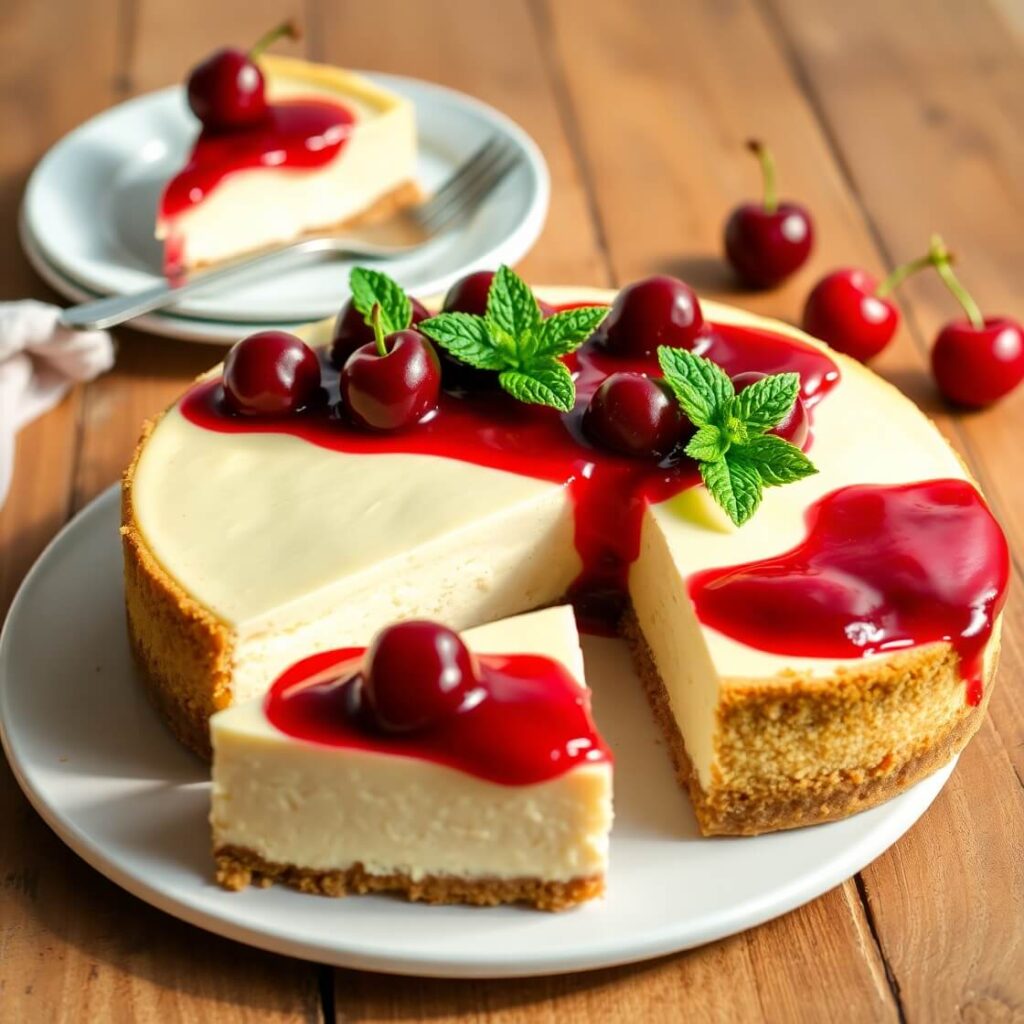
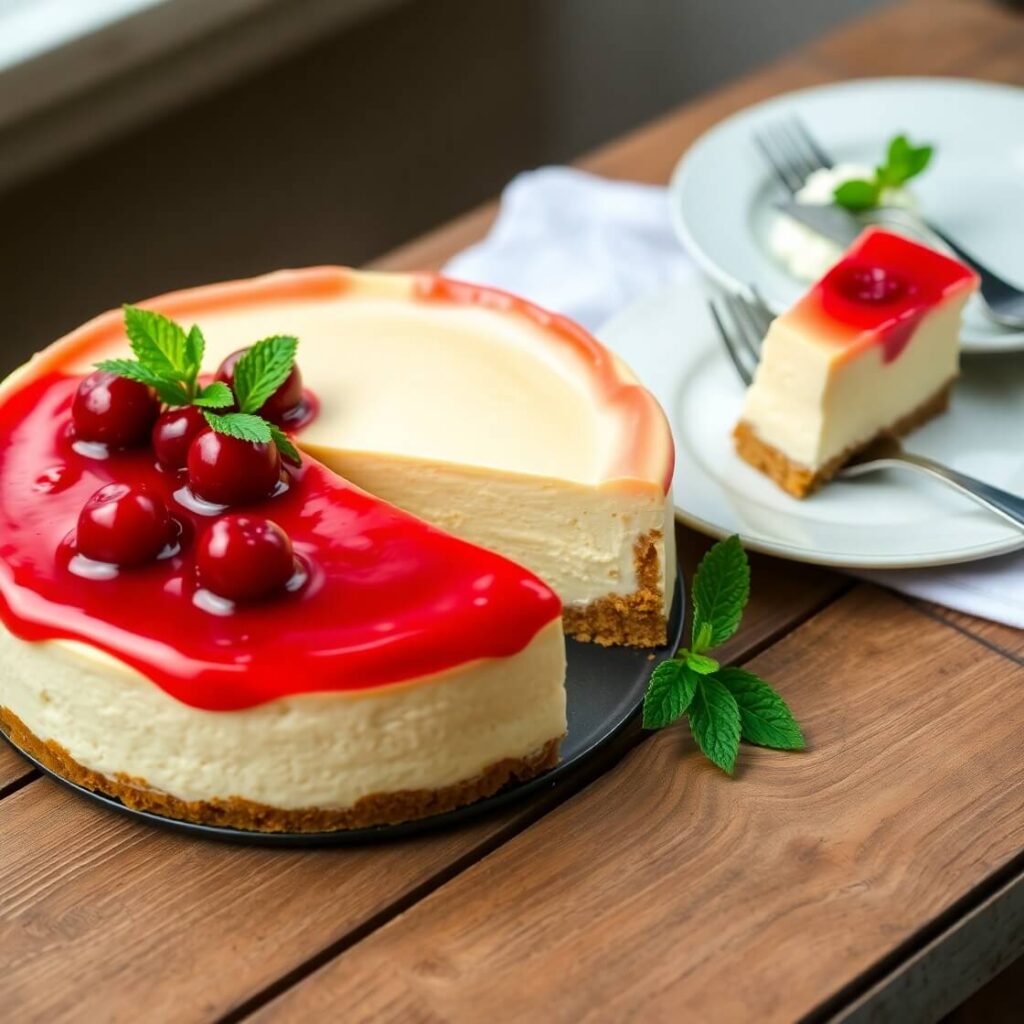
No bake cherry cheesecake is one of those delightful desserts that feels like a celebration in every bite — yet it’s incredibly simple to make. I came up with this recipe when I wanted a luscious, creamy cheesecake without the fuss of baking or waiting hours for it to cool down. It’s perfect for warm days when turning on the oven feels like a chore or for those moments when you want a show-stopping dessert but don’t want to spend all day in the kitchen. The sweet and tangy cherry topping adds a beautiful pop of color and flavor, making this cheesecake a true crowd-pleaser. If you’re craving something rich, smooth, and fresh, but without the oven hassle, this no bake cherry cheesecake is your new best friend.
Why I Love This Recipe

What really makes this no bake cherry cheesecake stand out is its simplicity and versatility. It’s a recipe that doesn’t require fancy equipment or skills — just a few staple ingredients that come together to create something impressive. The creamy filling is rich but light, with the perfect balance of sweetness and tang from cream cheese and fresh cherries.
This cheesecake sets up beautifully in the fridge without baking, which means no risk of cracking or overcooking. Plus, the cherry topping adds a vibrant burst of flavor and a glossy finish that’s irresistible. I love that it’s an all-season dessert — it’s just as comforting in the winter as it is refreshing in the summer.
If you’re someone who enjoys easy recipes that look like you’ve spent hours crafting, this is it. It’s ideal for last-minute gatherings, birthday parties, or just a sweet treat to enjoy after dinner. The no bake aspect means it’s accessible to bakers and non-bakers alike.
Ingredients for No Bake Cherry Cheesecake
Let’s talk ingredients — because the magic really lies in what you choose here. To create that perfect no bake cherry cheesecake, you’ll need:
- Cream cheese, softened: This is the heart of the cheesecake filling. The creaminess and slight tang define the texture and flavor.
- Heavy whipping cream or double cream: Whipping this to soft peaks adds the light, airy texture that balances the richness of the cream cheese.
- Powdered sugar: For smooth sweetness that blends easily without graininess.
- Vanilla extract: Just a splash elevates the whole flavor profile with its warm, aromatic notes.
- Graham cracker crumbs or digestive biscuits: For the crust, providing that buttery, crunchy base to contrast the creamy filling.
- Unsalted butter, melted: To bind the crust and give it a rich flavor.
- Cherry pie filling or fresh cherries cooked down: The crowning glory on top — sweet, tangy, and glossy.
All of these ingredients are commonly found in most kitchens or local grocery stores, making this a highly convenient recipe.
The cream cheese and cream give you that velvety texture, while the crust anchors everything. If you opt for homemade cherry topping instead of store-bought pie filling, you can control the sweetness and freshness, making it even better.
How Much Time Will You Need
One of the biggest perks of this recipe is how quick it is to pull together. From start to finish, it’ll take you around 20 to 30 minutes to prepare the crust, whip up the filling, and assemble everything.
The real waiting time comes from chilling — you’ll want to let it rest in the fridge for at least 4 hours to set firmly. If you have more patience, overnight chilling gives the best texture and flavor.
So, active hands-on time is minimal, making this an ideal dessert to prep in the morning or the day before your event.
How to Make This No Bake Cherry Cheesecake
Step-by-step, here’s how to bring this cheesecake to life:
Step 1: Prepare the crust. In a mixing bowl, combine the graham cracker crumbs (or crushed digestive biscuits) with the melted unsalted butter. Stir until the crumbs are fully coated and the mixture holds together when pressed. Press this mixture firmly into the bottom of a 9-inch springform pan or pie dish, creating an even layer. Chill it in the fridge for about 10 minutes to set while you prepare the filling.
Step 2: Make the cheesecake filling. In a large bowl, beat the softened cream cheese with an electric mixer until smooth and creamy. Gradually add powdered sugar and vanilla extract, continuing to beat until fully incorporated.
Step 3: Whip the heavy cream in a separate chilled bowl. Beat it on medium-high speed until soft peaks form — this means the cream holds shape but still folds gently when stirred.
Step 4: Gently fold the whipped cream into the cream cheese mixture using a spatula. Do this carefully to keep the filling light and airy without losing volume.
Step 5: Pour the filling over the chilled crust, smoothing the top with a spatula.
Step 6: Refrigerate the cheesecake for at least 4 hours, or overnight for best results. This allows the filling to set firmly.
Step 7: Once set, top the cheesecake with your cherry pie filling or fresh cherry compote. Spread evenly to cover the surface.
Step 8: For an extra touch, garnish with a few fresh cherries or a sprinkle of toasted almonds.
Step 9: Serve chilled and enjoy!
Substitutions
The beauty of this recipe is how flexible it is with substitutions that can either lighten it up or cater to dietary needs.
If you want a lighter cheesecake, swap out the heavy cream for coconut cream or a plant-based whipping cream. This keeps the richness but makes it dairy-free.
For the crust, if you don’t have graham crackers, digestive biscuits or even crushed vanilla wafers work beautifully. You can also mix in some finely chopped nuts like pecans or walnuts for added crunch.
Instead of cherry pie filling, fresh or frozen cherries cooked with a little sugar and lemon juice can be used to make a natural cherry topping without the preservatives.
If powdered sugar isn’t available, you can use superfine sugar, but ensure it dissolves well in the cream cheese.
Best Side Dishes for No Bake Cherry Cheesecake
Pairing your no bake cherry cheesecake with the right side dishes elevates the whole dessert experience. Here are three perfect companions:
- Fresh mixed berry salad: A light and refreshing contrast with strawberries, blueberries, and raspberries.
- Almond biscotti: Crunchy and subtly sweet, perfect for dipping or nibbling alongside your slice.
- Mint-infused iced tea: The herbal notes cleanse the palate and balance the cheesecake’s richness.
These sides create a beautiful balance of textures and flavors, making your dessert moment truly special.
Serving and Presentation Tips
Serving no bake cherry cheesecake in a way that dazzles your guests can really elevate the whole experience. I love to start by chilling the cheesecake thoroughly—this ensures it slices cleanly and holds its shape beautifully. When you’re ready to serve, use a sharp knife dipped in hot water and wiped dry between slices for perfect, smooth cuts.
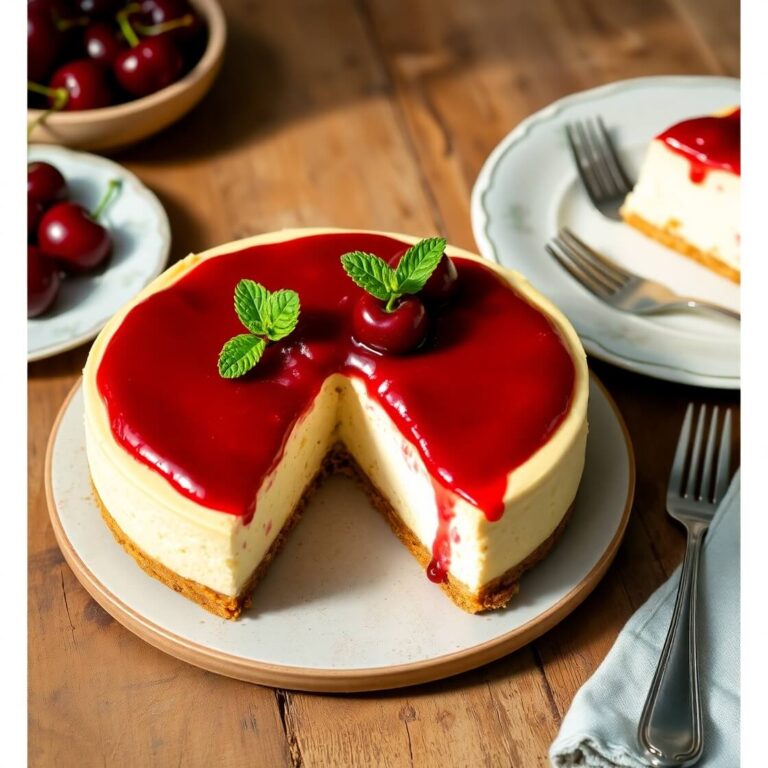
For presentation, consider adding a few fresh cherries on top or a sprig of mint for a pop of color and freshness. A light dusting of powdered sugar around the edges of the plate adds a delicate, elegant touch. Serving on a pretty cake stand or individual dessert plates with a dollop of whipped cream on the side instantly upgrades your dessert game.
If you’re serving at a party, cut the cheesecake into small, bite-sized squares or even use cookie cutters to create fun shapes—this makes it easier for guests to enjoy without utensils and adds a playful vibe.
Tips and Tricks to Make This Recipe Even Better
There are a few simple tricks that make this no bake cherry cheesecake taste even more incredible:
- Always use full-fat cream cheese and heavy cream for the richest, creamiest texture. Low-fat versions won’t set as well and can taste a bit grainy.
- Make sure the cream cheese is softened to room temperature before mixing. This helps you get a smooth, lump-free filling.
- Whip your heavy cream to soft peaks—not too stiff—so it blends into the cream cheese mixture smoothly without becoming too dense.
- Chill the cheesecake for at least 4 hours, but ideally overnight. Patience here pays off with a perfectly firm and sliceable cheesecake.
- If you want a more intense cherry flavor, try adding a teaspoon of cherry liqueur or a splash of almond extract into your cherry topping.
- For an extra special crust, mix in a pinch of cinnamon or nutmeg with the crumbs before adding the butter—it pairs beautifully with the cherry topping.
- Use a springform pan for easy removal and neat edges, but if you don’t have one, line your pan with parchment paper with some overhang to lift the cheesecake out cleanly.
Common Mistakes to Avoid
Even simple recipes can trip you up if you’re not careful. Here are common pitfalls to watch out for:
- Don’t rush the chilling time. Cutting into the cheesecake too soon will cause it to be too soft and messy.
- Avoid overmixing the whipped cream into the cream cheese mixture. Fold gently to keep the filling light and fluffy.
- Using cold cream cheese straight from the fridge can lead to lumps in the filling. Let it soften first.
- Don’t skip pressing the crust firmly. A loosely packed crust will crumble apart when you slice.
- When slicing, don’t use a dull knife or cut without cleaning the blade between cuts — this causes uneven edges and messiness.
- Be cautious with sweeteners. If you use a pre-made cherry pie filling that is very sweet, reduce the sugar in the filling slightly to balance flavors.
How to Store It
Storing your no bake cherry cheesecake correctly keeps it fresh and delicious:
- Always cover the cheesecake tightly with plastic wrap or use an airtight container to prevent it from absorbing fridge odors.
- Store it in the refrigerator — it will keep well for up to 4-5 days.
- If you need to store it longer, cheesecake freezes beautifully. Wrap it tightly in plastic wrap and then foil, and freeze for up to 2 months. Thaw overnight in the fridge before serving.
- Avoid leaving the cheesecake out at room temperature for more than two hours to maintain food safety and texture.
FAQ
Can I make this no bake cherry cheesecake vegan or dairy-free?
Yes! Substitute the cream cheese with a vegan cream cheese alternative and use coconut cream instead of heavy cream. Make sure your crust ingredients are also vegan-friendly.
Can I use fresh cherries instead of cherry pie filling?
Absolutely! You can cook fresh or frozen cherries with a little sugar and lemon juice until thickened to make your own cherry topping.
How long should I chill the cheesecake?
For best results, chill for at least 4 hours, but overnight chilling is ideal for the best texture and flavor.
Can I make this cheesecake in advance for a party?
Yes! This cheesecake is perfect for making a day ahead, which actually helps the flavors meld and the texture firm up beautifully.
What can I use if I don’t have graham crackers for the crust?
Digestive biscuits, vanilla wafers, or even crushed pretzels can be used. Adjust sugar accordingly if using salty substitutes like pretzels.
No Bake Cherry Cheesecake
A creamy, luscious no bake cheesecake with a buttery graham cracker crust and a vibrant cherry topping. Perfect for when you want an elegant dessert without the oven hassle. Rich, smooth, and refreshingly sweet — it’s a crowd-pleaser that’s quick to prepare and perfect for any occasion.
- Total Time: 4 hours 20 minutes
- Yield: 8
Ingredients
- 2 cups graham cracker crumbs (or digestive biscuits)
- 1/2 cup unsalted butter, melted
- 16 oz (450g) cream cheese, softened
- 1 cup powdered sugar
- 1 teaspoon vanilla extract
- 1 1/2 cups heavy whipping cream
- 1 cup cherry pie filling (or homemade cherry compote)
Instructions
- Mix graham cracker crumbs and melted butter until combined, then press firmly into the base of a 9-inch springform pan. Chill for 10 minutes.
- Beat softened cream cheese until smooth, add powdered sugar and vanilla, and mix well.
- Whip heavy cream to soft peaks in a separate bowl.
- Gently fold whipped cream into the cream cheese mixture until well combined.
- Spread the filling over the chilled crust and smooth the top.
- Refrigerate for at least 4 hours or overnight.
- Spread cherry pie filling evenly on top before serving.
Notes
- For best texture, ensure cream cheese is fully softened before mixing.
- Use a springform pan or line your dish with parchment for easy removal.
- Adjust sweetness of cherry topping to taste if using fresh cherries.
- Prep Time: 20 minutes
- Cook Time: 4 hours (minimum)
- Category: Dessert
- Method: No bake
- Cuisine: American
- Diet: Vegetarian
Nutrition
- Serving Size: 8
- Calories: 410
- Sugar: 28g
- Sodium: 180mg
- Fat: 32g
- Saturated Fat: 19g
- Unsaturated Fat: 9g
- Trans Fat: 0g
- Carbohydrates: 25g
- Fiber: 1g
- Protein: 5g
- Cholesterol: 100mg