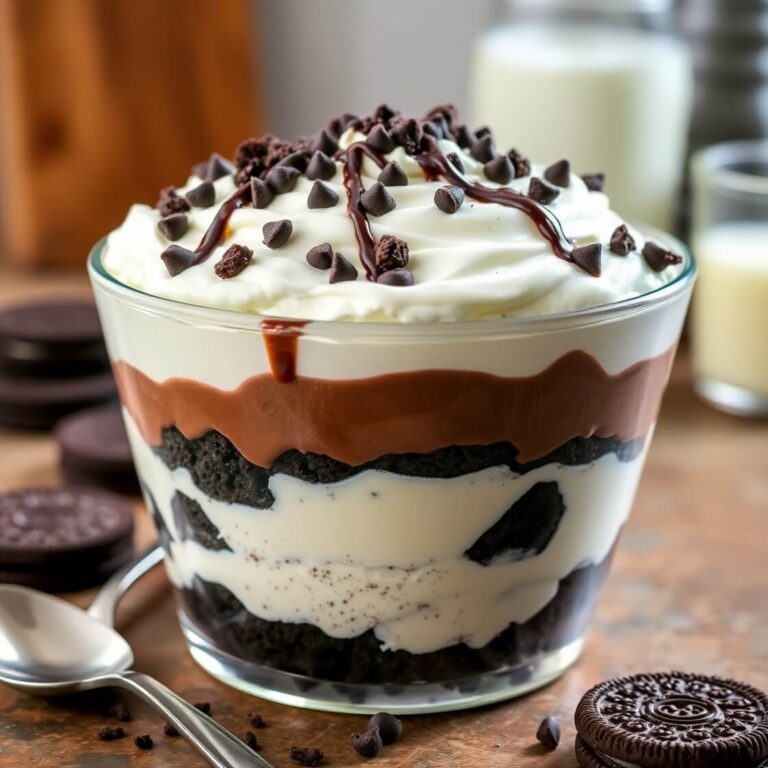
I still remember the first time I made this No Bake Oreo Cheesecake. It was one of those sweltering summer afternoons when turning on the oven felt like a crime against comfort. I was craving something rich, creamy, and indulgent—but with zero effort and minimal heat involved. That’s when this no-fuss, decadent dessert came to life in my kitchen.
It’s cool, creamy, and packed with that signature cookies-and-cream flavor we all know and love. The best part? It doesn’t require any baking, special equipment, or advanced culinary skills. It’s the kind of dessert that impresses guests at a dinner party just as easily as it delights kids at a birthday bash.
If you’re someone who wants a luxurious cheesecake without the hassle, this recipe is your new go-to. Read on and get ready to wow everyone with this irresistible no bake Oreo cheesecake.
Why I Love This Recipe

There’s something truly magical about recipes that feel fancy but come together with such ease—and this one hits that sweet spot.
This no bake Oreo cheesecake is the ultimate dessert hack. It’s simple enough for beginner home cooks but rich enough to serve at any celebration. It doesn’t require gelatin or fancy techniques. You don’t need to preheat the oven. You don’t even need to worry about cracks on the surface or water baths like you would with traditional baked cheesecakes.
Every bite is loaded with Oreo flavor—there’s Oreo in the crust, Oreo in the filling, and Oreo on top. It’s creamy, sweet, just the right amount of tangy from the cream cheese, and has that satisfying crunch and chocolate flavor from the cookies.
Plus, it’s totally customizable. You can add whipped cream, chocolate drizzle, or even fruit on top if you want to elevate the presentation. Whether you’re making it for a family gathering, potluck, or just because, it’s a showstopper without the stress.
Ingredients for No Bake Oreo Cheesecake
The ingredient list is refreshingly short, and everything is easy to find in most grocery stores. Let me walk you through what you’ll need and why it matters.
You’re going to need:
- Oreos – These are the heart and soul of the cheesecake. Crushed for the crust, folded into the filling, and sprinkled on top for that iconic cookies-and-cream flavor.
- Butter – Unsalted and melted. This binds the crust together and adds richness.
- Cream cheese – Full-fat is best for texture and flavor. It provides that classic tangy richness.
- Powdered sugar – Dissolves easily into the cream cheese and sweetens the filling without being gritty.
- Vanilla extract – Just a dash enhances all the flavors and gives it a warm depth.
- Heavy cream or whipping cream – This is what turns the filling light and airy. When whipped and folded in, it gives that mousse-like, creamy texture that melts in your mouth.
There are no fancy ingredients here—just everyday staples that come together in the most delightful way. It’s worth mentioning that using high-quality cream cheese and fresh heavy cream will make a noticeable difference in the final result.
How Much Time Will You Need
This is a quick and easy recipe—but patience is key for that perfect texture.
Here’s how the timing breaks down:
- Prep time: 20 minutes
- Chill time: At least 6 hours, preferably overnight
- Total time: About 6 hours 20 minutes
Most of that time is hands-off chilling in the fridge. So while it does require some planning ahead, the actual effort is minimal.
How to Make This No Bake Oreo Cheesecake
Let’s break this down step by step so you know exactly what to expect. This method is forgiving, flexible, and perfect for beginner bakers or anyone short on time.
Step – 1: Prepare the crust
Start by lining the bottom of a 9-inch springform pan with parchment paper. This makes it easier to remove the cheesecake later.
Crush 24 Oreo cookies in a food processor (filling included) until they turn into fine crumbs. If you don’t have a food processor, place them in a zip-top bag and crush them with a rolling pin.
Melt 1/2 cup of unsalted butter and mix it with the crumbs until everything is moistened. Press this mixture into the bottom of your prepared pan, using the back of a spoon or a flat-bottomed glass to press it down firmly and evenly.
Place the crust in the fridge to chill while you make the filling.
Step – 2: Whip the cream
In a large, cold mixing bowl, pour 1 1/2 cups of heavy cream. Whip it with a handheld or stand mixer until stiff peaks form. Set it aside—you’ll fold this into the cream cheese mixture later to make it light and fluffy.
Step – 3: Make the cheesecake filling
In another large mixing bowl, beat 24 ounces (three 8-oz blocks) of full-fat cream cheese until smooth and creamy. Make sure it’s at room temperature for easy mixing.
Add 1 cup of powdered sugar and 1 teaspoon of vanilla extract. Beat again until well combined and silky.
Now, roughly crush about 12 Oreos (you want larger chunks here, not fine crumbs) and fold them gently into the cream cheese mixture.
Finally, fold the whipped cream into the cream cheese filling, one-third at a time. Use a spatula and take your time with this step—you want to keep as much air in the mixture as possible.
Step – 4: Assemble the cheesecake
Pour the filling over your chilled crust and smooth the top with a spatula. For a rustic look, you can leave it slightly textured. For a cleaner presentation, use an offset spatula to level the surface.
Crumble or chop 4-6 more Oreos and sprinkle them on top as garnish. Press them in gently so they stay put.
Step – 5: Chill
Cover the cheesecake with plastic wrap or foil and refrigerate it for at least 6 hours—preferably overnight. This allows the cheesecake to set fully and develop that luscious texture.
Step – 6: Slice and serve
When you’re ready to serve, run a butter knife around the edge of the pan before releasing the springform sides. Slice with a sharp knife wiped clean between cuts for the neatest results.
Substitutions
Sometimes you just don’t have everything on hand—or you’re trying to make the dessert fit your preferences. Here’s how you can easily switch things up without sacrificing quality.
No Oreos? You can use any chocolate sandwich cookies or even chocolate graham crackers for the crust. Just be sure to adjust the butter accordingly if you’re using a drier cookie.
Cream cheese alternatives – If you’re looking for a lighter option, you could use Neufchâtel cheese. It has less fat but a very similar texture and flavor.
Sugar swaps – Powdered sugar is best for this recipe because it blends so smoothly. But if you’re out, you can make your own by blending granulated sugar until fine. You can also use stevia-based powdered sweeteners for a reduced-sugar version.
Dairy-free version – Use dairy-free cream cheese and coconut cream (chilled and whipped) in place of heavy cream. Just be aware the flavor and texture will shift slightly, but it still works beautifully.
Best Side Dishes for No Bake Oreo Cheesecake
While this cheesecake absolutely stands on its own, pairing it with the right side or drink can turn a simple dessert into a memorable treat.
- Fresh berries with mint – A small bowl of fresh raspberries or strawberries with mint brings a refreshing contrast to the richness of the cheesecake.
- Espresso or cold brew coffee – The bitterness of coffee balances the sweetness of the dessert, and the flavor pairing is simply irresistible.
- Chocolate dipped pretzels – A salty-sweet combo that adds crunch and complements the Oreo theme perfectly.
Serving and Presentation Tips
There’s something about a beautifully presented dessert that makes it taste even better. Even though this No Bake Oreo Cheesecake is effortless to make, it deserves a little fanfare when it hits the table.
The first tip? Let it chill completely. I know it’s tempting to dive in early, but a fully set cheesecake slices cleaner and holds its shape better.
When serving, use a sharp, thin-bladed knife. Run it under hot water and wipe it clean between each slice for those crisp edges. You can serve slices on individual plates with a drizzle of chocolate sauce or even a few extra Oreo crumbs sprinkled around the plate.
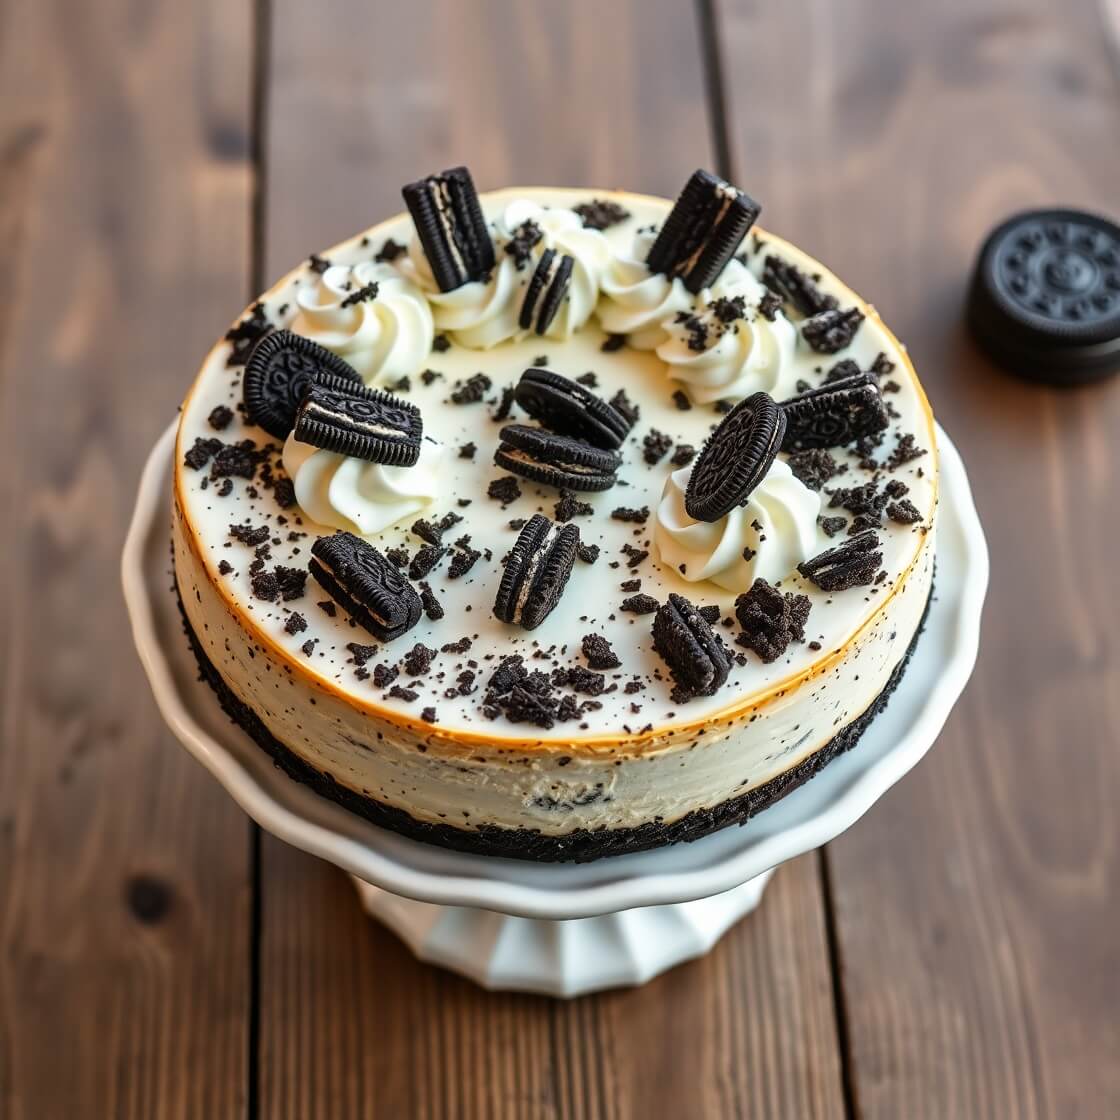
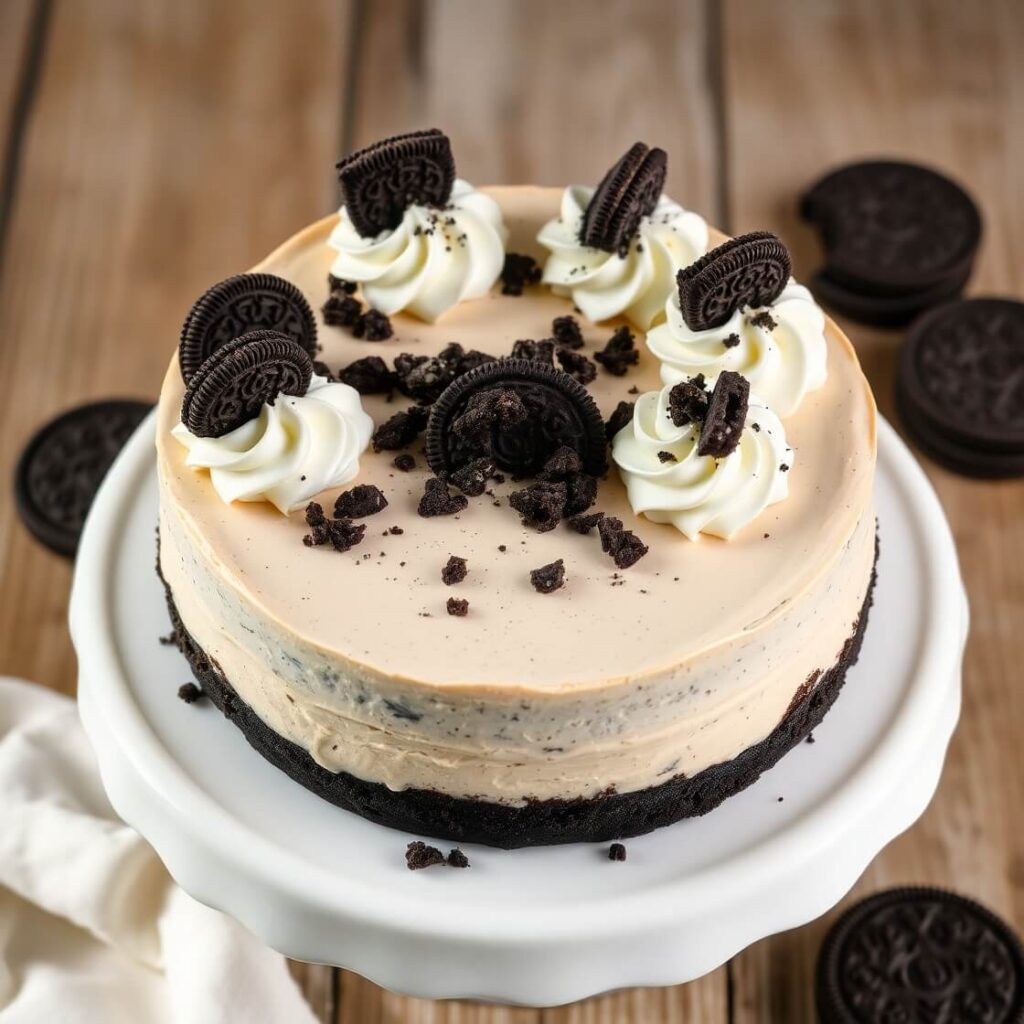
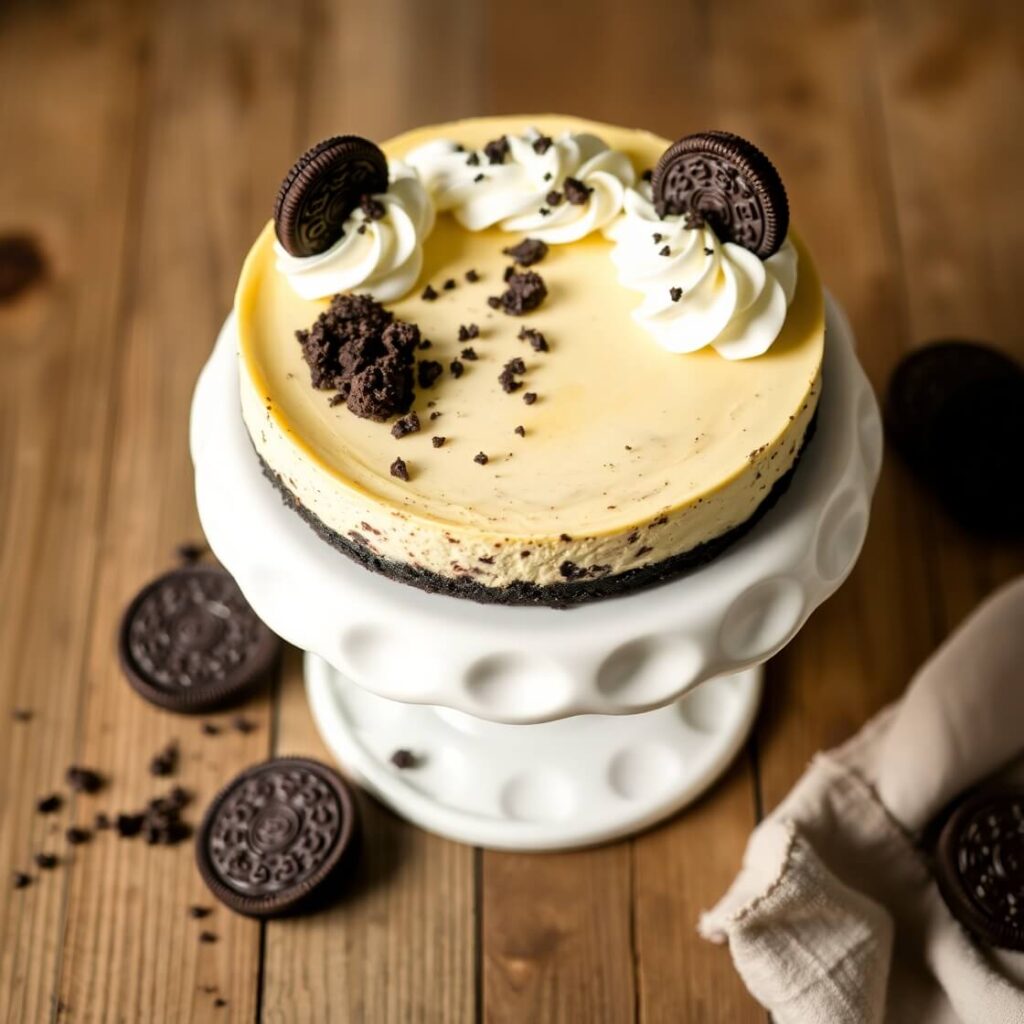
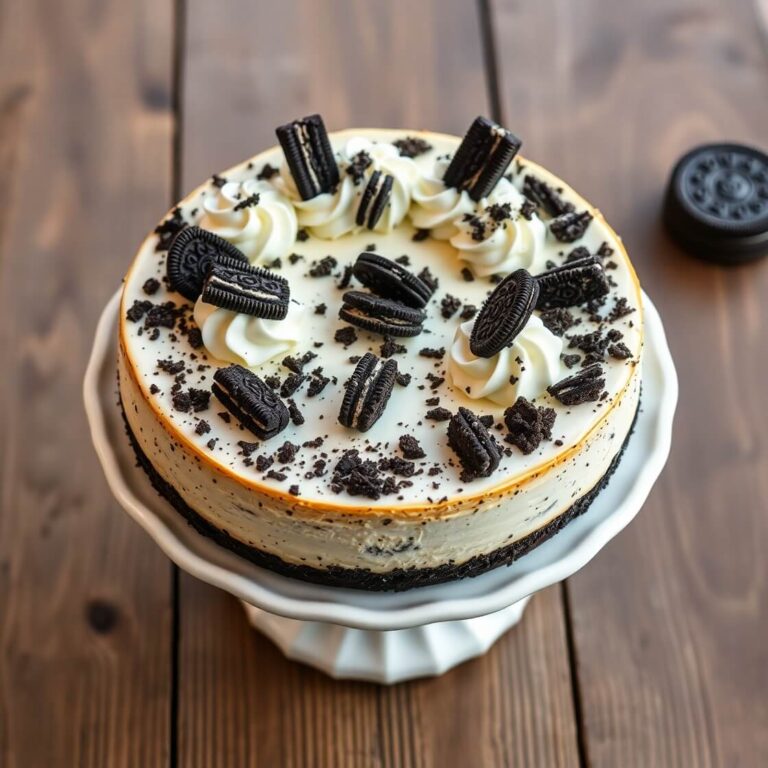
If you want to take things up a notch, pipe a swirl of whipped cream on each slice and top it with half an Oreo for that bakery-style finish.
For gatherings, consider serving it on a white cake stand or rustic wooden board—it makes the black-and-white Oreo pattern pop. And if you’re preparing it for a party, mini cheesecake versions in jars or muffin tins are just as cute as they are convenient.
Tips and Tricks to Make This Recipe Even Better
Making this no bake Oreo cheesecake is easy, but these little insider tips can elevate it from good to unforgettable.
- Room temperature cream cheese is non-negotiable. Cold cream cheese will leave lumps in your filling and make it harder to mix smoothly.
- Use cold heavy cream and chill your bowl before whipping. This ensures your cream whips up fluffy and stable—perfect for folding into the filling.
- Don’t overmix the whipped cream into the cheesecake base. Gently fold it in using a spatula to keep the mixture light and airy.
- Crust consistency matters. You want the texture to be like wet sand. If it’s too dry, it will crumble when sliced. If it’s too wet, it can get soggy. Adjust with a little more melted butter or cookie crumbs as needed.
- Chill overnight for the best results. Yes, six hours is technically enough—but overnight ensures the cheesecake sets completely and the flavors really meld together.
Common Mistakes to Avoid
Even a simple recipe has a few pitfalls to watch out for. Here are the most common mistakes—and how to sidestep them:
- Using low-fat cream cheese. It may seem healthier, but it won’t give you that luscious, creamy texture. Always go full-fat for best results.
- Not crushing Oreos finely for the crust. Large chunks can make the crust fall apart. Aim for a uniform, sand-like texture.
- Skipping the chill time. This is a no-bake recipe, but it still needs time to set. Rushing this step will lead to a soupy, messy dessert.
- Overmixing the filling. Once the whipped cream goes in, be gentle. Overmixing can deflate the air you whipped in and lead to a denser texture.
- Forgetting to line the pan. It’s not a dealbreaker, but lining the bottom of your springform pan with parchment makes it much easier to transfer the cheesecake to a serving plate.
How to Store It
The beauty of this cheesecake is that it stores well and still tastes fantastic days later.
In the fridge: Cover the cheesecake with plastic wrap or store slices in an airtight container. It’ll stay fresh for 4–5 days.
In the freezer: You can freeze the whole cheesecake or individual slices. Wrap tightly in plastic and then foil to prevent freezer burn. It’ll keep for up to 1 month. To serve, let it thaw in the fridge overnight. Note: the texture may be slightly softer after freezing, but it’s still delicious.
Pro tip: If you’re freezing individual slices, place them on a tray first to freeze solid, then wrap them individually. That way, you can pull out a slice anytime without thawing the whole thing.
FAQ
Can I make this cheesecake ahead of time?
Absolutely! In fact, it tastes better when made a day ahead. Just keep it covered in the fridge until you’re ready to serve.
Can I use store-brand sandwich cookies instead of Oreos?
Yes. Most chocolate sandwich cookies work just as well. Just make sure they’re fresh and have a good filling-to-cookie ratio.
Can I add other flavors to this cheesecake?
Sure! A swirl of peanut butter or Nutella folded into the filling is a fun twist. You can also mix in mint extract or top it with caramel drizzle for variety.
Can I make it in a different pan?
Yes, you can use an 8×8 square pan or even mini dessert cups. Just adjust your crust and filling amounts slightly to fit.
Is this cheesecake gluten-free?
Not as written, since Oreos contain gluten. But you can easily make it gluten-free by using gluten-free sandwich cookies for the crust and filling.
No Bake Oreo Cheesecake
This creamy, dreamy No Bake Oreo Cheesecake is rich, indulgent, and packed with cookies-and-cream flavor—without ever turning on the oven. With a buttery Oreo crust, smooth cream cheese filling, and crushed cookies throughout, it’s the perfect dessert for summer days, dinner parties, or when you just need a little slice of comfort. It’s easy enough for beginner bakers and delicious enough to impress any guest. Chill it overnight for the best texture, and enjoy it straight from the fridge for a refreshing treat.
- Total Time: 6 hours 20 minutes
- Yield: 12
Ingredients
- 30 Oreo cookies (divided, for crust, filling, and topping)
- 1/2 cup unsalted butter, melted
- 24 oz (3 blocks) full-fat cream cheese, room temperature
- 1 cup powdered sugar
- 1 tsp vanilla extract
- 1 1/2 cups heavy whipping cream (cold)
Instructions
- Crush 24 Oreos (with filling) into fine crumbs.
- Mix with melted butter and press into the bottom of a 9-inch springform pan. Chill while preparing filling.
- Whip heavy cream until stiff peaks form. Set aside.
- In a separate bowl, beat cream cheese until smooth. Add powdered sugar and vanilla; beat until well combined.
- Fold in roughly chopped 12 Oreos.
- Gently fold in whipped cream, one-third at a time, until smooth and fluffy.
- Spread filling over crust and smooth the top.
- Garnish with chopped Oreos. Cover and chill for at least 6 hours or overnight.
- Slice and serve chilled.
Notes
- For clean slices, warm a knife with hot water and wipe between cuts.
- Chill overnight for best results.
- Swap Oreos for gluten-free cookies for a gluten-free version.
- Use full-fat cream cheese for optimal texture.
- Prep Time: 20 minutes
- Cook Time: 6–8 hours
- Category: Dessert
- Method: No bake
- Cuisine: American
- Diet: Vegetarian
Nutrition
- Serving Size: 12
- Calories: 430
- Sugar: 24g
- Sodium: 320mg
- Fat: 32g
- Saturated Fat: 18g
- Unsaturated Fat: 12g
- Trans Fat: 0.5g
- Carbohydrates: 34g
- Fiber: 1g
- Protein: 5g
- Cholesterol: 90mg