
There’s something undeniably nostalgic about dump cakes. Maybe it’s the simplicity. Maybe it’s the comfort. Or maybe it’s just the gooey, indulgent bite you get every single time. Either way, when I stumbled on the idea of an Oreo Dump Cake, I knew I had to make it—and then make it again and again.
This cake is made for days when you need a little extra joy but not a lot of effort. It’s the kind of dessert you can throw together in minutes, using pantry staples, and it always delivers that decadent, creamy-crunchy Oreo goodness.
I first made this recipe during a lazy weekend when I had friends coming over but zero motivation to bake anything complicated. I had Oreos in the cupboard, a box of cake mix in the pantry, and a tub of whipped topping in the fridge. That’s how this ridiculously easy and over-the-top delicious Oreo Dump Cake came to life.
And let me tell you—it’s a crowd favorite. If you love Oreos, pudding, and the magic of a warm, melty dessert, you’ll want to read every last word.
Why I Love This Recipe

This recipe is a lifesaver for anyone who needs a last-minute dessert that still feels special. No bowls, no mixers, no hassle—just layers of deliciousness baked into one beautiful dish.
What makes this cake truly special is the flavor fusion and texture contrast. You get the soft, moist layers of chocolate cake, the richness of vanilla or cookies-and-cream pudding, and the surprise crunch of Oreo bits scattered throughout. It’s like a cross between a pudding cake and a cookie crumble—comfort food taken to the next level.
It’s also incredibly customizable. You can change up the flavor of pudding, swap in different kinds of Oreos (hello, Golden Oreos or Mint Oreos!), or add fun toppings like marshmallows or chocolate chips.
This is the kind of recipe anyone can make, and everyone will remember.
Ingredients for Oreo Dump Cake
Ready to raid your pantry? Here’s what you’ll need to make your own warm, gooey Oreo Dump Cake. Don’t worry—these are simple, everyday ingredients, but together they create dessert magic.
You’ll need:
- Oreos: Crushed roughly, with some large pieces for that classic crunch. You can use regular Oreos, but Double Stuf makes it extra rich.
- Chocolate cake mix: This acts as the base of the dump cake and provides that familiar cakey structure. You can also use devil’s food or fudge cake mix for extra intensity.
- Instant pudding mix: Vanilla or cookies & cream both work beautifully. The pudding melts into the cake, making everything extra moist and velvety.
- Milk: To make the pudding rich and smooth.
- Butter: Melted and drizzled over the cake mix to help it bake up golden and buttery.
- Cool Whip (or any whipped topping): For that fluffy, creamy layer on top once it’s baked and cooled.
- Chocolate chips (optional): These melt into little pockets of chocolatey goodness if you want to go all out.
These ingredients create the ultimate Oreo dessert experience—rich, gooey, melty, crunchy, and creamy, all in one pan.
How Much Time Will You Need
This is one of those delightful recipes where your oven does most of the heavy lifting.
- Prep time: 10 minutes
- Cook time: 40–45 minutes
- Cool time (optional but ideal): 10–15 minutes before serving
In under an hour, you can have a warm and indulgent dessert ready for family, friends, or, let’s be honest—just you and a fork.
How to Make This Oreo Dump Cake
This is called a dump cake for a reason—because you literally dump everything into a dish and bake it. No mixers. No fuss. Just follow along:
Step – 1: Prepare Your Baking Dish
Preheat your oven to 350°F (175°C). Lightly grease a 9×13-inch baking dish with butter or non-stick spray. This helps prevent sticking and makes cleanup a breeze.
Step – 2: Crush the Oreos
Take about 20-24 Oreo cookies and roughly crush them. You want a mix of crumbs and larger chunks. This gives the cake that perfect texture—some bites are gooey, some crunchy.
Spread about ⅔ of the crushed Oreos evenly across the bottom of the dish. This will be your “crust” layer.
Step – 3: Add the Pudding
In a separate bowl, whisk together a package of instant vanilla or cookies & cream pudding with 2 cups of cold milk. Let it sit for 2–3 minutes until it thickens slightly.
Pour the pudding over the crushed Oreos and gently smooth it into an even layer with a spatula.
Step – 4: Dump the Cake Mix
Sprinkle the dry chocolate cake mix evenly over the pudding layer. You don’t need to mix it—just spread it out gently so it covers all the pudding.
This may look a bit odd, but trust the process. The dry cake mix will absorb the moisture as it bakes and form a soft, rich layer.
Step – 5: Add Butter
Drizzle one stick (½ cup) of melted butter over the dry cake mix, trying to cover as much of the surface as possible. You don’t need to stir it in.
The butter melts into the cake mix during baking, helping it form a crisp, golden top layer.
Step – 6: Sprinkle Extras
If you want to go all out, now’s the time to sprinkle a handful of chocolate chips over the top. This adds little molten bites of chocolate throughout.
Finish with the remaining crushed Oreos on top.
Step – 7: Bake
Place the dish in your preheated oven and bake for 40–45 minutes, until the top is set and bubbly, and you see the edges start to crisp up.
You can insert a toothpick in the center—some pudding will stick (that’s normal), but the cake layer should be baked through.
Step – 8: Cool and Top
Remove from the oven and let it cool for about 10 minutes before topping with Cool Whip or whipped cream. You can spread it across the entire cake or serve dollops on individual portions.
This dish is best served warm with a scoop of ice cream or a cold glass of milk.
Substitutions
Not everyone has the exact ingredients on hand—and that’s okay. This cake is incredibly forgiving.
- Oreo substitutes: Try Golden Oreos, Mint Oreos, or any seasonal flavors (like Birthday Cake or Red Velvet).
- Cake mix: Devil’s food cake, fudge cake, or even vanilla cake mix if you want a lighter taste.
- Butter alternatives: You can use margarine or even coconut oil for a dairy-free version, but the flavor won’t be quite as rich.
- Pudding mix: Chocolate pudding, white chocolate pudding, or even banana pudding can create a fun twist.
- Whipped topping: Homemade whipped cream or dairy-free alternatives like coconut whip work great too.
Make it your own, based on what you have in the pantry.
Best Side Dish of Oreo Dump Cake
This cake is rich enough to shine on its own, but here are three perfect pairings to round out your dessert spread:
- Vanilla Bean Ice Cream: The cold, creamy contrast balances the warm, gooey cake.
- Fresh Berries: Strawberries or raspberries add a pop of tart freshness.
- Cold Milk or Mocha: A classic glass of milk or a lightly sweet iced coffee makes every bite taste like a childhood favorite—elevated.
Serving and Presentation Tips
Serving a dump cake might sound simple—and it is—but there are a few thoughtful ways to elevate the presentation and create a moment your guests won’t forget.
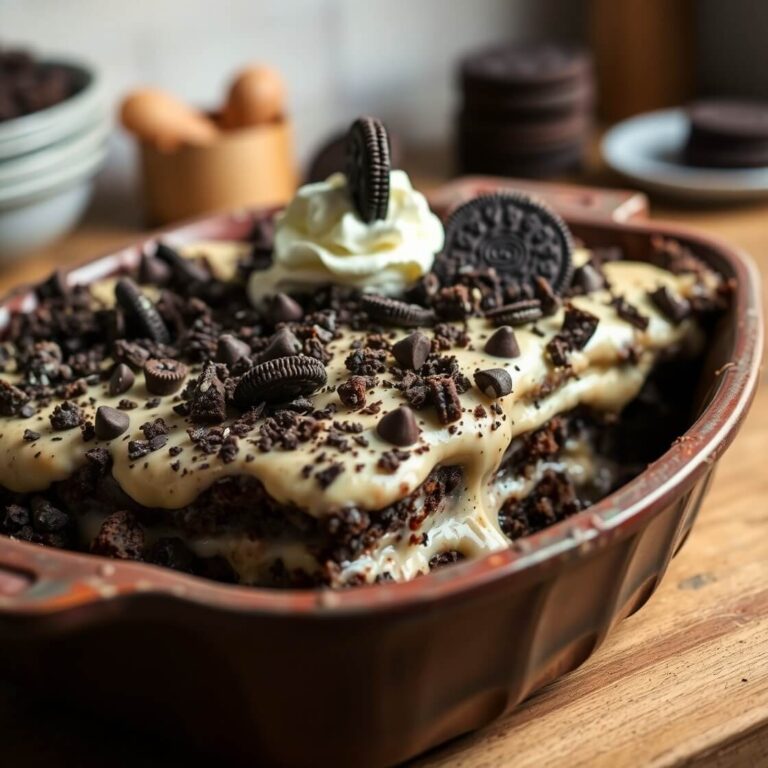
Start by scooping the cake while it’s still warm—right out of the baking dish—into small dessert bowls or ramekins. The contrast between the gooey pudding and the crumbly cake looks rustic and comforting. Add a generous dollop of Cool Whip or fresh whipped cream on top, and sprinkle with crushed Oreos for that extra dramatic flair.
For a more indulgent presentation, drizzle with chocolate syrup or a swirl of caramel sauce. If you’re serving this at a party or for guests, consider adding a whole Oreo standing upright in each serving for a little “ta-da” moment.
Plating matters—even for a dump cake. When it looks good, it somehow tastes even better.
Tips and Tricks to Make This Recipe More Better

Want to level up your Oreo Dump Cake every single time? These tips and tricks will help you turn this super simple dessert into something unforgettable.
- Use Double Stuf Oreos: For an ultra-creamy, sweet, and moist layer. The extra filling helps bind the cake and adds richness.
- Chill the pudding before layering: Letting the pudding thicken for a few minutes before layering helps create clean, distinct layers that don’t get too runny.
- Don’t overbake: This dessert is meant to be gooey in the center. Overbaking will dry it out. Take it out of the oven once the top looks set and golden brown.
- Add texture: Crushed pretzels, chopped nuts, or even toffee bits sprinkled on top can add extra crunch and flavor.
- Layer whipped cream just before serving: This prevents the Cool Whip from melting too fast and keeps it fluffy and fresh-looking.
These little tweaks make a big difference in both flavor and presentation.
Common Mistakes to Avoid
Even the easiest desserts come with a few pitfalls. Here’s how to dodge them so your Oreo Dump Cake turns out perfect every time.
- Using too much pudding or liquid: This can make the bottom layer overly soggy and prevent the cake mix from baking properly. Stick with the recommended amount.
- Stirring the layers: It might feel tempting to mix everything together, but don’t. This is a dump cake—the magic happens when the layers bake on their own.
- Uneven butter distribution: If the butter isn’t spread evenly across the dry cake mix, you’ll get dry patches. Use a spoon or small measuring cup to drizzle evenly.
- Skipping the whipped topping: It’s not just for looks—the whipped topping adds a creamy coolness that balances the richness.
- Serving too soon: Let the cake cool for 10 minutes before serving so it sets just enough to scoop cleanly.
Avoid these, and you’ll be in dessert heaven.
How to Store It
If you somehow manage to have leftovers (and that’s a big if), Oreo Dump Cake stores really well.
To refrigerate:
Let the cake cool completely. Cover the dish with plastic wrap or transfer portions into airtight containers. Store in the refrigerator for up to 4 days.
To freeze:
You can freeze individual portions wrapped tightly in plastic wrap, then foil, and place them in a freezer-safe bag. They’ll last about 2 months. When ready to eat, thaw overnight in the fridge and reheat gently in the microwave.
To reheat:
Warm individual portions in the microwave for 20–30 seconds. For a crispier top, pop them in the oven or toaster oven at 350°F for 10 minutes.
FAQ
Can I make this in advance?
Yes! You can assemble the layers (without baking) a few hours ahead and refrigerate. When you’re ready, bake it fresh so the top stays crisp.
Can I use different flavors of cake mix?
Absolutely. Try vanilla, red velvet, or even funfetti for a unique twist.
Is it possible to make this gluten-free?
Yes, just use gluten-free chocolate cake mix and certified gluten-free sandwich cookies. Always double-check labels.
Can I use homemade pudding instead of instant?
Yes, but make sure it’s thick enough to hold its shape and not too warm, or it may make the cake too soggy.
What’s the best way to crush Oreos for this recipe?
Use a zip-top bag and rolling pin or pulse in a food processor for 1–2 seconds. Don’t over-process—you want chunks, not dust.
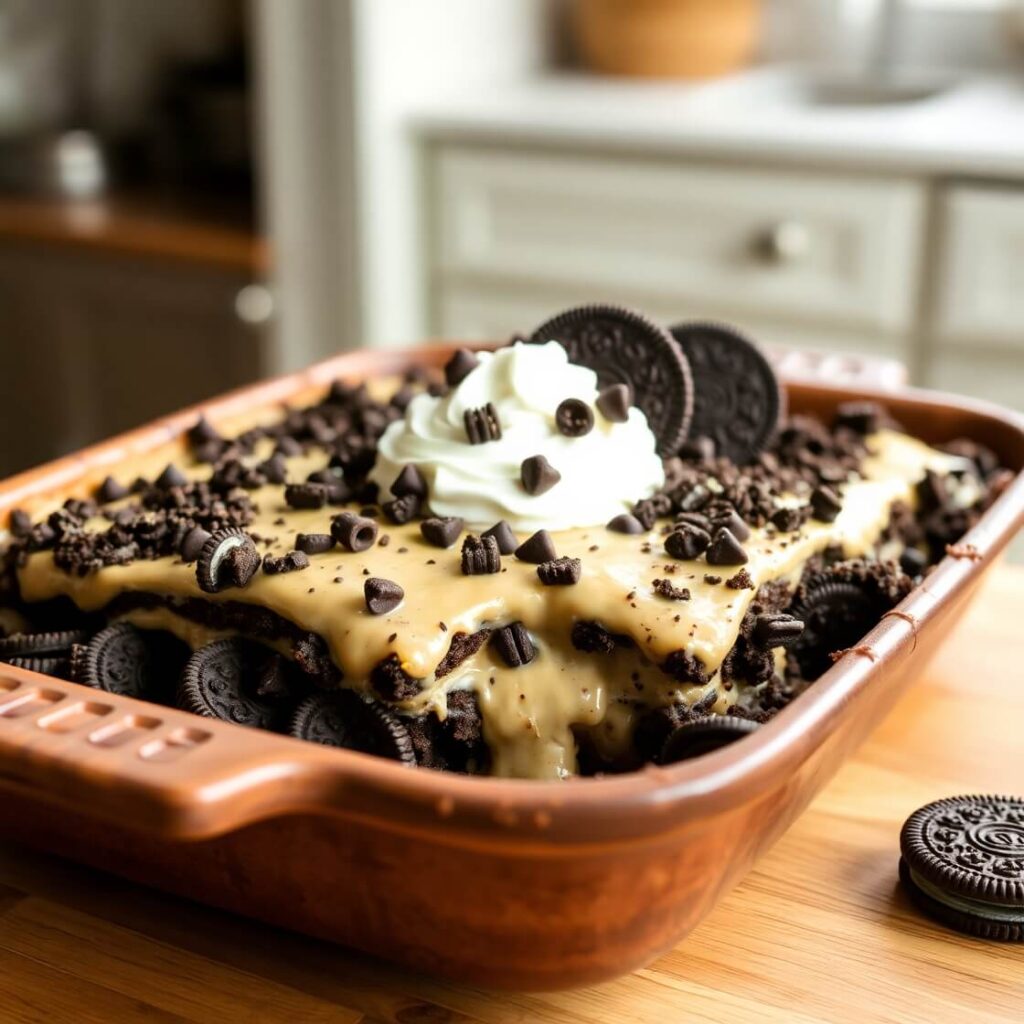
Oreo Dump Cake
This Oreo Dump Cake is a ridiculously easy, crowd-pleasing dessert that comes together with just a handful of pantry staples. Layers of crushed Oreos, creamy pudding, rich chocolate cake, and melted butter bake into a gooey, decadent treat that tastes like your favorite childhood cookie in cake form. No fancy steps, no mixers, and minimal cleanup—just dump, bake, and enjoy. Whether you’re serving it warm with ice cream or topping it with whipped cream, it’s bound to disappear fast.
- Total Time: 55 minutes
- Yield: 10–12
Ingredients
- 1 box chocolate cake mix
- 1 package instant vanilla or cookies & cream pudding mix (3.4 oz)
- 2 cups cold milk
- 1 stick (½ cup) unsalted butter, melted
- 20–24 Oreo cookies, roughly crushed
- 1½ cups whipped topping (Cool Whip or similar)
- ½ cup chocolate chips (optional)
Instructions
- Preheat oven to 350°F (175°C). Grease a 9×13-inch baking dish.
- Spread ⅔ of the crushed Oreos in the bottom of the dish.
- In a bowl, whisk together pudding mix and milk. Let sit for 2–3 minutes to thicken.
- Pour pudding over the Oreo layer and smooth it out evenly.
- Sprinkle dry cake mix over the pudding—do not stir.
- Drizzle melted butter over the dry cake mix, covering as much as possible.
- Sprinkle chocolate chips (if using) and remaining crushed Oreos on top.
- Bake for 40–45 minutes until the top is set and edges are bubbly.
- Let cool for 10 minutes. Serve warm with whipped topping.
Notes
- Use Double Stuf Oreos for extra creaminess.
- Let the pudding set slightly before pouring for cleaner layers.
- Don’t mix the layers—it bakes best when they stay separate.
- Add a scoop of ice cream or drizzle with chocolate syrup for an extra treat.
- Prep Time: 10 minutes
- Cook Time: 45 minutes
- Category: Dessert
- Method: Baking
- Cuisine: American
- Diet: Vegetarian
Nutrition
- Serving Size: 10–12
- Calories: 410
- Sugar: 30g
- Sodium: 340mg
- Fat: 20g
- Saturated Fat: 9g
- Unsaturated Fat: 8g
- Trans Fat: 0g
- Carbohydrates: 55g
- Fiber: 2g
- Protein: 4g
- Cholesterol: 35mg