
There’s something wonderfully nostalgic about ice cream sandwich cake. I first made this dessert on a sweltering summer day when turning on the oven felt like an act of defiance against nature itself. I was hosting a small backyard barbecue for family and needed a make-ahead treat that didn’t require baking—but still packed a wow factor.
That’s when the idea hit me: why not turn those classic ice cream sandwiches, the kind we all grew up with, into a no-fuss, crowd-pleasing cake? It turned out to be a revelation. Layered with whipped topping, chocolate fudge, and crushed cookies, this cake was gone before the burgers even hit the grill.
If you’re looking for an easy dessert that feels special but requires no fancy equipment or culinary degree, stick around—this is the one.
Why I Love This Recipe

There’s a little bit of magic in this recipe, and that’s why I keep coming back to it every summer—and sometimes even in winter, just because.
First of all, the simplicity. You’re using pre-made ice cream sandwiches, so the hardest part is just unwrapping them. It’s completely no-bake, which means it’s perfect for those days when you can’t bear to heat up the kitchen. And if you have kids, this is one of those rare desserts they can help with and actually enjoy doing so.
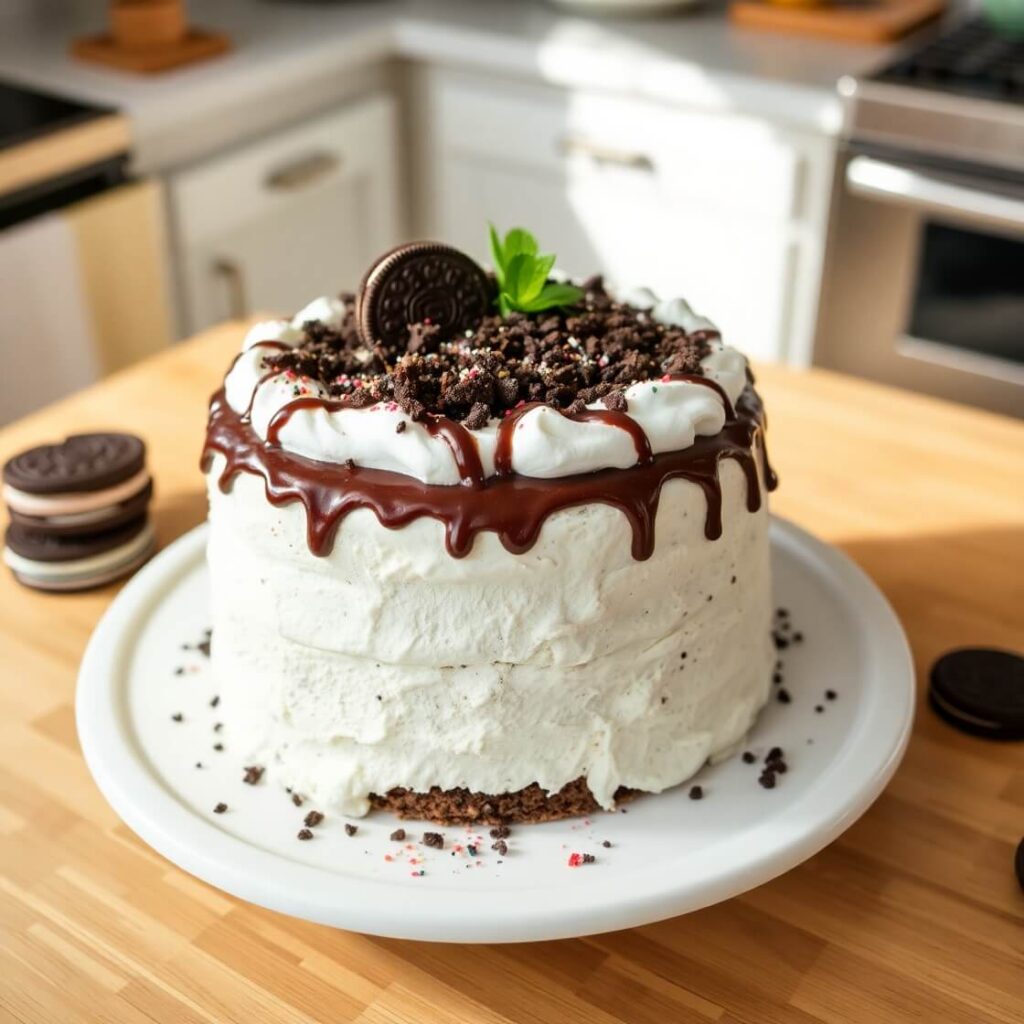
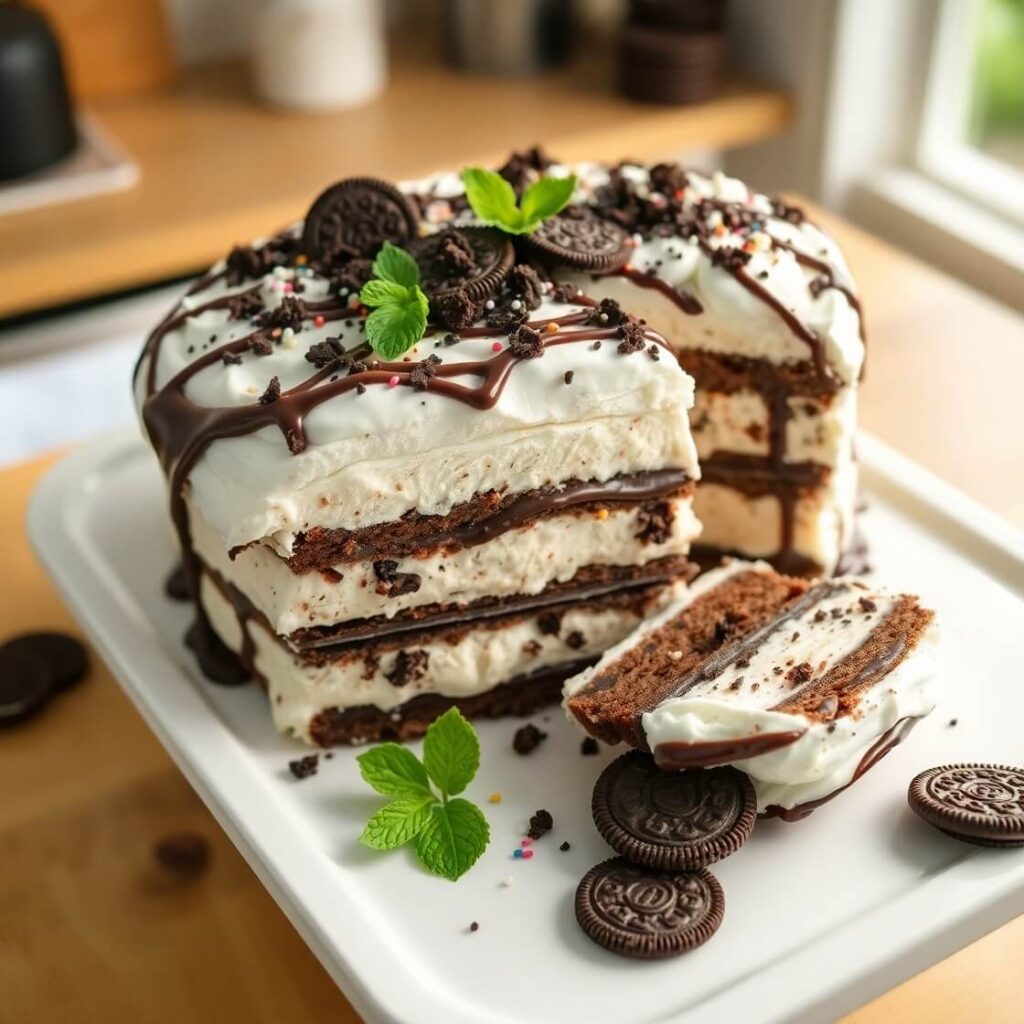
But what really sets this apart is the way it tastes. You get layers of creamy vanilla ice cream, soft chocolate cookie exterior, fluffy whipped topping, rich chocolate fudge, and whatever fun mix-ins you want to add—think crumbled Oreos, chopped nuts, or colorful sprinkles. It’s texture heaven and flavor harmony all in one.
Whether you’re making it for a summer birthday, a holiday gathering, or just a lazy Sunday, this ice cream sandwich cake always hits the spot. It’s one of those desserts that looks like it took a lot of effort—but really didn’t. And that, to me, is the beauty of it.
Ingredients for Ice Cream Sandwich Cake
You only need a few ingredients to create this magic, and they’re all easy to find. The base, of course, is store-bought ice cream sandwiches. From there, you’re layering and building flavor like you would with any great cake.
Here’s everything you need:
- Ice cream sandwiches: You’ll need about 12 to 16 standard-sized sandwiches. Go for the classic chocolate and vanilla kind, unless you want to get adventurous with flavors like cookies and cream or Neapolitan.
- Whipped topping (like Cool Whip): One large container (about 16 oz). This acts as your “frosting” and makes the whole thing airy and light.
- Chocolate fudge sauce: I love using a thick hot fudge sauce that’s slightly warmed so it spreads easily. It adds a rich, gooey element between layers.
- Crushed cookies or candy: This is where you can really customize. I often go for crushed Oreos or mini M&M’s, but chopped Reese’s, sprinkles, or even graham cracker crumbs all work beautifully.
- Optional garnishes: Drizzle of caramel, extra whipped topping, shaved chocolate, or berries for presentation.
The best part? You can tweak the ingredients to suit your cravings or dietary needs. More on that in the substitutions section.
How Much Time Will You Need
This recipe is all about convenience, so you won’t be spending hours in the kitchen.
Here’s a breakdown of the time:
- Prep time: 15 to 20 minutes (mostly just assembling)
- Freezing time: At least 4 hours, preferably overnight
- Total time: About 4.5 hours including freezing
This is the perfect make-ahead dessert. Just assemble it in the morning (or even the night before), and it’ll be ready to go by dessert time.
How to Make This Ice Cream Sandwich Cake
Here’s the step-by-step guide that makes this cake as easy as pie—actually, easier.
Step – 1: Prepare your pan
Line a 9×13 inch baking dish with aluminum foil or parchment paper. Make sure you leave some overhang so you can lift the cake out easily once it’s frozen. This step makes slicing and serving so much simpler later on.
Step – 2: Unwrap the ice cream sandwiches
Work quickly here so the sandwiches don’t start melting. You’ll want to unwrap 6 to 8 sandwiches (depending on the size of your dish) and lay them side by side in a single layer at the bottom of the pan. You may need to trim one or two to make them fit snugly.
Step – 3: Add your first layer of fudge
Warm your chocolate fudge sauce just slightly so it’s pourable but not hot. Spread an even layer over the ice cream sandwiches using the back of a spoon or offset spatula. Don’t worry if it mixes a bit with the ice cream—it’ll still taste great.
Step – 4: Add a layer of whipped topping
Scoop about half of the whipped topping over the fudge and gently spread it to cover the entire surface. This adds that cloud-like texture that balances the richness of the chocolate.
Step – 5: Add your crunch
Sprinkle on a generous layer of crushed cookies, candies, or your favorite toppings. This is where you can get creative. I love doing a combo of Oreos and mini peanut butter cups.
Step – 6: Repeat the sandwich layer
Add another layer of unwrapped ice cream sandwiches right on top of the whipped topping. Again, trim if necessary to make everything fit evenly.
Step – 7: Final layer of whipped topping
Top the second sandwich layer with the remaining whipped topping. Smooth it out with a spatula and make sure the sides are nicely covered too—it should look like a frosted cake.
Step – 8: Add garnish
Finish it off with another drizzle of fudge, a sprinkle of crushed cookies or candies, and maybe a few fresh berries or mint leaves if you’re feeling fancy.
Step – 9: Freeze
Cover the dish tightly with foil or plastic wrap and freeze for at least 4 hours. Overnight is ideal for the best texture.
Step – 10: Serve
Once frozen solid, lift the cake out using the parchment or foil edges. Cut into squares with a sharp knife dipped in warm water (wipe the knife between cuts for clean slices). Serve immediately.
Substitutions
One of the things I love most about this recipe is how flexible it is. You can easily swap out ingredients to suit your needs or taste preferences without sacrificing the final result.
- Dairy-free or vegan version: Use plant-based ice cream sandwiches and dairy-free whipped topping. There are great coconut or almond milk-based options out there now.
- Gluten-free: Look for gluten-free ice cream sandwiches (many brands offer them now), and use gluten-free cookies for your toppings.
- Different ice cream flavors: Try using chocolate, strawberry, or even mint ice cream sandwiches to give your cake a unique twist.
- Homemade whipped cream: If you prefer not to use store-bought whipped topping, you can whip up your own heavy cream with a little sugar and vanilla for a richer, more decadent flavor.
Don’t be afraid to play with combinations. This cake is pretty forgiving—it’s more about assembling than perfect technique.
Best Side Dishes for Ice Cream Sandwich Cake
While this cake is definitely the star of any dessert table, pairing it with the right side treats can make the whole experience even better.
Here are three side options to consider:
- Fresh Berry Salad: The brightness and tanginess of fresh strawberries, blueberries, and raspberries balance out the rich sweetness of the cake.
- Iced Coffee or Cold Brew: A chilled drink with just a hint of bitterness is the perfect complement to this sugary dessert.
- Mini Fruit Tarts: Light, fruity, and bite-sized—these work great alongside a slice of the cake, especially if you’re serving a crowd.
Serving and Presentation Tips
There’s something about a beautifully presented dessert that makes it feel extra special—even if it’s secretly the easiest thing in the world to make. That’s exactly what I aim for when serving this ice cream sandwich cake.
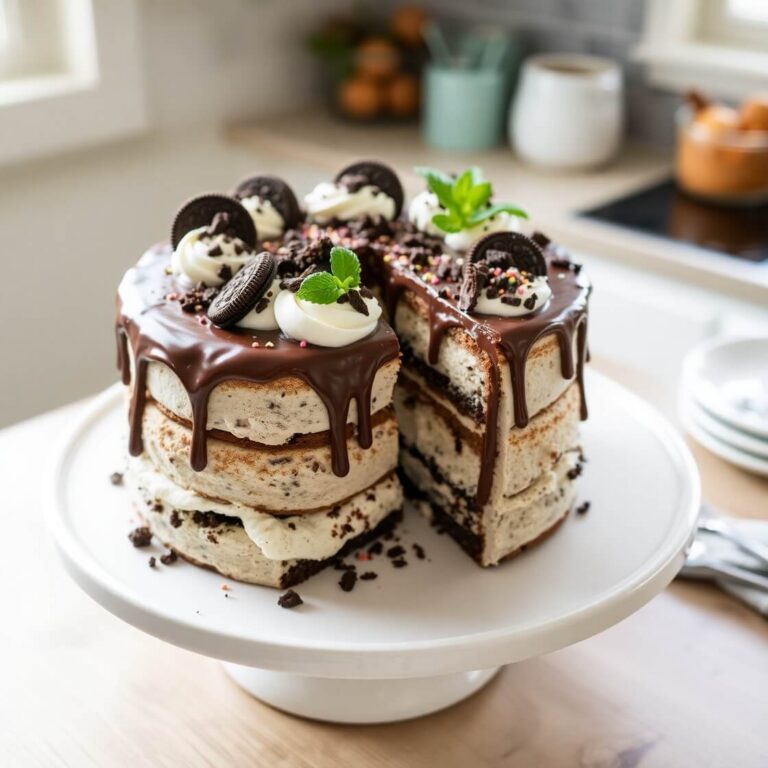
My favorite way to present it? Remove the cake from the pan using the parchment or foil overhang and place it on a serving platter. Then I take a few extra minutes to clean up the sides with a warm spatula. Once that smooth finish is in place, I drizzle a little more fudge on top in a zigzag motion and sprinkle on some crushed cookies, chopped nuts, or mini chocolate chips for texture.
If you’re serving guests, cut the cake into perfect squares and plate each one individually. Add a fresh mint sprig or a few berries on the side for a restaurant-style finish. Trust me—people will be amazed.
For a birthday party or gathering, you can even insert a few fun cake toppers or colorful candles on top. This dessert is incredibly versatile, and with just a few extra touches, it transforms from everyday treat to showstopper.
Tips and Tricks to Make This Recipe Better
Here’s the part where experience really helps. Over the years of making this cake (dozens of times by now!), I’ve picked up a few tricks to make it even better:
- Work in batches if it’s hot out: Ice cream melts quickly, especially when the weather’s warm. Only unwrap a few sandwiches at a time, and keep the rest in the freezer until you need them.
- Soften the whipped topping just enough: Let it sit on the counter for 10 minutes before using. If it’s too frozen, it’s hard to spread; too thawed, and it can melt too much.
- Warm your knife before slicing: Run a sharp knife under hot water, then wipe it dry before each cut. You’ll get those clean, bakery-style slices.
- Use a deep dish: If you’re layering generously (like I do!), a regular 9×13 pan can fill up quickly. A deeper pan helps you keep those layers even without overflowing.
- Let it sit for 5 minutes before serving: Straight from the freezer, the cake can be a little too firm. Letting it soften just slightly helps the flavors come through and makes it easier to cut.
Common Mistakes to Avoid
This cake is simple—but there are still a few things that can throw it off if you’re not careful.
- Letting everything melt as you work: This is the most common issue. Ice cream melts fast, so don’t delay while assembling. Get everything prepped first and move quickly.
- Using hot fudge straight from the jar: If the fudge sauce is too thick or cold, it’ll tear through the sandwiches. Warm it just a little to get that spreadable consistency.
- Skipping the freeze time: It’s tempting to dig in early, but this dessert needs at least 4 hours in the freezer to set. Otherwise, it turns into a melty mess the second you slice it.
- Not lining the pan: You’ll regret it when it’s time to take the cake out. Lining the pan with foil or parchment saves you so much trouble.
- Overloading with toppings: It’s fun to go wild with cookies, candies, and sauces, but too much can make the cake heavy and messy to cut. A little goes a long way.
How to Store It
One of the best parts of this recipe is how well it keeps.
To store leftovers:
- Wrap the pan tightly with foil or plastic wrap if you’re leaving the cake in the pan.
- If you’ve removed it from the pan, transfer slices to an airtight container and place parchment between layers to prevent sticking.
- It’ll keep well in the freezer for up to 7 days, though it’s best enjoyed within 3–5 days for optimal texture and flavor.
Avoid storing it near items with strong odors in the freezer, as it can absorb those scents over time. Also, don’t refreeze it multiple times—it tends to lose its creamy consistency.
FAQ
Can I make this ice cream sandwich cake ahead of time?
Yes! It’s best made the night before serving so it has plenty of time to firm up in the freezer.
What if I don’t have chocolate fudge sauce?
You can use caramel sauce, strawberry syrup, or even peanut butter thinned with a little milk for an alternative layer.
Can I use homemade ice cream sandwiches?
Absolutely. If you’re feeling ambitious, homemade sandwiches will give you a more artisanal result. Just make sure they’re sturdy enough to layer.
Is this recipe kid-friendly?
Very much so. In fact, kids love helping assemble the layers—it’s a perfect weekend project.
Can I double this recipe for a crowd?
Yes. You can use a larger sheet pan or make two 9×13 pans side by side. Just make sure you have enough freezer space to store them.
Ice Cream Sandwich Cake
This no-bake ice cream sandwich cake is a dreamy, layered dessert that combines the nostalgic flavor of classic ice cream sandwiches with whipped topping, fudge, and cookie crumbles. It’s rich, creamy, and takes just 15 minutes to assemble—perfect for summer cookouts, birthdays, or any time you want a low-effort, high-impact treat. It freezes beautifully and can be customized with your favorite toppings, from sprinkles to caramel drizzle. You’ll come back to this recipe again and again.
- Total Time: 4 hours 20 minutes (including freeze time)
- Yield: 12
Ingredients
- 12–16 classic ice cream sandwiches
- 1 (16 oz) tub whipped topping, thawed
- 1 cup chocolate fudge sauce (slightly warmed)
- 1 cup crushed cookies (Oreos or similar)
- Optional: sprinkles, mini chocolate chips, chopped candy for topping
Instructions
- Line a 9×13 baking dish with foil or parchment.
- Unwrap 6–8 sandwiches and lay them flat in the bottom of the dish. Trim to fit.
- Spread half the fudge sauce over the sandwiches.
- Top with half the whipped topping and a sprinkle of crushed cookies.
- Add another layer of ice cream sandwiches.
- Spread remaining whipped topping evenly over the top.
- Garnish with extra fudge, sprinkles, or cookie crumbs.
- Freeze for at least 4 hours, ideally overnight.
- Slice with a warm knife and serve immediately.
Notes
- Let the whipped topping soften slightly before spreading to avoid tearing the sandwiches. For cleaner cuts, run a knife under hot water between slices. Customize with caramel, peanut butter, or different candy mix-ins to suit your taste.
- Prep Time: 20 minutes
- Cook Time: 0 minutes
- Category: Dessert
- Method: No-bake, freezer
- Cuisine: American
- Diet: Vegetarian
Nutrition
- Serving Size: 12
- Calories: 290
- Sugar: 22g
- Sodium: 180mg
- Fat: 13g
- Saturated Fat: 8g
- Unsaturated Fat: 4g
- Trans Fat: 0g
- Carbohydrates: 36g
- Fiber: 1g
- Protein: 3g
- Cholesterol: 15mg